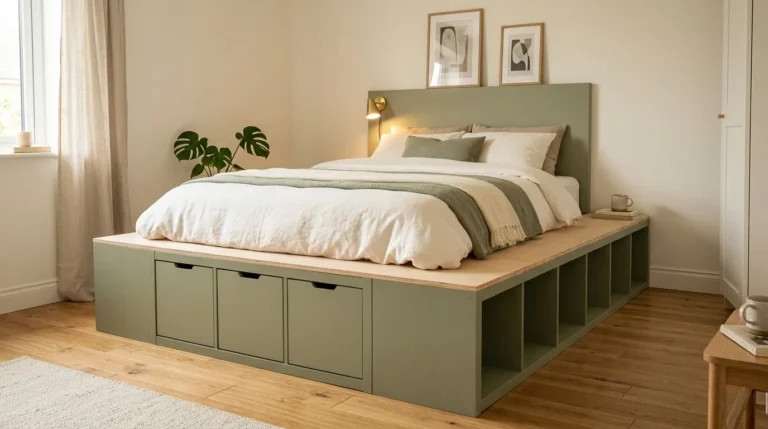

15 IKEA KALLAX Bedroom Ideas for Seasonal Clothes Storage
Every bedroom has the same problem twice a year. Winter sweaters crowd the closet in July, and summer dresses fight for space in January. Most of us end up with a pile on a chair and a bag under the bed.
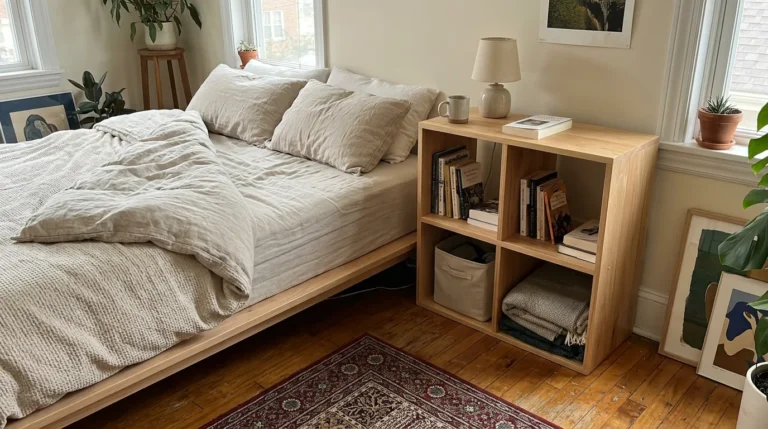
The IKEA KALLAX is one of the simplest fixes. It is a square-cube shelf that works as a dresser, a bench, a divider, or a built-in, and it takes boxes, baskets, and inserts without any tools beyond a screwdriver.
These KALLAX bedroom ideas focus on one goal: keeping this season’s clothes within reach while next season’s pieces wait neatly out of the way.
The approach is straightforward. Choose a layout that fits your room, match your boxes to the cubes, label by season, and swap twice a year.
Disclosure: This post contains Amazon affiliate links. If you buy through them, I may earn a small commission at no extra cost to you. As an Amazon Associate I earn from qualifying purchases.
Why KALLAX Works for Seasonal Clothes Storage
The KALLAX is built from square cubes, each roughly 13 inches (33 cm) across inside. That size suits folded clothes, storage boxes, and baskets, which is exactly what seasonal rotation needs.
The unit can stand upright or lie on its side, and it comes in several sizes, from a single row of cubes to a large grid. You can leave cubes open, fill them with boxes, or add drawer and door inserts.
Here is how it solves the usual problems.
| Storage Problem | KALLAX Solution |
|---|---|
| Off-season clothes crowd the closet | Boxes in the bottom and top cubes hold the swap |
| No room for a dresser | A low unit gives drawers and a surface in a small footprint |
| Clothes look messy on open shelves | Boxes and door inserts hide the clutter |
| Bulky sweaters and coats take up space | Roomy cubes hold folded knits or vacuum bags |
| Storage that does not suit a changing room | Move, rotate, or add inserts as needs change |
You are not buying a new wardrobe. You are giving the clothes you already own a tidy home.
Safety note: Anchor tall units to the wall using the hardware IKEA recommends, especially in rooms used by children. A loaded shelf can tip if it is not secured.
Planning note: Measure your wall, ceiling height, and the path to the room before you buy. Check the current sizes and inserts on IKEA’s site, since ranges and dimensions can change.
Layouts That Fit Your Bedroom
The first decision is where the unit goes and which way it faces. These five layouts cover most bedrooms, and each one comes with a quick setup guide and a shopping list.
1. A Low Horizontal Unit Under a Window

A wide, low KALLAX under a window works like a dresser without blocking the light. Each cube measures about 33 by 33 cm (13 by 13 in) inside, which suits folded tees, jeans, and light knits. A set of four fabric boxes to fill it usually costs roughly $20 to $50, though prices vary.
How to set it up: Lay the unit on its long side and measure the sill height first. Leave a few centimeters of clearance so curtains hang freely. Fill the bottom cubes with the heaviest folded items and keep lighter pieces higher up.
Swap or extra step: Add felt pads under the base to protect the floor, and keep one cube open for a basket of off-season tees. This works well in rented rooms, since nothing has to be drilled into the window wall.
- Fold tees and jeans upright so you can see every piece.
- Keep curtains clear of the top surface so they do not pull on lamps.
- Check the box width before buying, since a loose fit slumps and rattles.
Shop This Look
| BOXES | PADS | LINERS |
|---|---|---|
| Fabric Cube Storage Bins | Felt Furniture Pads | Non-Slip Shelf Liner Roll |
| Shop → | Shop → | Shop → |
2. A Tall, Narrow Unit in a Corner
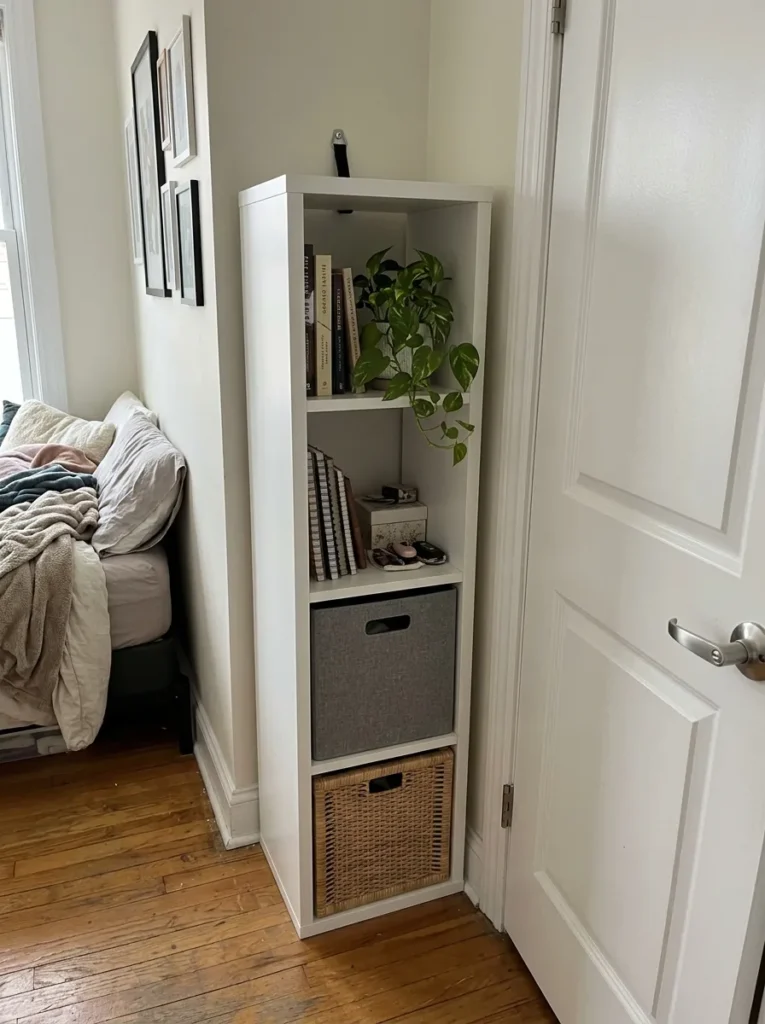
A tall, narrow unit uses wall height instead of floor space, which helps in a small bedroom. A 1×4 unit measures about 42 by 147 cm (roughly 16.5 by 58 in) and about 39 cm (15 in) deep, so it fits beside a door or in a corner. Anti-tip straps usually cost roughly $8 to $15, though prices vary.
How to set it up: Stand the unit upright against the corner wall and attach the anti-tip hardware to a stud, or use anchors rated for your wall type. Put current-season clothes in the middle cubes, and keep the top and bottom cubes for items you reach for less often.
Swap or extra step: Add handles or pull tabs to boxes in the top cubes so they are easy to lift down. If you cannot drill into the wall, ask your landlord first, or choose a lower horizontal layout instead.
- Anchor the unit before you load it.
- Keep the heaviest boxes in the bottom two cubes.
- Keep a small step stool nearby for the top cube.
Shop This Look
| ANCHORS | BOXES | LABELS |
|---|---|---|
| Anti-Tip Furniture Straps | Storage Bins With Handles | Clip-On Basket Labels |
| Shop → | Shop → | Shop → |
Also view: IKEA KALLAX Bedroom Ideas to Make a Tiny Room Feel Bigger
3. A Room Divider for Shared or Studio Rooms

Standing the unit away from the wall creates a soft boundary between a sleeping area and a desk or dressing corner. Open cubes keep the room airy, and boxes facing the bed hide storage from view. A set of woven baskets to fill the cubes usually costs roughly $25 to $60, though prices vary.
How to set it up: Place the unit where you want the divide and decide which side faces the bed. Put closed boxes or baskets on the bed side, and leave a few open cubes on the other side for books and decor. Check that the unit is stable before loading it.
Swap or extra step: Use the open cubes on the work side for seasonal accessories, and swap baskets between sides at the change of season. Add a backing panel if you want more privacy.
- Face closed boxes toward the bed.
- Use lightweight decor on the open side.
- Keep heavy items low, since a free-standing unit can tip.
Shop This Look
4. A Bench at the Foot of the Bed

A low horizontal unit with a cushion on top becomes seating and storage in one. The cubes below hold shoes, spare blankets, or off-season knits. A bench cushion usually costs roughly $20 to $45, though prices vary.
How to set it up: Measure the top of the unit and choose a cushion that matches. Keep the cushion firm so it sits flat, and put the heaviest boxes in the cubes closest to the floor. Check the weight limit for your model before anyone sits on it.
Swap or extra step: Place a non-slip pad under the cushion so it does not creep. Rotate the cube contents each season, with blankets in winter and sandals in summer.
- Choose a firm cushion that keeps its shape.
- Check the weight limit before using the top as a seat.
- Keep sharp or hard items out of the cubes under the cushion.
Shop This Look
| CUSHIONS | BINS | GRIPPERS |
|---|---|---|
| Firm Bench Seat Cushion | Lidded Fabric Storage Bins | Non-Slip Cushion Pad |
| Shop → | Shop → | Shop → |
5. A Closet Alcove Built-In Look

If your room has a recessed wall or an unused closet, a row of KALLAX units can fill it so it looks custom. A 2×4 unit measures about 77 by 147 cm (roughly 30 by 58 in) and 39 cm deep, so two side by side cover a wide wall. A set of matching boxes usually costs roughly $30 to $70, though prices vary.
How to set it up: Measure the alcove width twice and subtract a couple of centimeters so the units slide in easily. Line the units up on a level floor, join them with connector hardware, and anchor them to the wall.
Swap or extra step: Use boxes in one color for a clean, built-in look, and add stick-on LED lights if the alcove is dark. This suits owners, and renters who can anchor safely.
- Match box colors so the wall looks planned.
- Leave a small gap for adjustment.
- Keep outlets and vents accessible.
Shop This Look
| BOXES | LIGHTS | LABELS |
|---|---|---|
| Matching Fabric Storage Cubes | Stick-On LED Puck Lights | Adhesive Label Holders |
| Shop → | Shop → | Shop → |
Boxes, Drawers, and Doors That Hide the Clutter
Open cubes look tidy only while everything inside is folded perfectly. Boxes, drawers, and doors give you a calmer look with far less upkeep.
6. Fabric Boxes for Sweaters
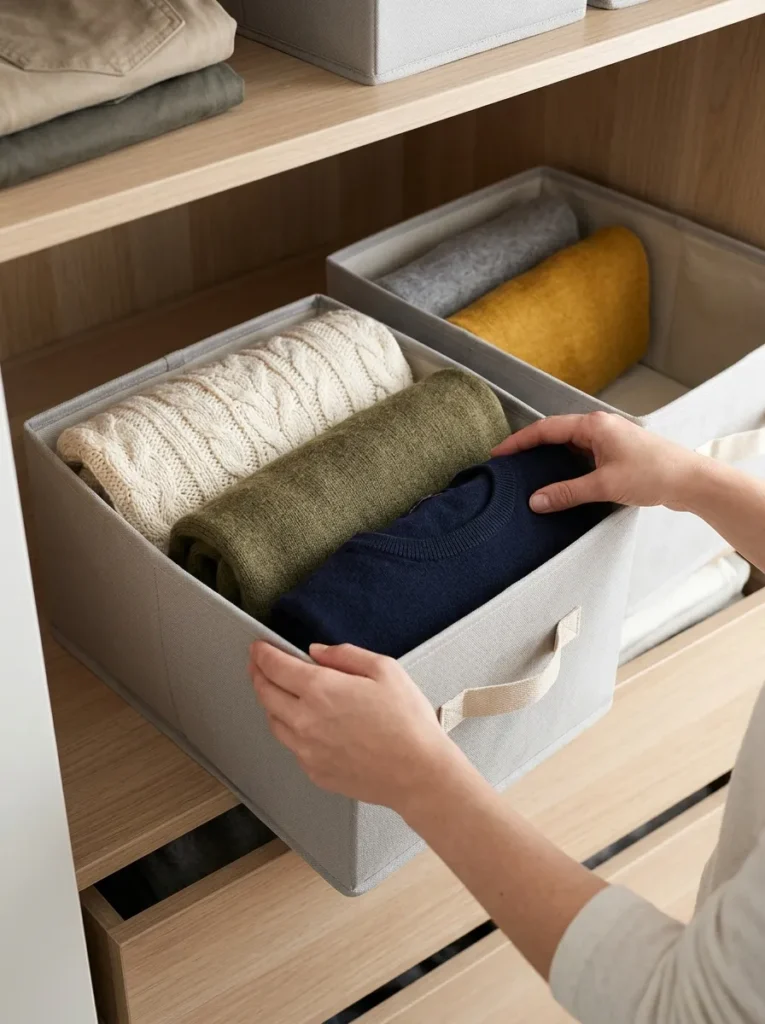
Fabric boxes are one of the easiest ways to make a KALLAX work for sweaters. Each cube opening measures about 33 by 33 cm (13 by 13 in), so boxes made for that size slide in neatly and keep stacks from slumping. A set of four usually costs roughly $25 to $60, though prices vary.
How to set it up: Fold sweaters in thirds and stand them upright, two or three per box. Do not overfill, since a stuffed box will not slide out and the handle can tear.
Swap or extra step: Clip a label on each box, then lift whole boxes in and out at the change of season. Drop a cedar block into each box of wool to help keep moths away.
- Stand folded sweaters upright so you can see each one.
- Keep heavy boxes in the bottom row.
- Check box dimensions against the cube before buying.
Shop This Look
| BOXES | LABELS | CEDAR |
|---|---|---|
| Collapsible Fabric Storage Cubes | Clip-On Label Holders | Cedar Blocks for Closets |
| Shop → | Shop → | Shop → |
7. Drawer Inserts for Tees and Activewear
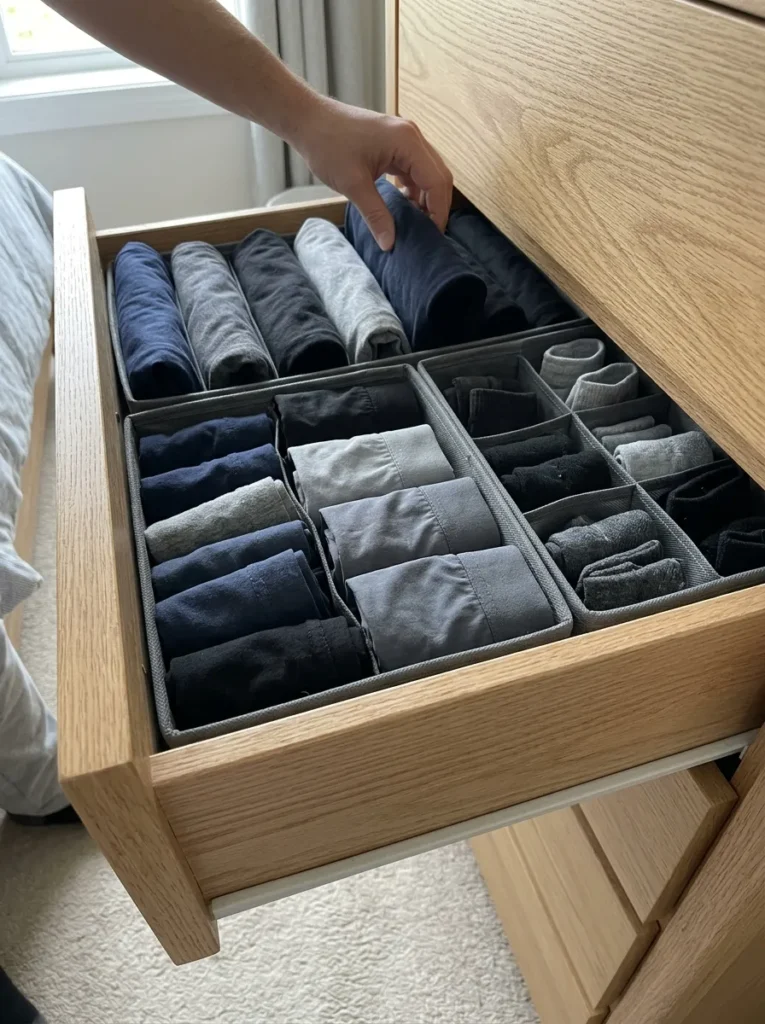
Drawer inserts turn a cube into a small dresser drawer, which suits the pieces you reach for most: tees, leggings, socks, and sleepwear. They keep each stack separate and make it easy to see everything at once. Drawer organizers to go inside usually cost roughly $12 to $30, though prices vary.
How to set it up: Measure the drawer interior and choose dividers that fit. Fold each item into a small rectangle and stand it upright in rows. Group items by type so each section has one job.
Swap or extra step: At the change of season, empty one drawer into a box and refill it with the new season’s pieces. Add scented drawer liners if you want a fresh smell.
- Fold clothes upright, file style.
- Use dividers to stop stacks from tipping.
- Keep one drawer for next season’s basics.
Shop This Look
| DIVIDERS | LINERS | BINS |
|---|---|---|
| Drawer Dividers and Organizers | Scented Drawer Liners | Small Fabric Organizer Bins |
| Shop → | Shop → | Shop → |
8. Door Inserts to Hide Swimwear and Scarves
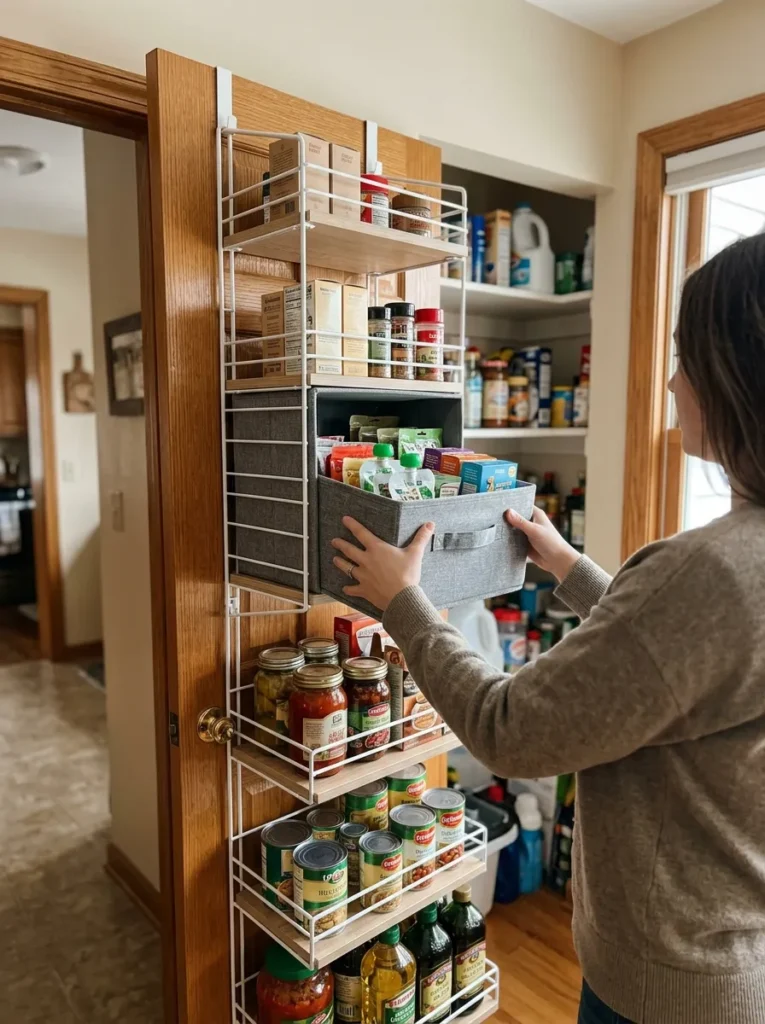
A cube with a door hides items you want out of sight, such as swimwear, scarves, or overflow. Mixing open cubes, boxes, and a few closed cubes keeps the unit from looking like a plain grid. Lidded bins are a budget alternative to doors and usually cost roughly $20 to $45 for a set, though prices vary.
How to set it up: Choose a cube at eye level for the door insert, where it is easiest to keep neat. Place items in a bin first so the door can close without squashing anything. Keep the heaviest items below.
Swap or extra step: Rotate which cube holds the closed storage as the seasons change. Add a moisture absorber if you store swimwear, so the cube does not smell damp.
- Make sure swimwear is completely dry before storing.
- Keep door cubes at eye level.
- Use matching bins in open cubes for a calm look.
Shop This Look
| BINS | LABELS | ABSORBERS |
|---|---|---|
| Lidded Fabric Storage Bins | Adhesive Label Holders | Closet Moisture Absorbers |
| Shop → | Shop → | Shop → |
9. Baskets for Hats, Gloves, and Scarves
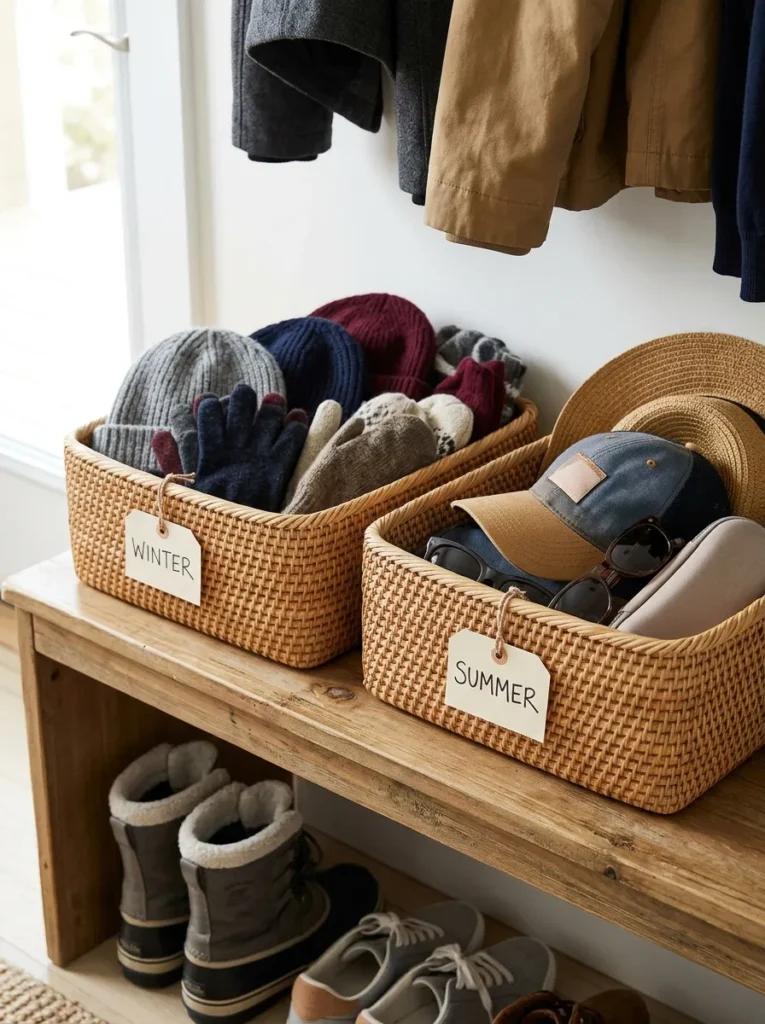
Seasonal accessories are small and easy to lose, so they need their own homes. A shallow basket per category, such as winter hats and gloves in one and sun hats and sunglasses in another, keeps everything findable. A set of baskets usually costs roughly $20 to $50, though prices vary.
How to set it up: Choose baskets slightly narrower than the cube so they slide out easily. Sort accessories into groups before filling, and keep the items you use most at the front. Do not stack baskets inside a cube, since the bottom one becomes hard to reach.
Swap or extra step: Swap baskets between a top cube and an eye-level cube as the season changes. Use small trays inside to separate items like gloves and scarves.
- Roll scarves so they do not crease.
- Keep sunglasses in a lidded case.
- Clip gloves together so pairs stay matched.
Shop This Look
10. Label Holders Sorted by Season
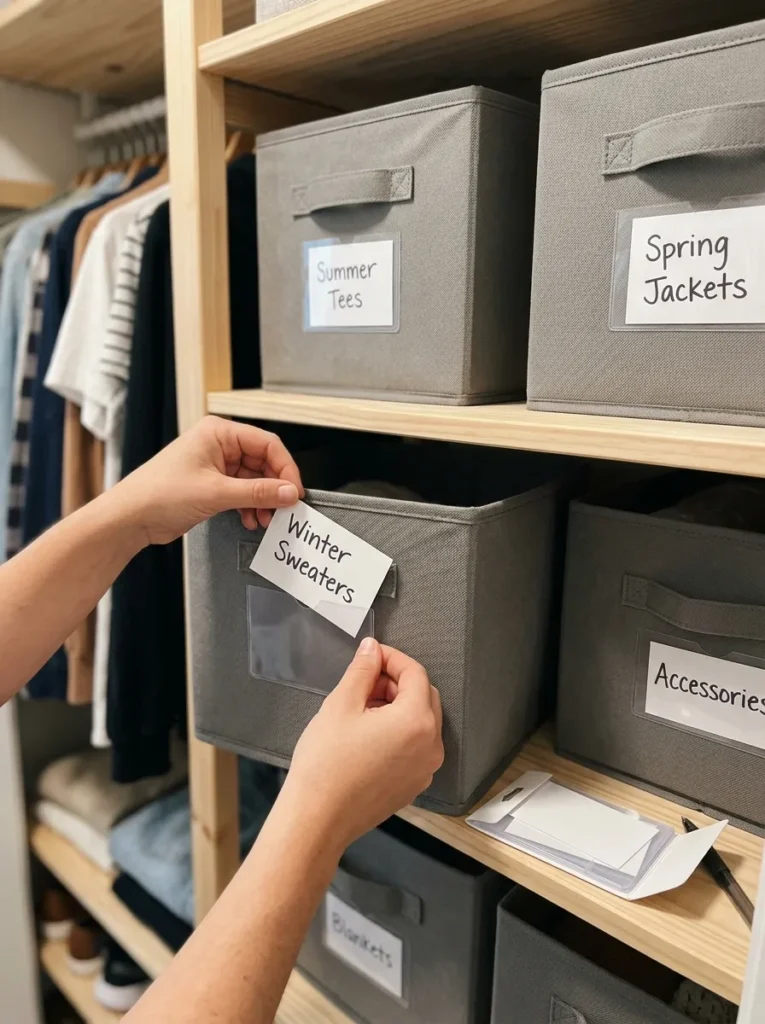
A clear label on each box saves time at every swap and makes the system easy for family members to follow. Write simple names like Winter sweaters, Summer tees, or Spring jackets on a card and slide it into a holder. A pack of label holders usually costs roughly $8 to $15, though prices vary.
How to set it up: Decide your label names first and keep them short. Write them on cards or stickers, and place them in the same spot on every box. Use the same wording each season so you always know where to look.
Swap or extra step: Use erasable labels or a chalk marker so you can rename a box if its contents change. Add a small sun or snowflake icon for quick visual sorting.
- Keep the wording identical from season to season.
- Label the side that faces you.
- Use one handwriting or font style for a neat look.
Shop This Look
| HOLDERS | STICKERS | MARKERS |
|---|---|---|
| Clip-On Label Holders | Waterproof Label Stickers | Erasable Chalk Markers |
| Shop → | Shop → | Shop → |
Rotation Systems for Seasonal Clothes
Storage only works if the seasonal swap is easy. These four systems turn the change into an hour of work instead of a weekend.
11. Current Season at Eye Level, Off-Season Top and Bottom

Put what you wear now in the middle cubes, where you can see and reach it, and store off-season boxes in the top and bottom rows. This turns the seasonal swap into a quick box exchange. A set of simple stackable bins usually costs roughly $20 to $50, though prices vary.
How to set it up: Sort clothes into this-season and next-season piles. Place the current pile in the middle rows, with the most-used pieces at the front. Put the next-season boxes in the top and bottom cubes, labeled clearly.
Swap or extra step: When the weather changes, trade the middle boxes with the top and bottom ones instead of unpacking everything. Keep a step stool nearby for the top row.
- Keep the most worn items at hand height.
- Do not mix seasons in one box.
- Check boxes for dampness at every swap.
Shop This Look
12. Color-Code Boxes by Season
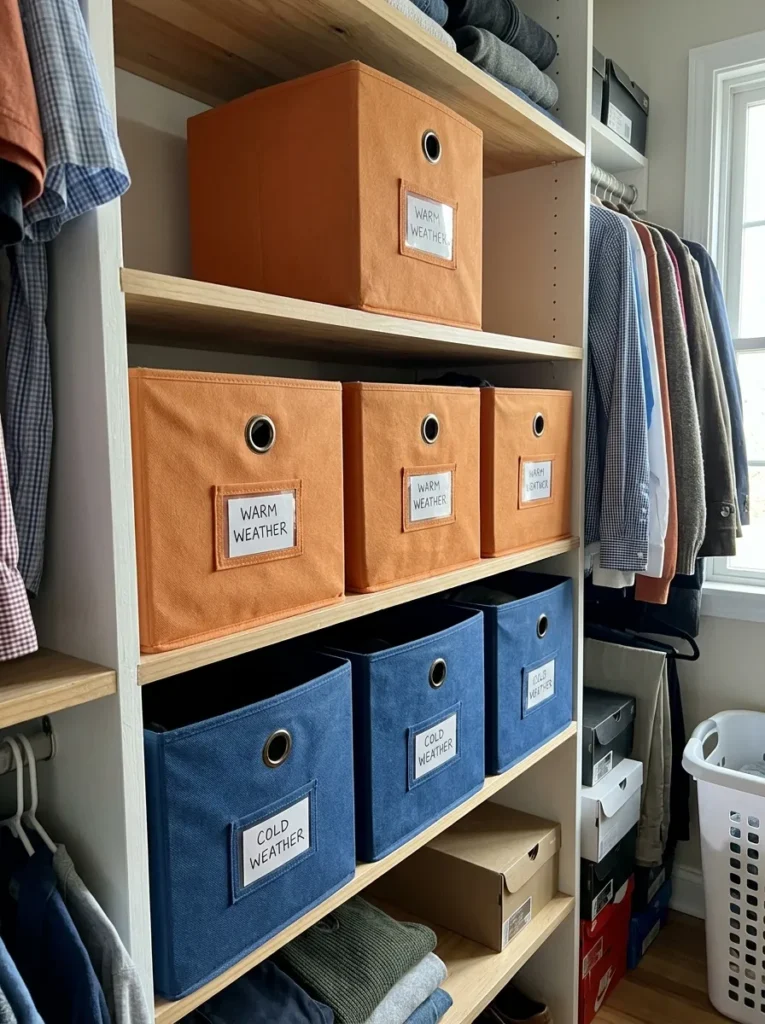
Using one box color for warm-weather clothes and another for cold-weather ones lets you spot the right cube at a glance, even before you read a label. A two-color set of boxes usually costs roughly $25 to $60, though prices vary.
How to set it up: Choose two colors that look good together, such as cream for summer and charcoal for winter. Fill each color with its season only, and keep the same pairing across the whole unit.
Swap or extra step: Pair the colors with labels so family members can follow the system. At the swap, move the active color to the middle rows and the other to the top and bottom.
- Pick two colors only.
- Add labels for guests and kids.
- Keep the color pairing the same every year.
Shop This Look
| BINS | DOTS | TAGS |
|---|---|---|
| Two-Color Fabric Storage Bins | Color Coding Dot Stickers | Storage Bin Tags |
| Shop → | Shop → | Shop → |
13. Vacuum Bags for Bulky Knits and Coats

Vacuum-seal bags shrink heavy sweaters and coats so a single box holds far more. They suit bulky winter items you will not touch for months. A set of bags usually costs roughly $15 to $35, though prices vary.
How to set it up: Wash and fully dry items first, then fold flat and seal following the bag’s directions. Store the bags in lower cubes, where weight is safest, and lay them flat so the seals are not stressed.
Swap or extra step: Avoid leaving delicate knits, wool, or down compressed for many months, since long compression can flatten the fibers. Check care labels first, and use breathable garment bags for those pieces instead.
- Wash and dry items fully before sealing.
- Do not compress delicate or down items long term.
- Check the seal at every season change.
Shop This Look
14. Boot and Shoe Cubes With a Seasonal Swap
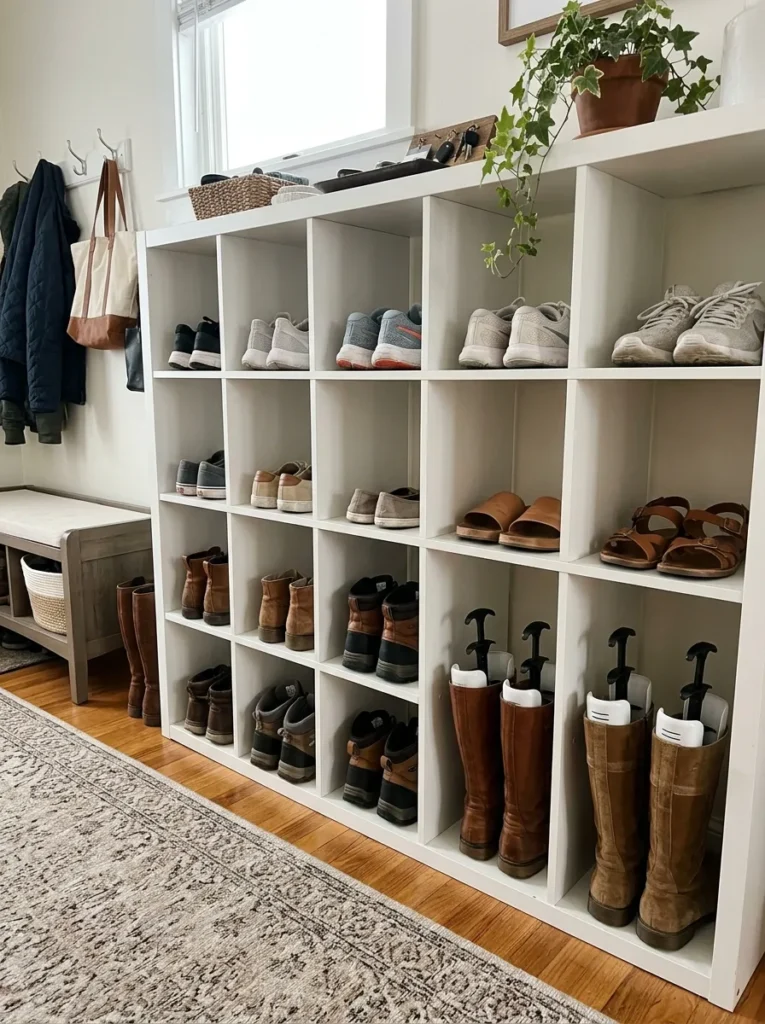
A few cubes can work as a shoe wall, with sandals and sneakers at the front in summer and boots in winter. Each cube is wide enough for most single pairs. A set of boot shapers usually costs roughly $12 to $25, though prices vary.
How to set it up: Wipe and dry shoes before storing them. Put one pair per cube, with the heaviest boots at the bottom. Tuck a shaper or a rolled paper insert into each boot to keep its shape.
Swap or extra step: Swap the front pairs as the weather changes, and move out-of-season pairs to the back or the top row. Add a liner so dirt does not mark the cube.
- Wipe shoes before storing them.
- Use shapers to prevent creases.
- Keep one pair per cube for easy access.
Shop This Look
Finish the Top Without Making It Look Cluttered
15. Style the Top Surface Lightly

The top of a KALLAX is prime space, and it is easy to overload. Treat it like a small shelf: one lamp, one plant or vase, and one tray for keys or jewelry are plenty. A small lamp usually costs roughly $20 to $45, though prices vary.
How to set it up: Clear the surface, then place the tallest item toward one side, such as a lamp or plant, and a low tray beside it. Leave open space around the pieces and keep the heaviest decor low. Check the top’s weight limit in IKEA’s guidance before adding more.
Swap or extra step: Repeat one color from your bedding in a basket or vase on top, to tie the storage to the rest of the room. Change the decor with the seasons, such as dried stems in fall and fresh greenery in spring.
- Keep decor lightweight.
- Leave open space so the surface looks clear.
- Do not stack laundry or bags on top.
Shop This Look
Seasonal Swap Guide: What Goes Where
Use this table as a starting point for sorting clothes into the cubes. Adjust it to your climate, since a mild winter and a snowy one need different amounts of space.
| Clothing Category | Spring and Summer | Fall and Winter | Storage Tip |
|---|---|---|---|
| Sweaters and knits | Fabric box, top or bottom cube | Middle cubes, within reach | Fold flat, never hang |
| T-shirts and tanks | Middle drawer inserts | Box in a lower cube | Fold upright to see everything |
| Jeans and trousers | Open cubes | Open cubes | Keep year-round for easy access |
| Coats and jackets | Vacuum bag in a lower cube | Hang in the closet | Check care labels before compressing |
| Swimwear and sun hats | Door insert or basket at eye level | Basket in the top cube | Dry fully before storing |
| Boots and heavy shoes | Lower cube with a paper insert | Front cubes | Wipe before storing |
| Scarves and gloves | Basket in the top cube | Basket at eye level | Roll scarves so they do not crease |
Do the swap twice a year, ideally when you notice the weather change. As you move each box, take a few minutes to sort what you did not wear last season.
Create a donate pile as you go. The fewer items you carry through each swap, the easier the next one will be.
Mistakes That Make KALLAX Storage Messy
A KALLAX can look sharp or chaotic, and the difference usually comes down to a few easy habits. If something feels off, you rarely need to start over. A small adjustment is usually enough.
- If the cubes are overstuffed: take a third out. Clothes should slide in and out easily, or the system will not last.
- If you cannot find anything: add labels. A card on each box turns a guessing game into a two-second check.
- If the unit feels top-heavy: move heavy boxes and shoes to the bottom row and keep light items higher up.
- If you skipped anchoring: secure the unit to the wall with the recommended hardware, especially if children use the room.
- If seasons are mixed together: separate them into their own boxes, so a swap means moving boxes, not sorting clothes.
- If the boxes do not fit: measure the inside of the cube and buy boxes made for that size. A box that is too large will not slide in properly.
This is where seasonal storage pays off. You are not trying to build a perfect system. You are building one you will actually keep using.
Use One Repeatable Formula for Seasonal Clothes Storage
You do not need a new plan each time the weather changes. A simple formula keeps the system running without extra effort.
Formula: one KALLAX layout + one box style + one label system + one twice-yearly swap.
For example, place a low horizontal unit under the window (layout), fill it with fabric boxes (box style), label each one by season (label system), and swap the boxes each spring and fall (swap).
Here are a few plans for different rooms.
| Bedroom Type | Plan | Why It Works |
|---|---|---|
| Small bedroom | Tall narrow unit in a corner + fabric boxes | Uses wall height instead of floor space |
| Kids room | Low unit + drawer inserts + picture labels | Easy for children to reach and put away |
| Shared room | Unit as a divider + boxes facing the sleeping side | Adds privacy and storage in one piece |
| Guest room | Bench at the foot of the bed + baskets | Hides spare linens and gives guests a place to sit |
Once you find the combination that suits your room, repeat it. Swap the clothes inside and keep the layout, boxes, and labels the same.
That is often the difference between storing clothes and actually being able to find them.
Frequently Asked Questions
How many seasonal clothes fit in one KALLAX cube?
It depends on the item. A cube usually holds a stack of several folded sweaters, or a larger number of tees and leggings in a drawer insert. Try one cube first and adjust from there.
Should I use a KALLAX horizontally or vertically in a bedroom?
Horizontal units work well as low dressers, benches, and under-window storage. Vertical units suit corners and narrow walls where you need height. Pick based on your floor space and window placement.
Does a KALLAX need to be anchored to the wall?
Yes, especially a tall or loaded one. Use the anchoring hardware IKEA recommends, and take extra care in rooms used by children.
What are the best boxes for a KALLAX?
Look for fabric boxes, baskets, and inserts made for the cube size. A good fit slides in easily and sits flush, so check the interior size and current product range before you buy.
How do I keep stored clothes from getting dusty or musty?
Wash clothes before storing them and make sure they are fully dry. Use boxes with lids or closed fabric bins, and add a cedar block or a small sachet if you like. Check boxes during each swap for dampness.