17 IKEA KALLAX Bedroom Hacks for Creating a Custom Built-In Look
An IKEA KALLAX built-in hack is the practice of modifying, extending, framing, finishing, and integrating a standard KALLAX shelving unit into the bedroom’s architecture so thoroughly that it reads as a purpose-built, custom-designed storage installation rather than a freestanding piece of flat-pack furniture. This article gives you 17 KALLAX bedroom hacks across ceiling-height extensions, paint and trim integration, hardware upgrades, door and insert modifications, lighting additions, styling and arrangement strategies, and complementary furniture combinations so your KALLAX unit transforms from recognizable IKEA product into a genuinely custom-looking bedroom built-in at a fraction of custom cabinetry cost.
The specific gap between a KALLAX that reads as an IKEA product and one that reads as a custom built-in is almost always bridgeable through a small number of specific modifications — ceiling height, architectural trim, consistent paint color with the wall, and quality hardware — that together create the visual language of custom millwork without the $5,000–$15,000 investment that genuine built-in cabinetry typically requires. The KALLAX’s modular grid structure, its consistent square dimensions, and its neutral finishes make it unusually well-suited to the built-in illusion — it already has the visual vocabulary of cabinetry, and the modifications in this article give it the architectural integration that cabinetry requires. Here are 17 hacks worth saving — and building.
Why KALLAX Built-In Hacks Achieve Genuine Custom Appearance
KALLAX built-in hacks draw from the DIY design tradition that has flourished specifically around IKEA’s modular furniture systems, the understanding that IKEA’s products provide quality structural foundations at accessible price points that, with targeted modifications, can achieve aesthetic results equivalent to custom work at 20–30% of custom cabinetry cost. The KALLAX specifically is the most built-in-hack-friendly of all IKEA products because its square modular grid is the same organizational vocabulary used in genuine custom bedroom cabinetry, its dimensions are consistent and stackable, and its finishes (particularly the white and black-brown options) are the same colors used in custom built-ins.
The modifications that create the built-in appearance cluster around four principles: vertical integration (extending the unit to ceiling height eliminates the telltale gap above IKEA furniture that signals freestanding product), architectural trim (adding baseboard, crown, and face-frame molding in the room’s existing trim vocabulary makes the unit read as a permanent architectural feature), consistent color (painting the KALLAX in the same color as the wall or in a deliberate contrast color eliminates the mass-market product reading), and hardware quality (replacing IKEA’s standard hardware with quality alternatives upgrades the unit’s tactile and visual register to custom millwork).
Hack Investment Guide
| Hack Category | Estimated Cost | Skill Level | Visual Impact |
|---|---|---|---|
| Ceiling height extension | $20–$60 in lumber | Beginner | Extremely high |
| Crown and base molding | $30–$80 in molding | Beginner | Very high |
| Wall paint color matching | $15–$30 in paint | Beginner | Very high |
| Hardware upgrade | $40–$120 in hardware | Beginner | High |
| Integrated lighting | $20–$60 in LED | Beginner | Very high |
| Door and insert additions | $60–$200 in materials | Intermediate | High |
17 IKEA KALLAX Bedroom Hacks for Creating a Custom Built-In Look
1. Extend KALLAX to Full Ceiling Height with a Plywood Filler

Vibe: The unit is custom — extending the KALLAX to ceiling height with a plywood filler eliminates the single most identifiable sign of freestanding IKEA furniture (the gap between the top of the unit and the ceiling) and replaces it with the floor-to-ceiling integration that is the definitive visual language of custom built-in cabinetry.
Why it works: The gap above a freestanding piece of furniture is the strongest visual signal that the piece is not built-in — genuine custom cabinetry extends to the ceiling either through the cabinet body itself or through integrated soffit treatment that eliminates any gap. A KALLAX with 12 inches of open space above it (the typical gap in an 8-foot ceiling room with a standard 57-inch KALLAX) reads as a freestanding unit regardless of all other modifications; the same KALLAX with a painted plywood filler extending from its top surface to the ceiling reads as a floor-to-ceiling built-in. The filler box (built from 3/4-inch plywood to match the KALLAX’s depth and width) can be used as additional storage (with fabric baskets slid into the upper section) or as a closed cabinet for seasonal or infrequent-use items.
How to get it: Measure the gap between the KALLAX’s top surface and the ceiling (accounting for any cornice or crown molding). Build a simple plywood box of the KALLAX’s width and depth and the measured ceiling gap height from 3/4-inch MDF or plywood ($15–$30 in materials). Paint the plywood filler in the same color as the KALLAX before installation. Secure the filler box to the ceiling with angle brackets and to the KALLAX’s top surface with wood screws. Fill any remaining gaps between the filler box and the ceiling or adjacent walls with paintable caulk, smooth, and paint — the seamless caulked joint is the finishing detail that completes the built-in illusion.
Quick Win: Even without building a full filler box, painting the ceiling area directly above the KALLAX in the same color as the unit (creating a painted “soffit” effect at the ceiling) significantly reduces the visual impact of the gap and begins the built-in reading at zero material cost.
Shop The Look
- MDF panel sheet 3/4 inch filler box
- Paintable caulk interior gap seal
- Angle bracket cabinet ceiling mount
- Cabinet filler strip wood trim
- Plywood sheet 3/4 inch furniture hack
2. Add Crown Molding at the Top for Architectural Finish

Vibe: The molding is architectural — crown molding at the KALLAX’s top edge is the single detail that most immediately signals custom cabinetry to the observant eye, because crown molding at the top of a storage unit is the specific finishing detail that distinguishes custom-built furniture from freestanding alternatives.
Why it works: Crown molding is the architectural trim element most associated with custom millwork — genuine custom built-in cabinetry always has some form of crown or cornice at the top that transitions the cabinet body to the ceiling or to the upper wall. A KALLAX with crown molding installed at its top edge acquires this same architectural signature — the eye reads the molding as a designed transition detail rather than as decoration, which immediately places the unit in the category of architectural installation rather than furniture. The crown molding also serves the practical function of concealing any small irregularities at the KALLAX’s top edge (the slightly uneven surface between the unit’s melamine top and any adjacent filler pieces) with a clean, finished architectural line.
How to get it: Purchase pre-primed wood crown molding from a hardware or lumber retailer ($1–$3 per linear foot in standard profiles). Cut the molding to the KALLAX’s width with a miter saw (45-degree miter cuts at the ends for clean corners against the wall). Apply construction adhesive to the back of the molding and press firmly to the KALLAX’s top face, supplemented with finish nails for additional security. Fill all nail holes and the joint between the molding and the KALLAX surface with paintable caulk, sand smooth, and paint in the same color as the KALLAX body.
Shop The Look
- Crown molding pre-primed wood furniture
- Miter box saw molding cut angle
- Construction adhesive wood trim panel
- Finish nail set wood trim install
- Paintable wood filler caulk molding
3. Paint KALLAX the Same Color as the Wall

Vibe: The unit is seamless — painting the KALLAX in the exact same color as the surrounding wall creates the built-in illusion through color integration, where the unit appears to be part of the wall architecture rather than furniture placed against it.
Why it works: Color is the most powerful visual signal of architectural integration or furniture independence — a piece of furniture in any color other than the wall reads as a separate object placed against the wall; a piece of furniture in the same color as the wall reads as an extension of the wall architecture. This color-integration principle works regardless of the specific color chosen — a white KALLAX against a white wall, a charcoal KALLAX against a charcoal wall, or a sage green KALLAX against a sage green wall all create the same architectural integration reading. The interior surfaces of the KALLAX (the visible back panels and shelf dividers visible through the open squares) should also be painted for consistency — an unpainted interior of a painted KALLAX breaks the integrated reading at the most prominent visual zone.
How to get it: Sand the KALLAX’s melamine exterior surfaces lightly with 150-grit sandpaper to create tooth for paint adhesion (melamine is non-porous and requires surface preparation for paint to adhere reliably). Apply a bonding primer specifically formulated for laminate and melamine surfaces ($15–$25 per quart) before the topcoat. Apply two coats of wall paint (the same paint used on the adjacent walls) over the primer for seamless color matching. Paint the visible interior surfaces (back panel and dividers) in the same color. Caulk all joints between the KALLAX and the adjacent wall, ceiling, and floor in the same paint color after painting.
Shop The Look
- Bonding primer laminate melamine furniture
- Chalk paint furniture KALLAX no sanding
- Sand paper 150 grit furniture prep
- Interior paint small quart bedroom
- Foam roller furniture paint smooth
4. Add Baseboard Trim at the Unit’s Base

Vibe: The base is continuous — running the room’s baseboard trim continuously across the front of the KALLAX’s base creates the single most convincing sign that the unit is built-in rather than freestanding, because the continuous baseboard line implies that the unit is part of the room’s permanent architecture.
Why it works: Genuine built-in cabinetry always has the room’s baseboard running continuously from the adjacent wall across the cabinet’s base — this continuity of the baseboard is what visually confirms the cabinet’s architectural permanence. A freestanding piece of furniture interrupts the baseboard (which ends at the furniture’s side and resumes after it) while a built-in cabinet integrates the baseboard as part of its own base profile. Adding the room’s baseboard trim across the front of the KALLAX’s base, cut and mitered to match the existing baseboard on both sides, creates this continuous baseboard line that is among the most convincing built-in signals available.
How to get it: Purchase baseboard molding in the same profile as the room’s existing baseboard (bring a photo and a small cutoff sample to the hardware store for profile matching — $1–$3 per linear foot for standard profiles). Cut the baseboard to the KALLAX’s width with 45-degree miter cuts at the ends for clean returns to the wall. Apply construction adhesive and finish nails to secure the baseboard to the KALLAX’s front face at the base. Fill all nail holes and any small gaps between the new baseboard and the existing wall baseboard with paintable caulk. Paint in the same color as the room’s existing baseboard trim.
Shop The Look
- Baseboard molding profile match existing
- Wood baseboard trim interior furniture
- Baseboard adhesive construction furniture
- Trim paint white semi-gloss baseboard
- Caulk paintable interior trim baseoard
5. Upgrade Hardware to Quality Knobs and Pulls
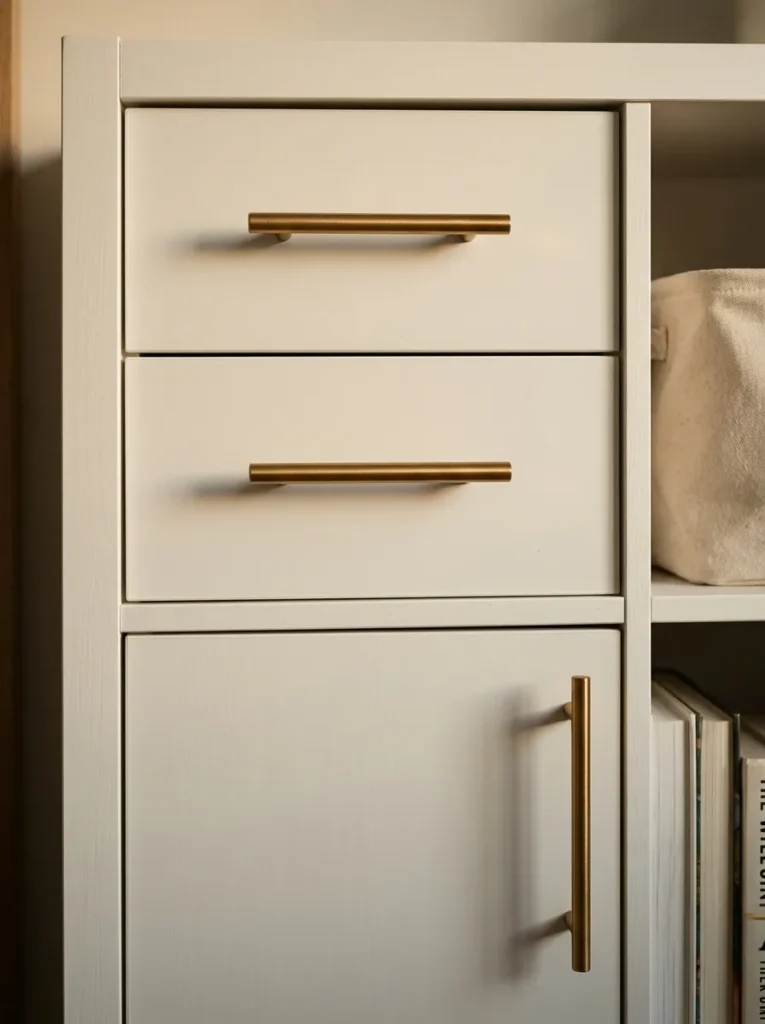
Vibe: The hardware is quality — replacing standard IKEA drawer and door insert hardware with quality brushed brass bar pulls or ceramic knobs immediately upgrades the KALLAX’s tactile and visual register from mass-market furniture to custom cabinetry quality.
Why it works: Hardware is the detail-level element that most immediately communicates the quality register of any cabinetry — it is the part of the unit that is touched most frequently (every drawer and door interaction) and seen most clearly at close range. Standard IKEA hardware (or no hardware, in the case of push-to-open mechanisms) reads as the functional minimum; quality brushed brass, aged bronze, or ceramic hardware reads as a deliberate design choice that references the material vocabulary of custom cabinetry. The hardware upgrade is also the most cost-effective KALLAX hack on a per-impact basis — $3–$8 per quality pull or knob, replacing four to six draws or door inserts, costs $12–$48 total and produces a visible quality improvement at every interaction with the unit.
How to get it: Drill holes for the chosen hardware pulls or knobs in KALLAX drawer inserts and door inserts — standard bar pulls typically require two holes at the pull’s center distance (available in 3-inch, 4-inch, and 5-inch center spacings), while knobs require a single centered hole. Quality brushed brass bar pulls are available from home improvement retailers and Amazon at $3–$8 each for quality options. Ceramic cabinet knobs in warm cream or warm grey are available at $2–$6 each. Select a consistent hardware finish across all KALLAX inserts for the material cohesion that quality cabinetry requires.
Shop The Look
- Brushed brass bar pull cabinet 4 inch
- Ceramic cabinet knob cream round
- Matte black bar pull cabinet modern
- Cabinet hardware set bedroom wardrobe
- Aged brass knob drawer cabinet quality
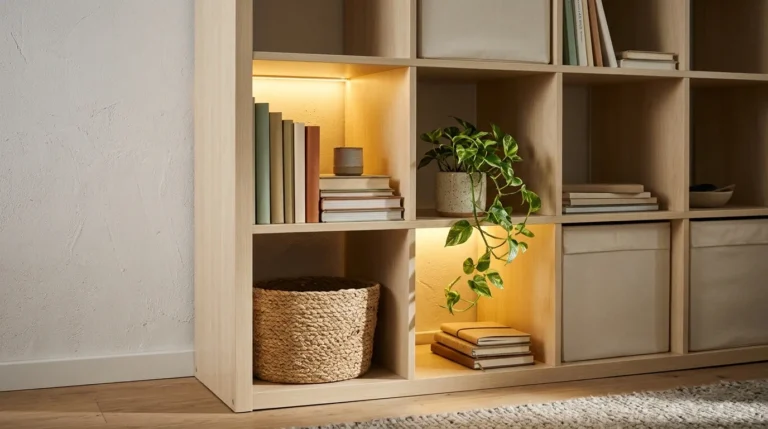
6. Install LED Strip Lighting Inside Open Squares

Vibe: The lighting is sophisticated — warm LED strip lighting inside selected KALLAX open squares creates the specific interior illumination of quality custom wardrobes and display cabinetry, where the lit interior transforms the KALLAX from a shelving unit into a display installation with genuine atmospheric quality.
Why it works: Interior cabinet lighting is one of the most consistent markers of quality in both custom cabinetry and high-end retail display — the fact that the inside of the unit is lit implies that the contents are worth illuminating, which elevates the perceived value of the stored objects and the unit itself. Warm LED strip inside a KALLAX square also solves the accessibility problem of deep KALLAX interiors in lower light conditions — the interior LED strip illuminates the square’s full depth from above, making every stored item visible and selectable even in low bedroom ambient light. The warm 2700K color temperature is critical for bedroom KALLAX lighting — cool-white interior LEDs create a clinical appearance while warm amber LEDs create the atmospheric quality of quality cabinetry.
How to get it: Apply adhesive-backed warm 2700K LED strip along the interior top edge of selected KALLAX squares — the strip should be positioned at the square’s front-top interior edge where it illuminates the square’s depth downward rather than creating a visible light strip at the square’s front face. Use LED strip with a built-in dimmer controller ($20–$45 for a warm LED strip kit with remote dimmer) to allow the interior lighting to be dimmed for atmospheric use in the evening. Connect all squares’ LED strips to a single controller for synchronized lighting across the unit.
Shop The Look
- LED strip warm 2700K cabinet interior
- Under cabinet LED strip adhesive warm
- LED strip controller dimmer remote
- KALLAX interior lighting kit warm
- Cabinet LED strip bookcase shelf light
7. Add a Face Frame for Custom Cabinet Appearance

Vibe: The unit is defined — a face frame installed over the KALLAX’s front face creates the specific visual language of face-frame cabinetry, where each square opening has a defined border that reads as the deliberate cabinet-making detail distinguishing quality custom cabinetry from standard shelving.
Why it works: Face-frame cabinetry — where a solid wood frame is applied to the front face of the cabinet box, framing each door and drawer opening — is the traditional American cabinet-making approach that is specifically associated with quality, custom residential cabinetry. A KALLAX without a face frame reads as shelving (the square openings have no defined border, appearing as spaces within the unit rather than as framed openings); a KALLAX with a 1×2-inch lumber face frame reads as cabinetry (the framed openings now have defined borders that reference the visual language of quality built-ins). The face frame adds approximately 1.5 inches of visual border around each square opening and eliminates the thin melamine edge of the KALLAX that reads as the manufactured-product detail most inconsistent with custom cabinetry appearance.
How to get it: Cut 1×2-inch or 1×3-inch poplar or pine lumber to create the face frame components — horizontal rails (running the full KALLAX width) and vertical stiles (running between the rails at each column division). Attach the face frame pieces to the KALLAX’s front face using construction adhesive and finish nails, ensuring that each square opening is consistently bordered on all four sides. Fill all nail holes and joints with wood filler, sand smooth, and paint in the same color as the KALLAX body. Total material cost for a face frame on a 4×4 KALLAX: $25–$50 in lumber.
Shop The Look
- 1×2 poplar lumber face frame cabinet
- Face frame cabinet building kit
- Wood filler paintable furniture repair
- Pocket hole jig face frame join
- Nail gun finish nail trim install
8. Replace KALLAX Back Panels with Wallpaper or Patterned Paper
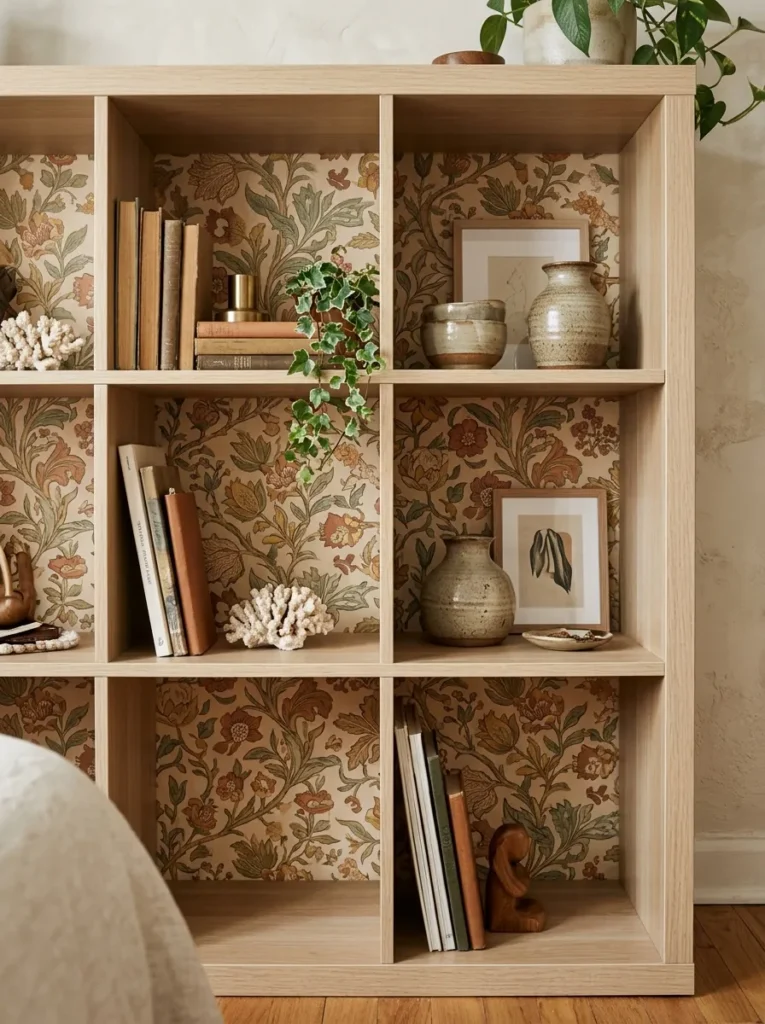
Vibe: The backs are designed, wallpaper applied to the back panels of open KALLAX display squares creates a designed backdrop behind displayed objects that transforms the KALLAX from a shelving unit into a display cabinet with intentional compositional depth at every open square.
Why it works: The KALLAX’s back panel is visible through every open square and is the surface that provides the backdrop for every displayed object — the quality of this backdrop determines whether displayed objects read as placed on a shelf or composed in front of a designed surface. A plain white or brown-black KALLAX back panel provides the most neutral (and most generic) possible backdrop; a wallpapered back panel in a sophisticated pattern provides a designed backdrop that elevates every object displayed in front of it and gives the unit a bespoke, considered quality that standard KALLAX use cannot achieve. The wallpaper pattern should be chosen in relationship to the room’s broader pattern and color vocabulary — a botanical print that references the room’s natural material palette, a geometric that references the room’s graphic elements, or an abstract that adds color depth without competing with displayed objects.
How to get it: Remove the KALLAX back panels if possible (the KALLAX back is a thin cardboard-like panel that is inserted during assembly — newer KALLAX units have slightly more complex back attachment but the panels can still be removed with care). Cut wallpaper to the panel dimensions, apply using standard wallpaper paste or peel-and-stick wallpaper for the easiest application, and replace the panels in the unit. Alternatively, apply wallpaper directly to the back panels without removing them, using a small brush to work into the panel’s corners. Peel-and-stick wallpaper ($30–$80 per roll, sufficient for a full 4×4 back) is the most DIY-accessible option.
Shop The Look
- Peel stick wallpaper botanical bedroom
- Removable wallpaper geometric warm tones
- Wallpaper panel back cabinet display
- Peel stick wallpaper shelf backing
- Contact paper pattern cabinet back
9. Create a Dedicated Closet Alcove with KALLAX Units

Vibe: The alcove is purpose-built — KALLAX units arranged on three sides of an alcove or recessed wall zone, painted to match the alcove walls, create a fully functioning bedroom closet that reads as a purpose-built architectural feature rather than arranged furniture.
Why it works: A bedroom alcove (a shallow recessed area in a bedroom wall, or a corner zone defined by two adjacent walls) is the most natural setting for a KALLAX built-in installation because the three walls of the alcove create the natural boundaries that define a built-in cabinet — the KALLAX units fill the alcove width and depth, and the alcove walls provide the natural side panels that eliminate the freestanding-unit reading. The three-sided installation (back wall KALLAX plus two side units along the alcove’s side walls) creates the enclosed wardrobe atmosphere that makes the zone read as a dedicated closet environment rather than a storage arrangement. The hanging rail installed between two KALLAX units at one section of the alcove (secured between two units with a tension rod or a dowel at the correct garment-length height) adds the hanging component that a complete wardrobe system requires.
How to get it: Measure the alcove dimensions and plan KALLAX unit positions to fill the available width and depth as completely as possible — fill any remaining gaps between KALLAX units and alcove walls with plywood filler panels cut and painted to match. Install a hanging rail (an IKEA GRUNDTAL rail, a standard closet tension rod, or a wall-mounted garment rail) between two KALLAX side units at the correct height for the garments to be hung (66 inches from the floor for standard hanging, 40 inches for folded-garment hanging). Paint all KALLAX units and the alcove walls in a consistent color for maximum integration.
Shop The Look
- Closet hanging rail bedroom alcove
- Tension rod closet hanging between units
- Wall mounted garment rail wardrobe
- KALLAX alcove closet configuration
- Plywood filler panel alcove gap fill
10. Add KALLAX Door Inserts with Inset Panels for Shaker Style

Vibe: The doors are Shaker — Shaker-profile door inserts on selected KALLAX squares create the specific custom kitchen cabinetry aesthetic that is the most recognizable and most enduring custom built-in vocabulary — the flat recessed-center panel that reads as quality craftsmanship in any interior style.
Why it works: The Shaker door profile — a flat center panel inset within a simple frame of four equal stiles and rails — is the most widely used and most design-enduring cabinet door style in both American and European custom cabinetry, because its clean geometry works across traditional, transitional, and contemporary design contexts. A KALLAX fitted with Shaker-profile door inserts immediately acquires the visual vocabulary of this custom cabinetry tradition — the doors don’t read as IKEA doors, they read as cabinetry doors. Third-party companies (Superfront, Reform, Semihandmade, and various Amazon sellers) produce Shaker-profile door inserts specifically designed to fit KALLAX squares, providing pre-made doors that require only painting and hardware installation.
How to get it: Third-party KALLAX-compatible Shaker door inserts are available from Superfront ($30–$60 per door panel), Reform ($40–$80 per panel), and Amazon-sold compatible doors ($15–$35 per door). Select the door finish (unfinished for painting in the desired color, or pre-finished in white or wood veneer) and paint in the chosen color before installation. Install KALLAX door inserts using the hinge hardware provided — most third-party doors use the same hinge system as IKEA’s own door inserts. Add the chosen hardware pulls or knobs after installation.
Shop The Look
- Shaker door insert KALLAX compatible third party
- KALLAX door panel Shaker profile painted
- Cabinet door insert replace KALLAX upgrade
- Shaker cabinet door unfinished paintable
- KALLAX compatible replacement door panel
11. Create a Desk Integration by Adding a Floating Desktop Surface

Vibe: The unit is integrated — a floating desktop surface spanning a horizontal KALLAX base creates the bedroom study station’s most elegant and most functionally complete configuration — desk surface and organized storage in a single architectural installation.
Why it works: The KALLAX used horizontally (on its side, with the squares oriented as vertical compartments rather than the standard horizontal open shelves) becomes a low storage base at the ideal desk height when a desktop surface is added at its top — the standard KALLAX 1×4 unit used on its side provides a base height of approximately 30 inches, which is the correct desk surface height for seated work. The desktop surface (a solid wood panel, a MDF board with an edge profile, or an IKEA KARLBY countertop) spans the KALLAX’s full width and extends beyond it on one or both sides to create the full desk working surface. This integrated desk-and-storage configuration creates a bedroom study station of genuine architectural integration at a combined cost of $80–$200 for the KALLAX and desktop surface.
How to get it: Position a 1×4 KALLAX unit on its side against the bedroom wall at the desired desk location (the unit’s 57-inch long dimension becomes the desk’s width when horizontal). Cut or purchase a desktop surface in solid pine, MDF, or a quality manufactured panel (IKEA KARLBY countertop in oak or walnut veneer, $149–$249, is the most widely recommended KALLAX desk hack desktop). Secure the desktop to the KALLAX’s top surface with L-brackets and to the wall with wall anchor brackets. Sand the desktop edge and apply the finish (stain, oil, or paint) before installation.
Shop The Look
- IKEA KARLBY countertop desk surface oak
- Solid pine desktop board bedroom desk
- L bracket desktop support wall mount
- KALLAX desk hack integration horizontal
- Floating desk surface wall anchor
12. Apply Decorative Vinyl or Wood Veneer to the KALLAX Exterior

Vibe: The exterior is natural — applying wood grain vinyl or genuine wood veneer to the KALLAX’s exterior surfaces transforms the standard melamine finish into a warm natural material appearance that reads as quality furniture construction rather than flat-pack laminate.
Why it works: The KALLAX’s white or brown-black melamine finish is the most immediately recognizable sign of its mass-market production — the melamine surface’s flat, non-textural quality reads as manufactured laminate at close inspection range regardless of the unit’s size or configuration. Wood grain adhesive vinyl (which provides a convincing visual approximation of wood texture at low cost) or genuine wood veneer (which provides actual wood material quality at the surface) transforms this surface into one with the warmth and texture of quality furniture. The exterior side panels and top surface are the KALLAX’s most visible surfaces from normal room viewing positions — upgrading these specific surfaces produces the highest visible impact from the minimum veneer area.
How to get it: Self-adhesive wood grain vinyl (available in walnut, oak, and cherry grain patterns at $15–$30 per roll sufficient for a full 4×4 KALLAX exterior) is the most accessible option — clean the KALLAX surface thoroughly, cut the vinyl to panel dimensions, apply with a squeegee, and trim the edges cleanly. Genuine wood veneer (edge-banding veneer with iron-on adhesive backing, $20–$50 for a KALLAX exterior) provides a more authentic material result — the iron-on backing is applied with a household iron and the excess is trimmed with a sharp blade. Finish both the vinyl and genuine veneer applications with the same consistent hardware and paint details as the other built-in hacks.
Shop The Look
- Wood grain adhesive vinyl walnut KALLAX
- Wood veneer iron-on edge banding oak
- Self adhesive vinyl furniture wrap wood
- Contact paper wood grain furniture
- Veneer sheet furniture upgrade KALLAX
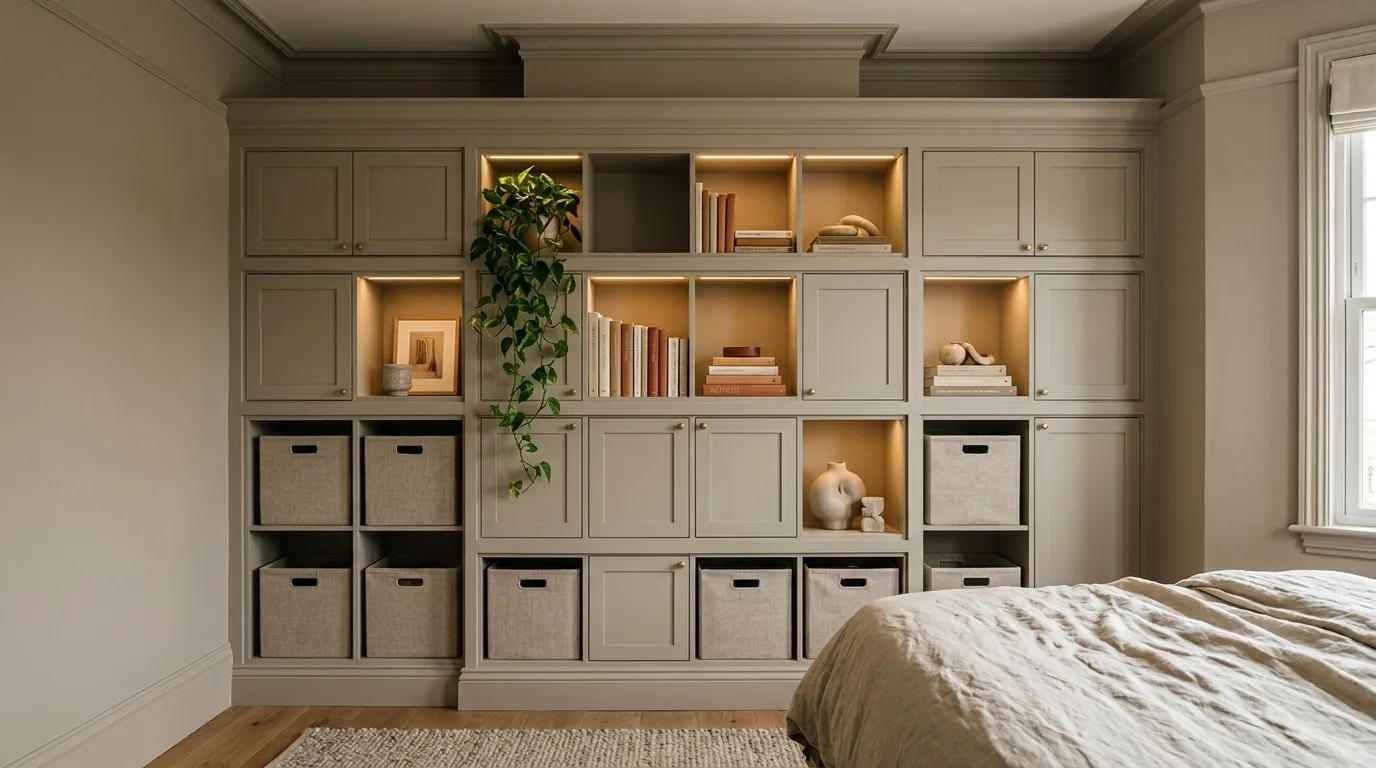
13. Combine Multiple KALLAX Units for a Full Feature Wall
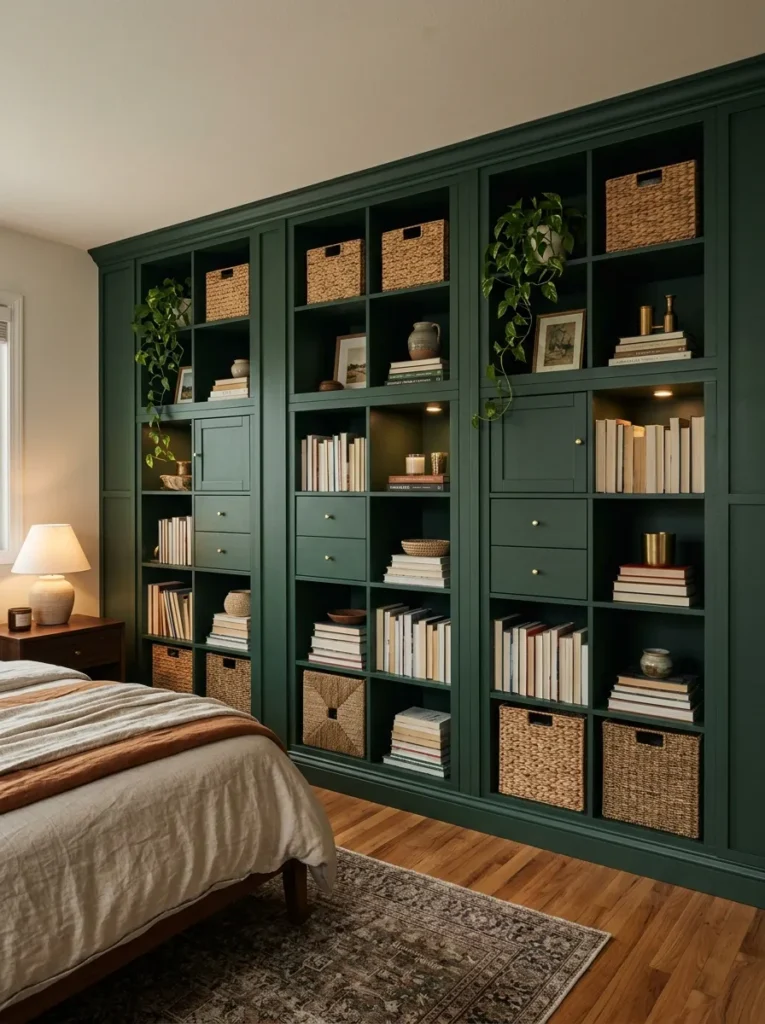
Vibe: The wall is dramatic — multiple KALLAX units combined with continuous trim across their tops and bases, and concealed joints between adjacent units, creates the most dramatically custom-looking bedroom feature — a full-wall built-in that spans the room’s entire primary wall and reads as a single architectural installation.
Why it works: The full-feature-wall KALLAX installation is the most ambitious and most rewarding KALLAX hack because it achieves the specific scale of custom built-in cabinetry that is most associated with genuinely high-end bedroom design — the bedroom with a full wall of built-in cabinetry reads as a deliberately designed space rather than a bedroom with storage furniture. The combination of multiple identical units creates the scale that no single KALLAX can achieve, and the continuous trim elements (crown at the top, baseboard at the base, vertical trim strips at the joints between units) unify the individual units into a single visual composition that reads as one purpose-built installation. The total cost of this installation (two to three 4×4 KALLAX units plus trim materials) is $400–$800 — compared to $5,000–$15,000 for equivalent custom built-in cabinetry.
How to get it: Purchase two or three 4×4 KALLAX units in the same finish (white is the most versatile). Position side by side against the primary bedroom wall, leaving no gaps between adjacent units. Apply the ceiling-extension filler (Hack #1) across all units simultaneously. Install continuous crown molding across the top of all units. Install continuous baseboard across the base of all units. Apply vertical 1×2-inch trim strips at the external joints between adjacent KALLAX units to conceal the joint and create a uniform vertical column division across the full feature wall. Paint the entire installation (all units, all trim) in a single consistent color.
Shop The Look
- IKEA KALLAX 4×4 set three units wall
- Vertical trim strip wood 1×2 joint cover
- Feature wall built-in KALLAX multi unit
- Cabinet join strip furniture combination
- Full wall shelving unit bedroom custom
14. Add a Seating Bench on a Horizontal KALLAX Base
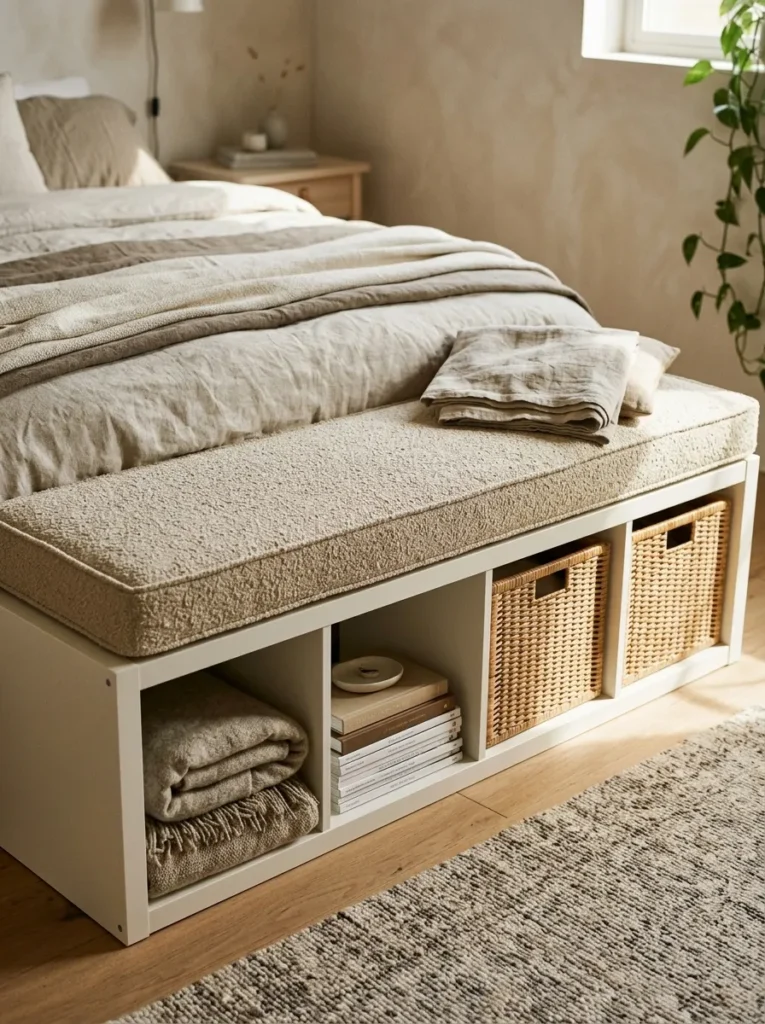
Vibe: The bench is purposeful — a horizontal KALLAX fitted with an upholstered foam cushion creates a bedroom bench with integrated cubby storage that reads as a purpose-designed bedroom furniture piece — simultaneously providing seating at the bed’s foot and organized storage for shoes, baskets, or seasonal items in the four open cubbies.
Why it works: The KALLAX bench hack is among the most functional of all KALLAX bedroom modifications because it creates a furniture piece that most bedrooms genuinely need (a seating bench at the bed’s foot for dressing, for sitting while putting on shoes, and for aesthetic bedroom composition at the bed’s foot level) that is not readily available at an accessible price point in quality materials. The horizontal 1×4 KALLAX (57 inches long when lying on its side) provides the perfect bench length for a queen or king bed’s foot, the four side-opening cubbies provide immediate-access storage for shoes and baskets, and the custom upholstered foam cushion top (cut from 3-inch thick upholstery foam and covered in the chosen fabric) provides comfortable seating quality comparable to custom-made bedroom benches at $300–$600.
How to get it: Position a 1×4 KALLAX on its side (the unit lies with its 57-inch dimension horizontal and its four squares opening to the side). Cut 3-inch thick upholstery foam ($20–$40) to the exact dimensions of the KALLAX’s top surface. Cover the foam with the chosen fabric (linen, boucle, or performance velvet) using a staple gun, wrapping the fabric around the foam’s sides and stapling to the foam’s underside. Place the foam cushion on the KALLAX’s top surface — no adhesion is needed as the cushion’s weight keeps it in position. Alternatively, attach with a thin furniture adhesive for a permanent installation.
Shop The Look
- Upholstery foam 3 inch bench cushion cut
- Linen fabric upholstery bench cover
- Boucle fabric bench cushion bedroom
- KALLAX bench hack horizontal cushion
- Staple gun upholstery foam cover
15. Install Fluted or Reeded Panel Overlays on Selected Squares

Vibe: The texture is contemporary — fluted or reeded panel overlays applied to selected KALLAX exterior faces create the warm, dimensional surface texture that is the defining material quality of the most current high-end bedroom cabinetry design, transforming the flat KALLAX surface into a tactile, light-catching feature.
Why it works: Fluted and reeded surfaces — vertical parallel ridges creating a corrugated dimensional texture — are the most prominent material trend in contemporary custom cabinetry and furniture design, appearing on kitchen cabinetry, bedroom wardrobes, and furniture fronts across every design direction from minimalist to maximalist. Applied to selected KALLAX exterior surfaces (the outer panels and selected square faces), fluted panel overlays transform the flat melamine surface into a textural architectural element that catches and reflects light in the same way as the custom cabinetry it references. Thin fluted MDF panels ($20–$50 per sheet, sufficient for multiple KALLAX squares) are available from lumber retailers and specialty wood suppliers in pre-cut standard-profile reeded patterns.
How to get it: Purchase pre-cut fluted MDF panels or thin PVC reeded panels from lumber suppliers or specialty architectural material retailers. Cut to the dimensions of the KALLAX exterior panels or selected square faces. Apply with construction adhesive to the KALLAX’s exterior surface, pressing firmly and allowing to cure for 24 hours. Fill the joints between the fluted panel and the KALLAX edge with caulk or filler. Paint the entire unit (KALLAX body plus fluted overlays) in a consistent color — the paint in the reeded channels creates the shadow depth that makes the texture most visible.
Shop The Look
- Fluted MDF panel overlay cabinet furniture
- Reeded panel wood furniture contemporary
- PVC fluted panel wardrobe overlay
- Fluted wood panel texture furniture DIY
- Reeded MDF overlay cabinet door panel
16. Anchor the KALLAX with a Statement Rug Below
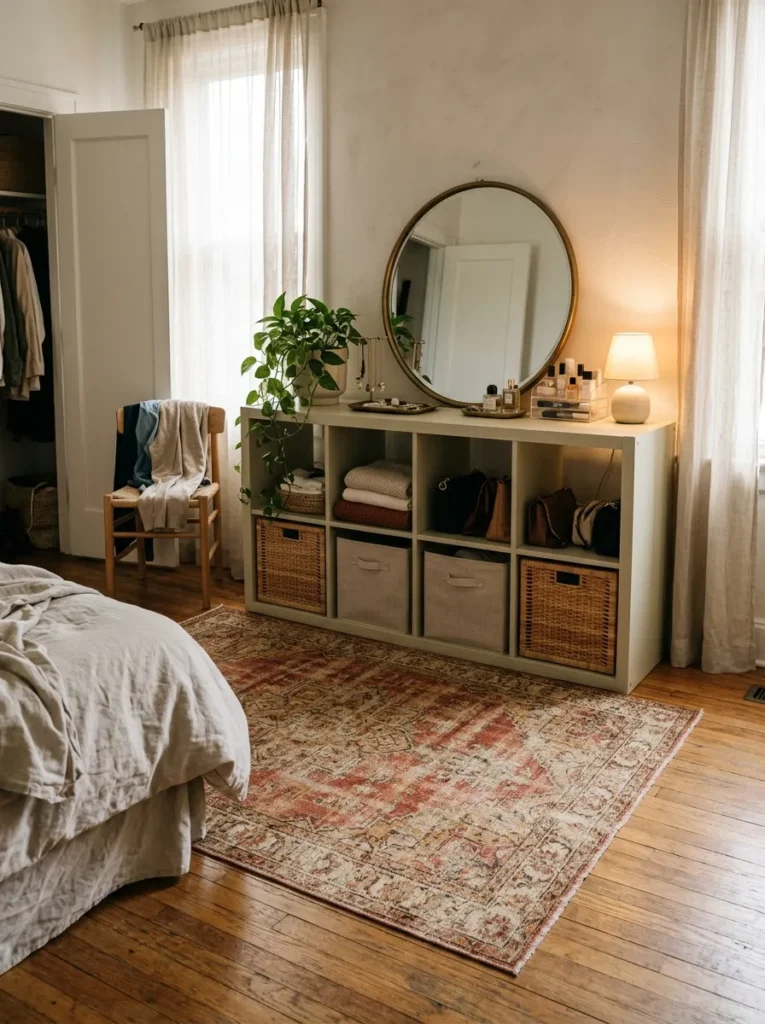
Vibe: The zone is anchored — a quality area rug placed in front of the KALLAX unit creates the floor-level material anchor that transforms the KALLAX from a storage unit positioned against a wall into the anchor piece of a designed dressing or wardrobe zone within the bedroom.
Why it works: A freestanding furniture piece without a rug beneath or in front of it floats visually on the floor — it reads as placed rather than positioned, as functional rather than designed. A rug that extends from the KALLAX’s base outward into the room creates the floor-level composition that gives the unit a designed zone rather than a positioned location. The rug specifically works to make the KALLAX read as a built-in by giving it a floor context — genuine built-ins are always part of a designed zone (the closet zone, the dressing area, the study corner) while freestanding furniture is positioned individually. A vintage or antique rug in warm, faded tones is specifically the most effective KALLAX anchoring rug because its worn patina and warm natural dyes create the material warmth that contrasts most productively with the KALLAX’s clean geometric structure.
How to get it: Choose a rug that extends at least 18–24 inches in front of the KALLAX’s base and the full width of the KALLAX plus 12 inches on each side for the most compositionally generous anchoring proportion. A 4×6-foot rug positioned in front of a single 4×4 KALLAX provides adequate anchor; a 5×8-foot or 6×9-foot rug positioned in front of a multi-unit feature wall provides the proportionally generous anchor that the wider installation requires. Source vintage or antique rugs from estate sales, antique markets, or vintage rug dealers for the warm, faded quality that most effectively contrasts with the KALLAX’s clean geometry.
Shop The Look
- Vintage style area rug warm faded tones
- Antique look rug bedroom wardrobe zone
- Area rug 5×8 bedroom KALLAX anchor
- Distressed rug natural wool warm tones
- Faded vintage rug bedroom warm cream
17. Style the Final Unit with Deliberate Editorial Display

Vibe: The unit is editorial — the final hack layer of deliberate display styling — books by spine color, a trailing plant, a quality ceramic, and a leaning print — at the three-object-per-square maximum transforms the structurally hacked KALLAX into a magazine-quality bedroom feature that reads as both a designed architectural installation and a genuinely personal expression.
Why it works: The structural hacks (ceiling extension, trim, paint, hardware, lighting) create the custom built-in appearance; the styling decisions (what is displayed in each open square and how) create the personal, inhabited quality that makes a custom built-in feel genuinely occupied rather than merely installed. Editorial display styling — the specific disciplines of book spine color organization, maximum three objects per open square, plant integration at varied heights, and personal objects alongside quality ceramics — is what distinguishes a beautifully hacked KALLAX from a beautifully styled one. The two qualities together (structural built-in appearance plus thoughtful personal styling) create the result that reads as genuinely custom, genuinely personal, and genuinely magazine-quality from any angle in the bedroom.
How to get it: Apply the display styling disciplines to all open squares in the completed, hacked unit. Organize all books with their jackets removed by spine color in warm tonal progressions. Place one trailing or draping plant (pothos, string of pearls, or heartleaf philodendron) in a mid-height open square where its trailing stems cascade downward over one or two squares below. Position one quality ceramic or sculptural object per displayed square at the maximum three-object limit. Lean one small framed artwork or print against the back panel of one square at a height where it reads as a design decision rather than a space-filling addition.
Shop The Look
- Trailing pothos plant small ceramic pot shelf
- Small ceramic sculpture display shelf
- Small art print frame leaning display
- Book spine color organization display
- Plant pot small trailing ceramic shelf
How to Execute Your KALLAX Built-In Project
The correct execution sequence for a KALLAX built-in project is: unit purchase and assembly first, structural modifications second (ceiling extension, trim, paint), hardware and insert installation third, lighting fourth, and display styling last. This sequence ensures that every structural modification is made before any finishing or styling investment — repainting a unit to match a wall after trim has already been installed is far easier than the reverse, and adding LED lighting before the unit is in its final position is far more efficient than retrofitting it after styling is complete.
The most common KALLAX built-in mistake is applying structural modifications to a unit that has been assembled and installed in a position that was not measured and confirmed before installation. Before purchasing any KALLAX unit for a built-in project, measure the available wall space (width, height, and depth clearance) precisely, confirm the unit configuration that fills the space most completely, and plan all structural modifications on paper before any purchasing decision is finalized. A 4×4 KALLAX that is 57 inches wide but the available wall space is 60 inches wide leaves 3 inches of unused space on each side that requires specific filler treatment — a gap that is obvious and difficult to resolve after installation but trivially easy to plan for before it.
Three KALLAX built-in upgrades under $30 that produce immediate, significant visual improvement toward the custom built-in reading: applying one coat of a bonding primer to the KALLAX’s exterior surfaces ($10–$15) in preparation for the wall-color paint that is the single most impactful visual hack; installing a $3 spring-tension rod across the interior of one square for scarf or belt organization that immediately improves both the unit’s organizational capability and its functionality; and caulking all visible gaps between the KALLAX unit and the adjacent wall, floor, and ceiling ($5–$10 in paintable caulk) which immediately reduces the freestanding-furniture reading by eliminating the shadow gaps that signal unattached furniture edges.
A complete KALLAX built-in installation — with ceiling extension, crown molding, baseboard, wall-color paint, face frame, upgraded hardware, interior LED lighting, Shaker door inserts on selected squares, wallpapered back panels on display squares, and editorial display styling — requires a total investment of $350–$650 in materials (in addition to the KALLAX unit cost) and approximately 8–16 hours of DIY work across two weekends. The result is a bedroom storage installation that, at normal viewing distance and to the eye of most observers, is indistinguishable from custom built-in cabinetry — and is achieved at 10–20% of the cost of the custom alternative it references.
Frequently Asked Questions About KALLAX Built-In Hacks
Which single KALLAX hack creates the most custom built-in appearance?
Extending the KALLAX to full ceiling height with a plywood or MDF filler (Hack #1) and painting the entire unit — filler, KALLAX body, and trim — in the same color as the adjacent wall (Hack #3) together produce the most dramatic built-in transformation available from any combination of KALLAX modifications. The ceiling-height extension eliminates the most definitive sign of freestanding furniture (the gap above the unit), and the wall-color paint integration eliminates the most definitive sign of a separate furniture piece (a color that differs from the architectural surround). Applied together, these two hacks convert virtually any KALLAX unit into something that the untrained eye reads as a built-in architectural feature rather than furniture, and their combined cost is typically $30–$80 in materials.
Do I need carpentry skills to execute KALLAX built-in hacks?
The majority of the hacks in this article require only basic DIY skills — measuring, painting, applying adhesive, and using a caulk gun — rather than carpentry expertise. The hacks requiring slightly more skill (cutting crown molding to 45-degree miters, building a plywood ceiling filler box, installing a face frame) benefit from access to a miter box or miter saw for accurate angle cuts but are achievable with hand tools and patience. None of the hacks in this article requires the specialized joinery, finish carpentry, or cabinet-making skills of genuine custom built-in installation — the KALLAX’s factory-assembled structural integrity provides the framework within which all modifications are applied as surface treatments rather than structural carpentry.
How do I ensure KALLAX units are safe and stable when stacked or used as room dividers?
IKEA specifically requires that all KALLAX units be secured to the wall using the anti-tip bracket hardware provided with each unit, and this requirement becomes even more critical when units are stacked, used as room dividers, or heavily loaded with clothing and accessories. Install the provided wall anchor brackets into wall studs (not only into drywall — drywall anchors are insufficient for the load of a KALLAX unit with full content weight) before placing any content in the unit. For stacked units (two 4×4 KALLAX units creating a floor-to-ceiling configuration), secure both the upper and lower units to the wall independently and to each other at their joining surface. For KALLAX room dividers, secure the unit to the wall at one end and to the ceiling (with a top-mounted angle bracket) for maximum stability.
Can I paint over the KALLAX’s melamine finish without sanding?
Yes — using a bonding primer specifically formulated for laminate and melamine surfaces (available from Zinsser, Rust-Oleum, and other paint brands) eliminates the need for sanding in most cases. The bonding primer creates chemical adhesion to the melamine’s non-porous surface that standard primer cannot achieve without surface preparation. Apply the bonding primer in one thin, even coat, allow to dry for the manufacturer’s specified time (typically 1–2 hours), and apply two topcoats of the desired paint color. For the most durable result, finish with a water-based polyurethane topcoat ($12–$20) in a satin or semi-gloss sheen — this provides a scrubbable surface that withstands the regular cleaning that bedroom wardrobe units require.
What is the best paint finish for a KALLAX built-in in a bedroom?
Satin finish is the optimal paint sheen for a KALLAX built-in in a bedroom context — it provides enough sheen to be wipeable and scrubbable (important for a wardrobe unit that receives daily handling) while remaining low-reflective enough to read as quality cabinetry rather than high-gloss furniture. Flat or matte finishes are not appropriate for KALLAX built-ins because they cannot be cleaned easily and show fingermarks and handling marks immediately. High-gloss finishes on KALLAX built-ins can read as lacquered furniture (appropriate in some design contexts) but typically show surface imperfections in the KALLAX’s melamine surface more clearly than satin finishes. Semi-gloss is an acceptable alternative to satin for any KALLAX squares that incorporate door inserts, as the slightly higher sheen is appropriate for door faces.
Ready to Transform Your KALLAX into a Custom Built-In?
These 17 hacks cover the full spectrum of what a KALLAX built-in transformation can achieve — from the architectural integration of ceiling-height extensions and continuous trim molding, to the material warmth of wood veneer exteriors and fluted panel overlays, from the contemporary cabinetry quality of Shaker door inserts and quality brass hardware, to the atmospheric sophistication of warm interior LED lighting and wallpapered display back panels, from the functional intelligence of desk integrations and bench conversions to the spatial impact of full-feature-wall multi-unit combinations and room divider configurations. You do not need all 17 hacks to achieve a genuinely custom-looking KALLAX built-in — you need the two or three that address your specific unit’s most significant departure from the custom built-in reading (almost always the ceiling gap, the paint color, and the hardware) and the display styling discipline that gives the completed unit its personal character. Start with the ceiling and the paint: measure the gap above your KALLAX today, plan the plywood filler, and choose the paint color. The custom built-in is closer than you think — and significantly less expensive. Pin the hacks that named your KALLAX’s specific limitations, those are the ones worth building first.