
13 IKEA KALLAX Bedroom Ideas for Modern Farmhouse Decor
A plain white cube shelf does not look like farmhouse furniture. That is the problem most people run into. These IKEA KALLAX bedroom ideas fix it with texture, warm wood tones, and a few cheap swaps. The shelf itself stays the same. What changes is the finish, the legs, the baskets, and what sits in the cubes. Done well, a KALLAX can pass for custom furniture.
I think the KALLAX gets a bad rap. People see it in every dorm room and assume it can’t look grown up. In my opinion, that’s lazy thinking. I feel the real issue is that we leave it bare, toss in random bins, and then wonder why it looks like a college flashback. A little styling goes a long way.
Below you get 13 ideas, ordered from the cheapest and quickest to the biggest projects. Small ones cost roughly 10 to 40 dollars and take under 30 minutes. The bigger builds can reach a few hundred dollars and need a full weekend. Prices vary by store and size, so treat every number as a rough guide.
Let’s start with the easiest win. It needs one small unit and about 15 minutes.
This post contains affiliate links. If you buy through them, I may earn a small commission at no extra cost to you.
Start With a KALLAX Bedroom Nightstand in Farmhouse Style

Setup: Hold a tape measure from the floor to your mattress top and compare it to 30 inches. Set the unit flat against the wall, and keep the top clear except for a lamp base and a small tray. Warning: the unit can tip if it is not anchored, so use the wall hardware that comes with it.
Quick swap: If 30 inches sits too far above your mattress, look for a shorter KALLAX with fewer cubes, and check IKEA’s current sizes because lineups change. Tuck a basket in the bottom cube for tissues and chargers. This suits small bedrooms and guest rooms, where a bulky wood nightstand would crowd the walkway.
- Anchor the unit to the wall before loading it
- Keep the top clear except for the lamp and one tray
- Put items you use daily in the top cubes
Shop This Look
| SHELF UNIT | WOOD TRAY | ANTI TIP STRAPS |
|---|---|---|
| IKEA KALLAX 2×2 Shelf Unit | Rustic Wood Serving Tray | Furniture Anti Tip Straps |
| Shop → | Shop → | Shop → |
Fill the Cubes With Woven Baskets for Texture
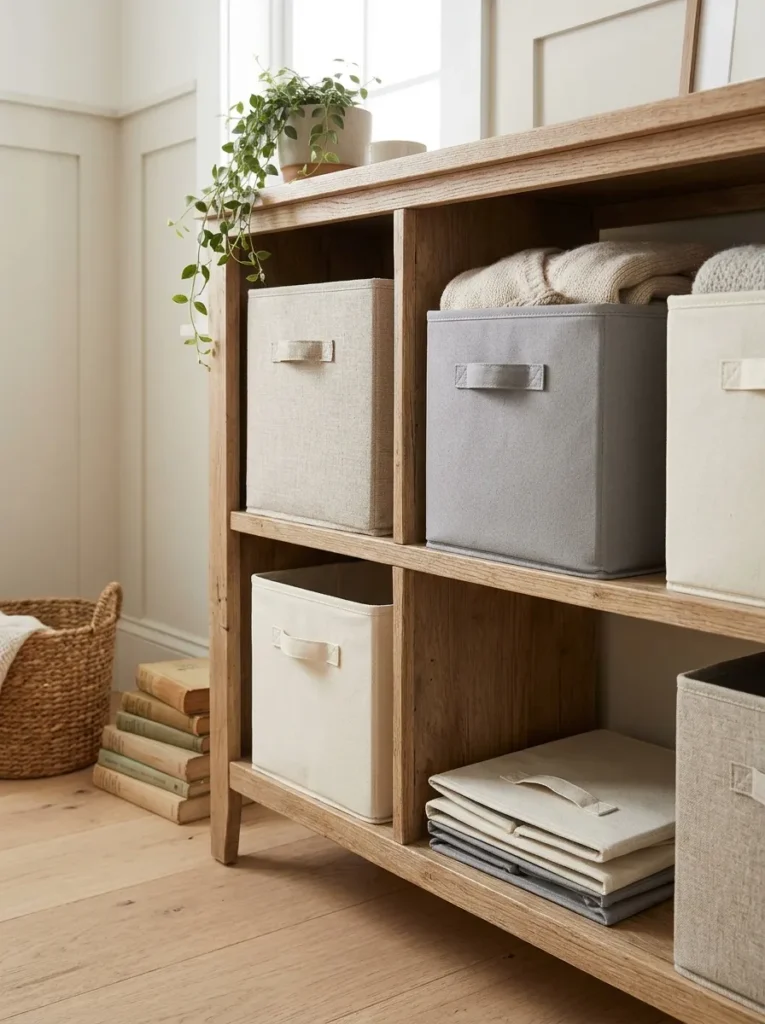
Fitting the baskets: Measure one cube opening with a tape before ordering, then subtract about half an inch so the basket slides easily. Stagger them so some sit flush and others sit slightly back. Warning: rough wicker snags sweaters, so line baskets with a fabric bag or choose smooth seagrass for clothing.
Texture tip: Mix two basket shades, such as a light natural and a darker brown, and keep the shapes matching so the shelf stays calm. Leave one or two cubes open for a candle or a book stack. This suits renters and anyone who wants fast storage in a bedroom with no closet space.
- Measure the cube opening before you order
- Choose baskets with handles so they pull out easily
- Keep the same shape and vary only the shade
Shop This Look
| WICKER | SEAGRASS | LINERS |
|---|---|---|
| Wicker Cube Storage Baskets | Seagrass Storage Bins with Handles | Basket Liner Fabric Bags |
| Shop → | Shop → | Shop → |
Add Linen Fabric Bins for Folded Clothes and Bedding
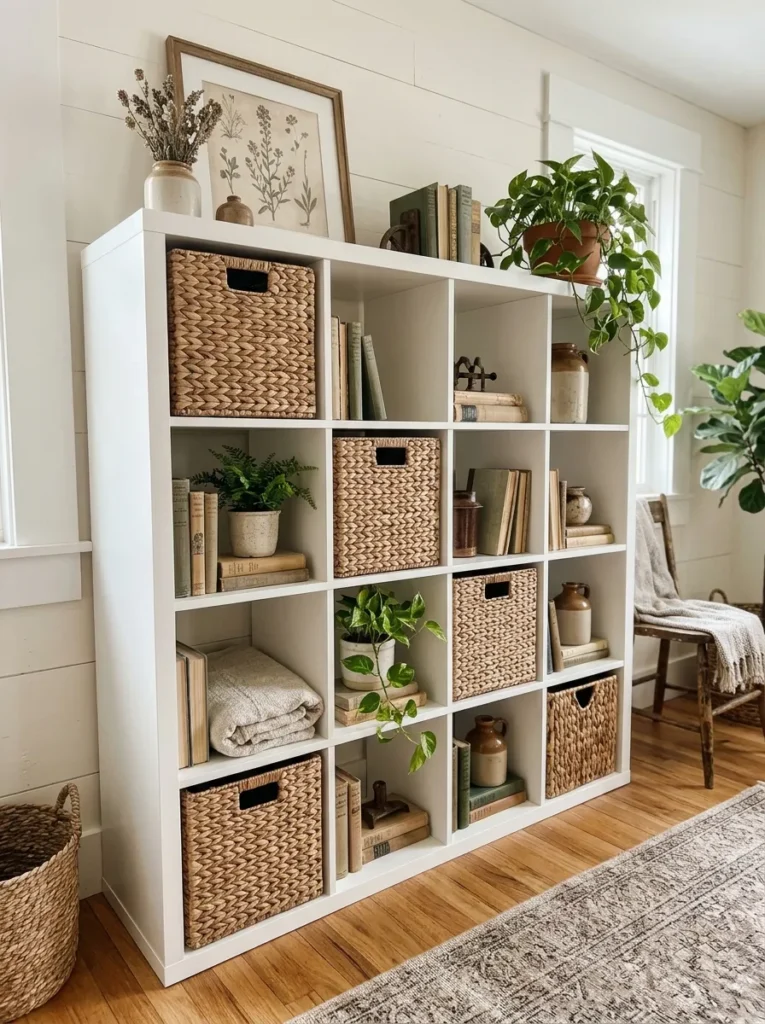
Folding method: Fold clothes into rectangles about 10 by 12 inches so they stand on edge, like files in a drawer. Fill each bin about three quarters full so the sides stay upright. Warning: overloaded bins sag, and heavy loads can pull on the handles, so check the product label for weight limits.
Budget option: Skip matching sets and buy one style of bin in two colors, then alternate them in a loose checker pattern. Add a small tag holder on the front so everyone knows what is inside. This suits shared bedrooms and kids’ rooms, where several people reach into the same shelf every day.
- Fold clothes to stand on edge
- Add a label to the front of each bin
- Wash fabric bins as the care label directs
Shop This Look
| LINEN BIN | CANVAS DRAWER | LABEL TAGS |
|---|---|---|
| Linen Cube Storage Bins | Canvas Cube Drawer Inserts | Cube Bin Label Tags |
| Shop → | Shop → | Shop → |
Style Open Cubes With Books, Frames, and Pottery
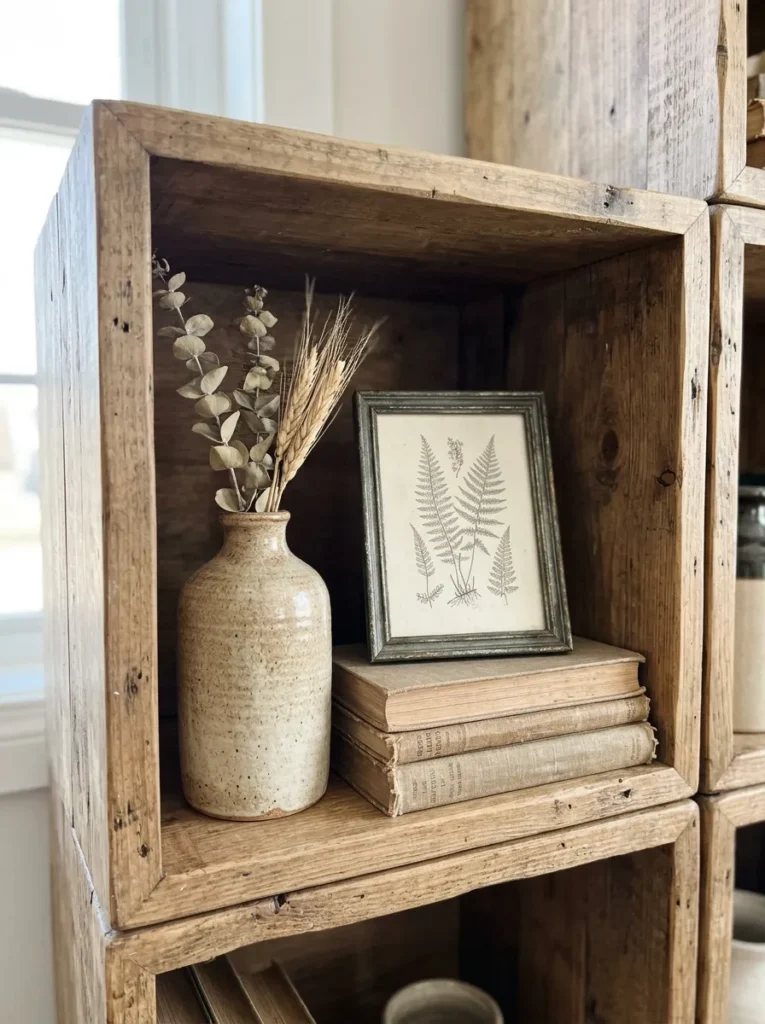
Layout rule: Fill about half of the cubes and leave the rest empty so the shelf does not look crowded. Put books flat in one cube, a frame leaning in another, and a vase in a third. Warning: items on the front edge fall easily, so keep everything at least an inch inside the opening.
Variation: Alternate cubes in a loose checker pattern, with decor in some and baskets in the rest. Black metal frames and cream pottery keep the color range tight. This suits a wall where the shelf is the main feature and needs to look finished from across the room.
- Odd numbers of items look best in each cube
- Lean framed art against the back panel
- Leave several cubes empty on purpose
Shop This Look
| MINI FRAME | STONEWARE VASE | WOOD BOWL |
|---|---|---|
| Small Black Picture Frame 5×7 | Cream Stoneware Vase | Decorative Wood Bowl |
| Shop → | Shop → | Shop → |
Dress the Top Surface With a Lamp and Faux Greenery
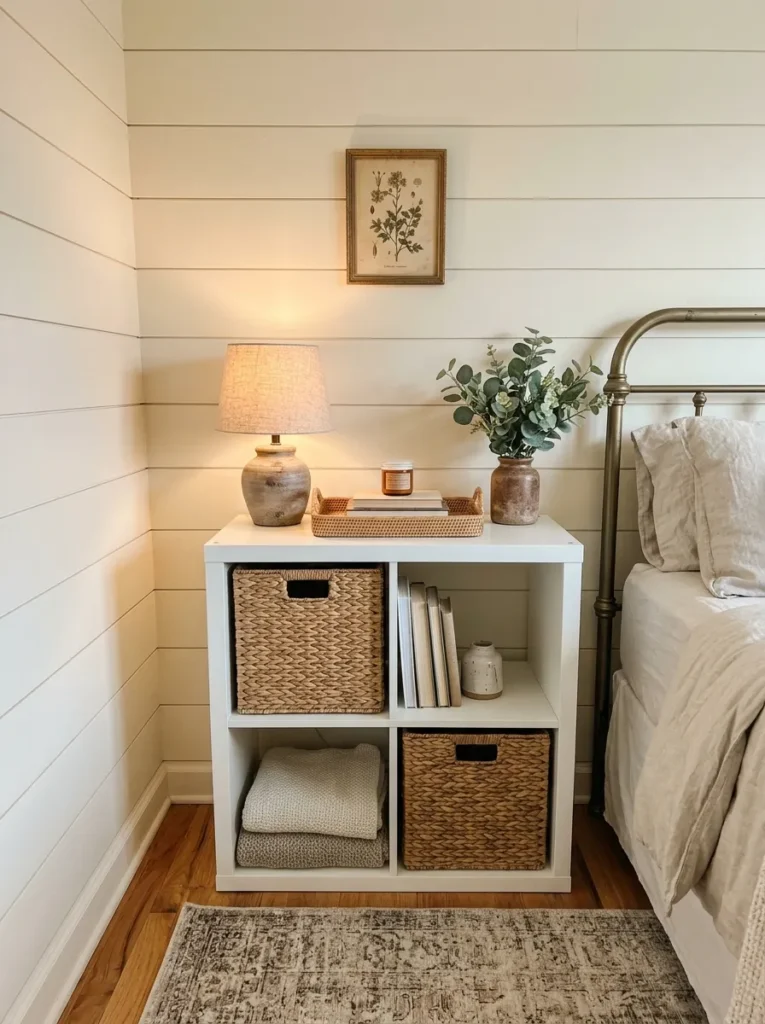
Cord check: Place the lamp near the outlet and run the cord down the back of the unit, using adhesive clips every 12 inches or so. Keep cords out of walkways. Warning: follow the maximum bulb wattage printed on the lamp, and ask a licensed electrician about anything beyond plugging in a lamp.
Greenery swap: Swap faux eucalyptus for dried stems or a small pothos if you want something that changes over time. Live plants need a saucer, because water can swell the particleboard top. This suits a bedroom that feels flat and a little cold at night, especially on the side away from the window.
- Use a warm white bulb around 2700K
- Clip cords along the back edge
- Keep live plants on a saucer
Shop This Look
| TABLE LAMP | FAUX STEMS | CORD CLIPS |
|---|---|---|
| Small Farmhouse Table Lamp | Faux Eucalyptus Stems | Adhesive Cord Clips |
| Shop → | Shop → | Shop → |
Close Off Cubes With Door Inserts for Hidden Storage
Door inserts cover a cube so clutter disappears behind a flat front. They suit modern farmhouse because plain panels look like cabinet doors, especially after you add a knob. Each insert fits a standard cube opening and costs roughly 15 to 30 dollars, though prices vary. Check that the insert is made for your exact KALLAX model before ordering.
Door fit: Install the insert before you load the cube, because it slides in more easily when the cube is empty. Attach a black or brass knob about 2 inches from the top corner using the screws that came with it. Warning: a heavy door on a half-empty unit can pull it forward, so anchor the unit first.
Mixed option: Use doors on the bottom row and leave the top cubes open. That hides chargers and spare linens but keeps display space where you can see it. This works well for a bedroom with only one shelf, where you need both display and storage, and in rooms with kids who like to pull everything out.
- Test the door fit with one insert first
- Choose knobs that match your other hardware
- Leave the top row open for decor
Shop This Look
| DOOR INSERT | DOOR KNOB | BUMPER PADS |
|---|---|---|
| IKEA KALLAX Door Insert | Matte Black Cabinet Knobs | Rubber Bumper Pads Adhesive |
| Shop → | Shop → | Shop → |
Cover the Frame in Wood Grain Contact Paper
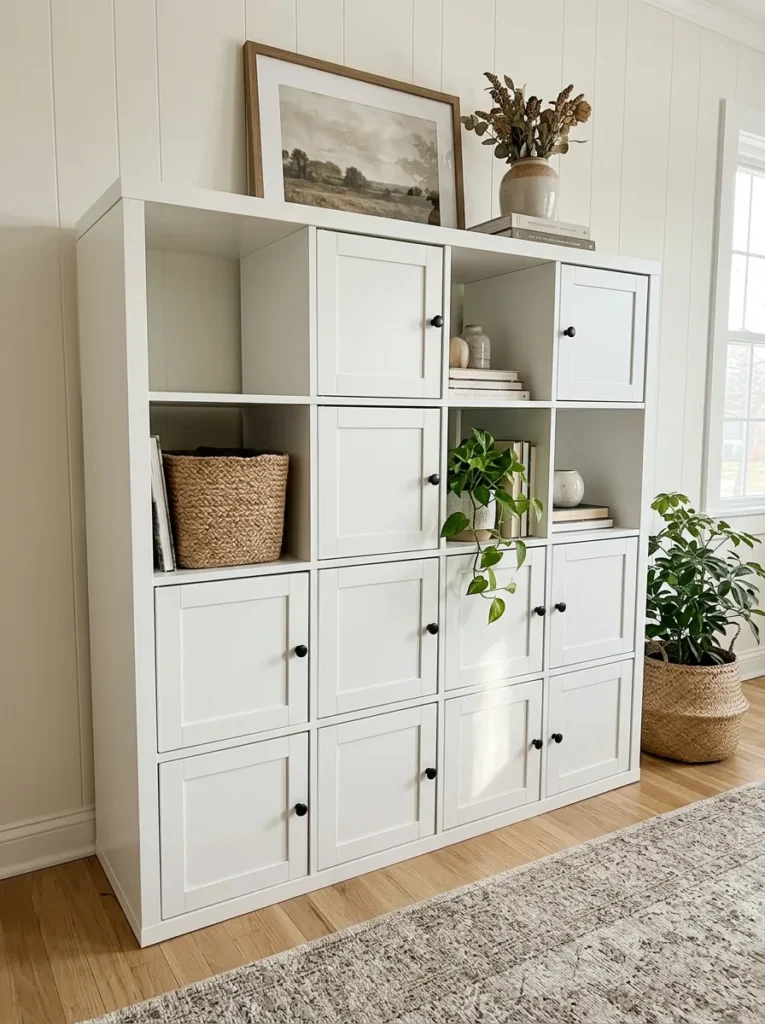
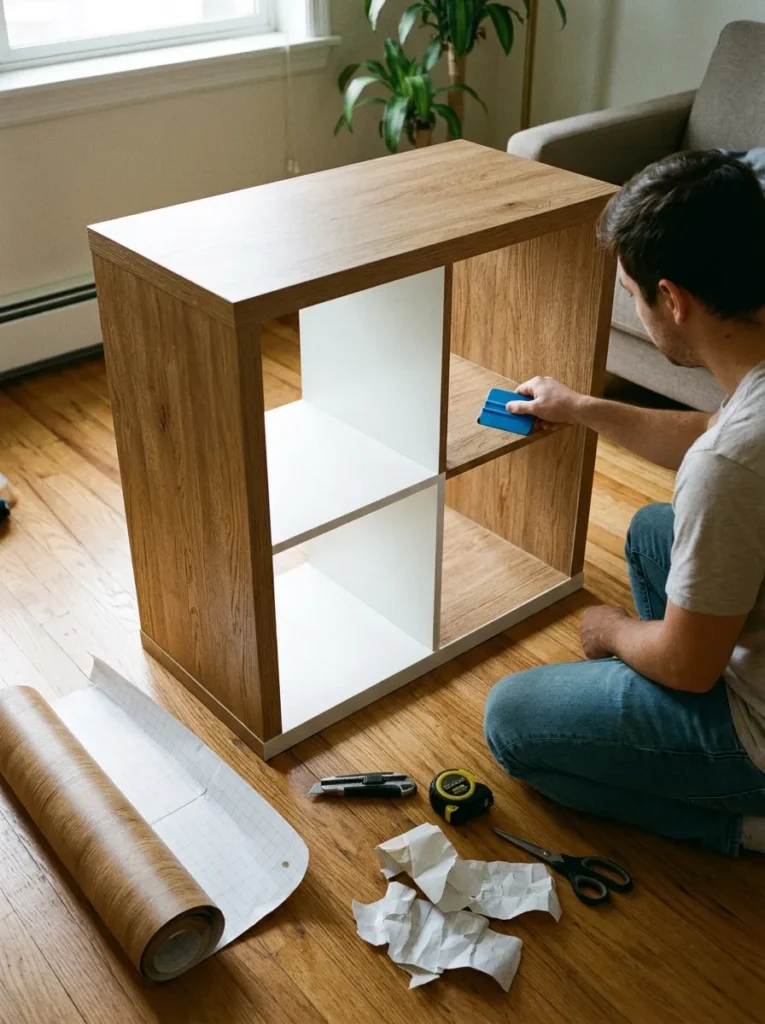
Prep steps: Wipe the surfaces with a damp cloth and let them dry fully. Cut each piece about half an inch larger than the panel, peel a few inches of backing at a time, and smooth with a squeegee from the center outward. Warning: bubbles show quickly on glossy surfaces, so work slowly and trim the edges last with a sharp blade.
Rental note: Test a small hidden spot first, since some films leave residue on laminated surfaces. Keep the interior white so the cubes stay bright. This suits renters who want a warmer look without painting, and it works best on an older unit with small scuffs that the film can cover.
- Wipe the surface and let it dry first
- Cut oversized pieces and trim last
- Test a hidden spot before committing
Shop This Look
| WOOD GRAIN FILM | SQUEEGEE | HOBBY BLADE |
|---|---|---|
| Wood Grain Contact Paper | Felt Edge Squeegee Tool | Hobby Knife Set |
| Shop → | Shop → | Shop → |
Raise the Unit on Tapered Wood Legs
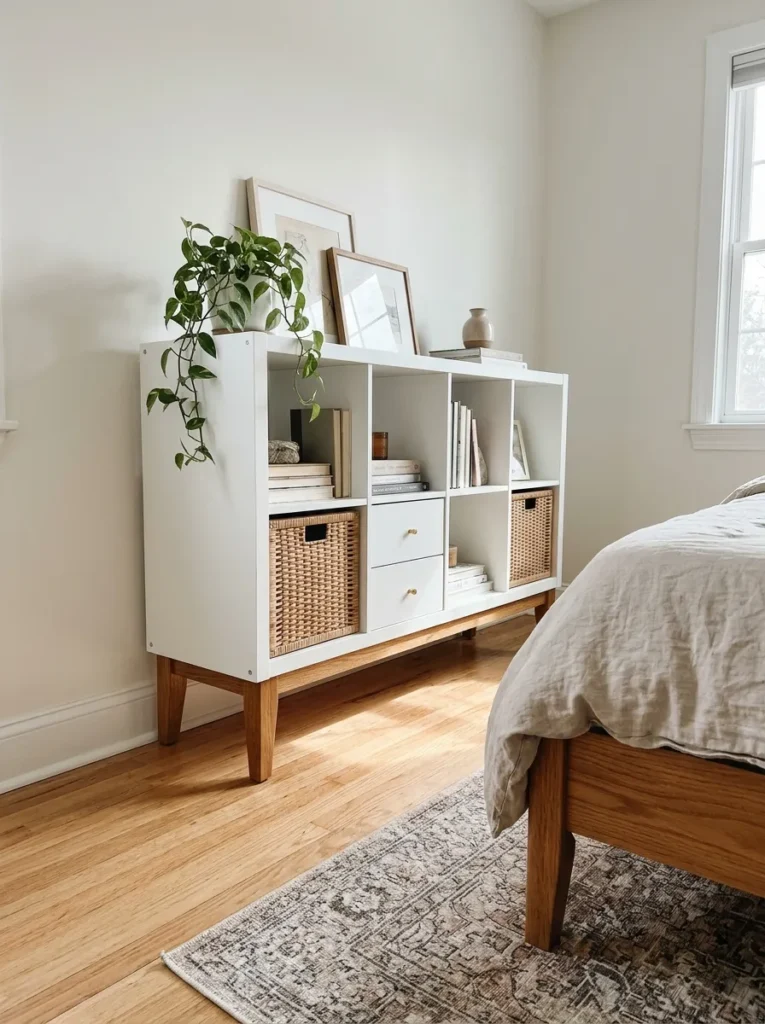
Legs lift a KALLAX off the floor and make it look like furniture instead of a shelf. A set usually adds 4 to 10 inches of height and costs roughly 15 to 40 dollars, though prices vary. The gap lets light pass underneath, which makes the room feel larger. Pick a wood tone that matches your bed frame or dresser.
Leg install: Mark each corner about 2 inches from the edge, attach the mounting plates with the screws included, and thread the legs in. Test the stability before loading the unit. Warning: the bottom panel is thin, so do not use screws longer than the plate calls for, and check the weight rating of the legs.
Height choice: Shorter legs, around 4 to 6 inches, keep the look sturdy, while taller ones feel more like a mid-century piece. Use leveling feet if your floor is uneven. This suits a dresser-style unit along a wall, and it makes vacuuming underneath much easier in a busy bedroom.
- Mount plates the same distance from each corner
- Check that the unit sits level after attaching legs
- Match the leg color to your bed frame
Shop This Look
| LEGS | TOP PLATES | LEVELING FEET |
|---|---|---|
| Tapered Wood Furniture Legs | Furniture Leg Mounting Plates | Adjustable Leveling Feet for Furniture |
| Shop → | Shop → | Shop → |
Turn a Long KALLAX Into a Bedroom Bench at the Foot of the Bed
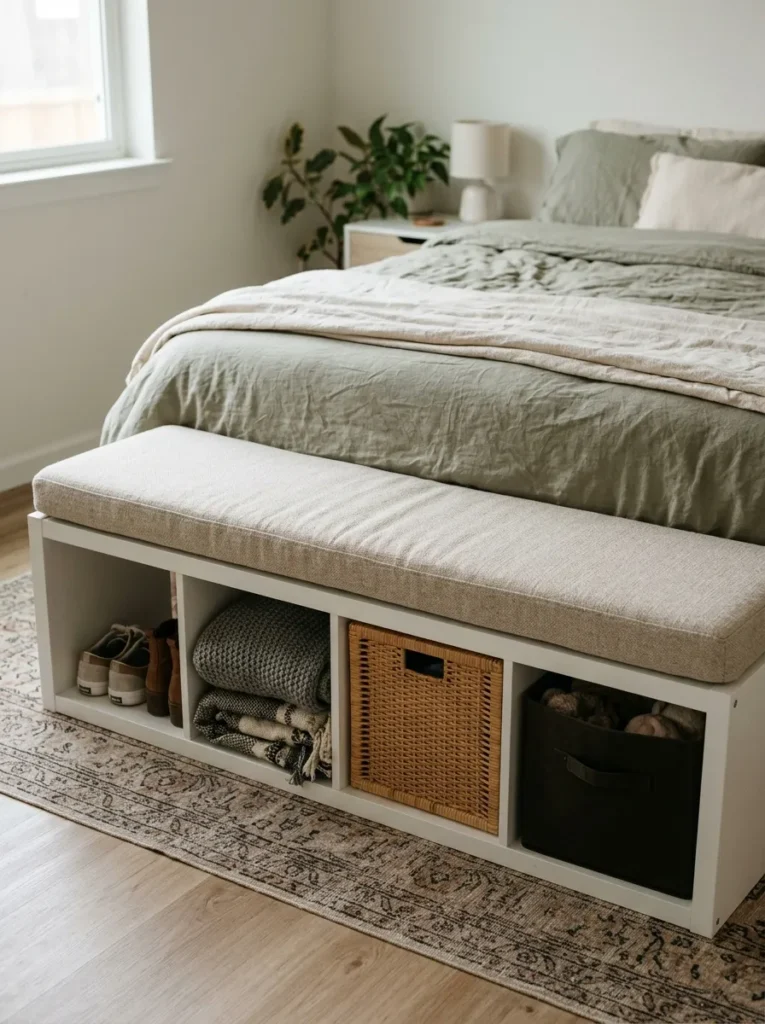
A wide, low KALLAX makes a natural bench, with cubes for shoes, blankets, and baskets. The 4×1 version is about 58 inches wide, 16.5 inches high, and 15 inches deep, close to the width of a queen mattress at 60 inches. Expect roughly 60 to 100 dollars plus a cushion, and prices vary by color.
Bench build: Place the unit at the foot of the bed, add a board cut to match the top, then set a cushion on it. Warning: IKEA lists a maximum load per shelf on the product page, and it is lower than most adults weigh, so treat the unit as a perch for light use, not a heavy seat.
Cushion swap: Pick a cushion with a non-slip back, or fold a neutral check quilt on top instead. Leave at least 24 inches between the bench and any other furniture so people can walk past. This suits bedrooms with open space at the foot of the bed, and it keeps shoes and spare blankets close.
- Leave space to walk past the bench
- Use a non-slip pad under the cushion
- Store light items such as blankets inside
Shop This Look
| SEAT CUSHION | PLYWOOD TOP | NON SLIP PAD |
|---|---|---|
| Long Linen Bench Cushion | Birch Plywood Panel | Non Slip Rug Pad |
| Shop → | Shop → | Shop → |
Pair Two Units With a Plank Top for a Desk or Vanity
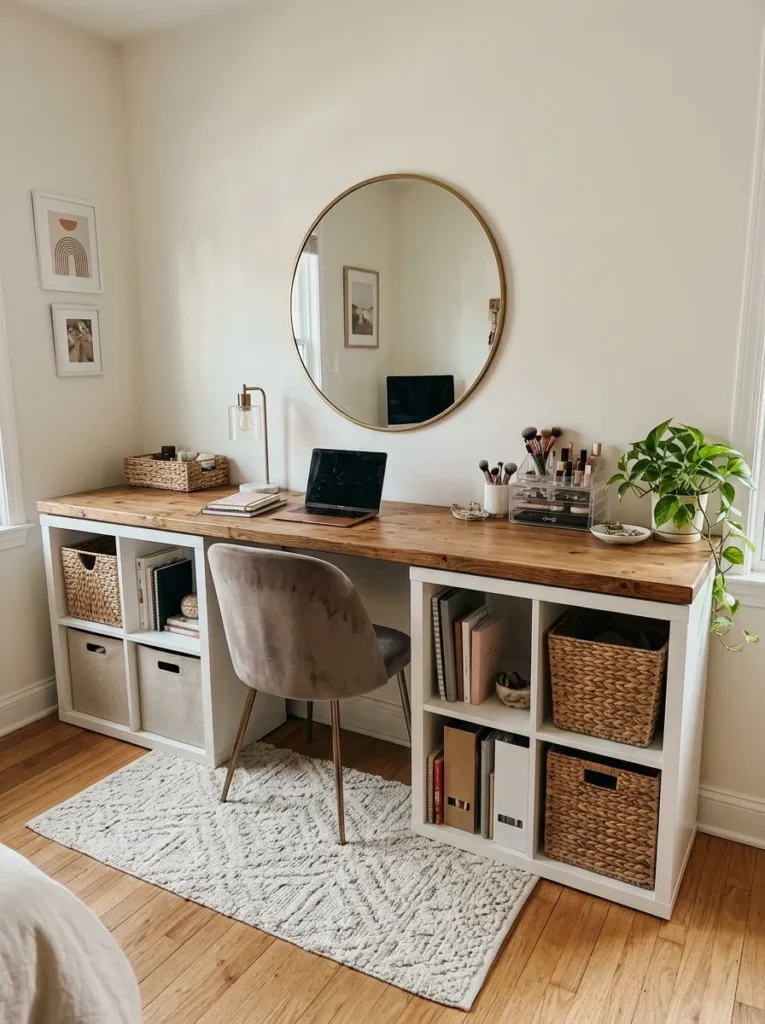
Two KALLAX units set about 28 to 30 inches apart with a wood plank across the top make a desk or vanity with storage on both sides. A board around 60 inches long spans the gap and rests on about 15 inches of each unit. Boards, brackets, and a mirror usually total roughly 60 to 150 dollars, and prices vary.
Desk build: Set the units 28 to 30 inches apart, lay the board across, and mark where it meets each top. Attach it with corner brackets underneath, using screws short enough not to poke through the board. Warning: follow the label directions for any sanding or sealing products, and work in a well-ventilated space.
Vanity option: Add a round mirror on the wall and a small stool, and keep makeup and brushes in the cubes. A drawer insert on one side gives hidden storage for small items. This suits a bedroom corner or a wall under a window, and it can double as a homework spot for a teenager.
- Allow 28 to 30 inches of knee space
- Sand the board edges so they are smooth
- Add a cord clip along the back for lighting
Shop This Look
| WOOD BOARD | WALL MIRROR | STEEL BRACKETS |
|---|---|---|
| Pine Project Board | Round Wood Frame Wall Mirror | Steel Corner Brackets |
| Shop → | Shop → | Shop → |
Mount a KALLAX on the Wall as Floating Shelves
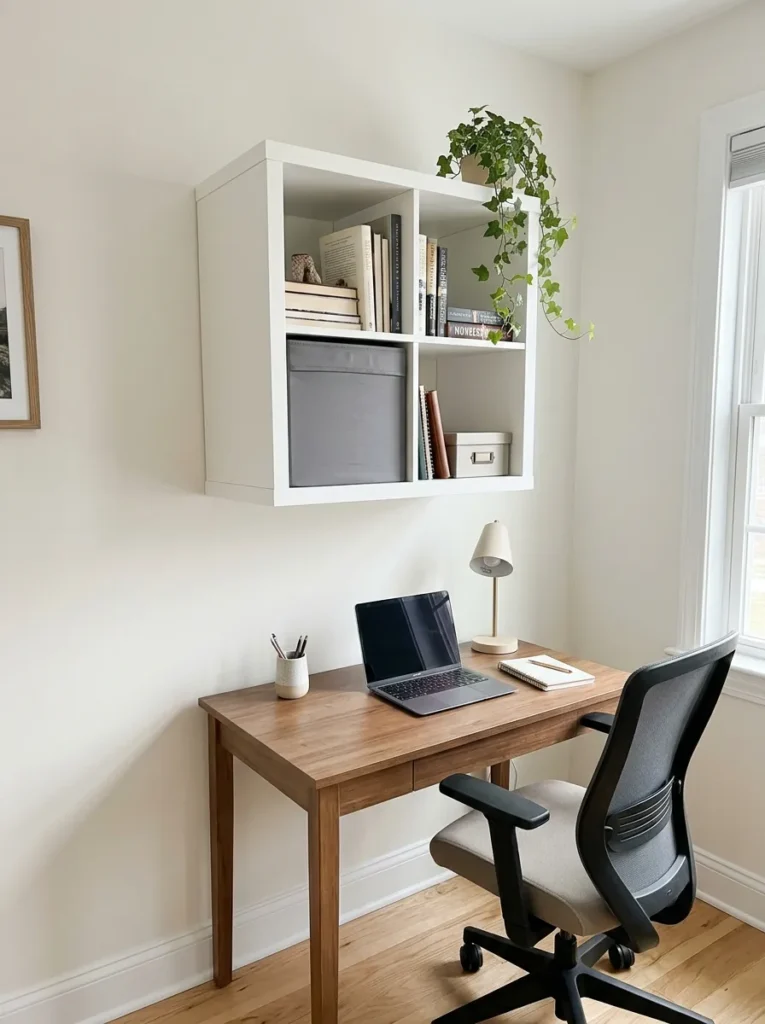
Hanging a KALLAX keeps the floor clear and gives a floating, built-in look. IKEA says the unit can be wall mounted and lists a maximum load for hanging, so read that before you start. The cost is mostly hardware, roughly 10 to 30 dollars, and prices vary. A 2×2 is about 30 inches wide, which fits over a desk or dresser.
Mounting basics: Find the wall studs with a stud finder, mark a level line, and use the hardware recommended for your wall type. Warning: drywall alone cannot hold a loaded unit, and drilling near wires or pipes is risky, so follow the instructions and hire a licensed professional if you are unsure.
Lighter option: Keep wall-hung cubes mostly for decor, such as frames and baskets of light items, and put heavy books on a floor unit instead. Mount it about 12 to 18 inches above a desk or dresser. This suits small rooms, and renters should check lease rules before drilling any holes.
- Find studs before marking holes
- Keep wall-hung cubes light
- Check your lease rules first
Shop This Look
| ANCHORS | STUD FINDER | SPIRIT LEVEL |
|---|---|---|
| Heavy Duty Drywall Anchors | Electronic Stud Finder | 24 Inch Level |
| Shop → | Shop → | Shop → |
Add Beadboard Wallpaper to the Back of the Cubes

Peel and stick beadboard wallpaper gives the back of each cube a classic farmhouse panel look. Cut pieces roughly 13 by 13 inches to line one cube, which uses very little material. A roll costs roughly 20 to 40 dollars, though prices vary, and one roll can cover the cubes of several units.
Panel steps: Measure each cube, cut the beadboard to about 13 by 13 inches, trim a quarter inch off if it binds, and press it onto the clean back. Seal the edges with paintable caulk if you want a smooth look. Warning: check the caulk label for ventilation advice and drying times before you start.
Color choice: Keep the paper in white or soft cream if the room has dark floors, or try a muted sage for contrast. Use it in only some cubes so the pattern does not compete with baskets and decor. This suits anyone who wants a noticeable change without cutting wood or using power tools.
- Cut a test piece before cutting the roll
- Smooth out air from the center to the edges
- Keep colors soft so baskets stand out
Shop This Look
| BEADBOARD | PAINTABLE CAULK | PAINT BRUSH |
|---|---|---|
| Peel and Stick Beadboard Wallpaper | Paintable Caulk Tube | Angled Paint Brush Set |
| Shop → | Shop → | Shop → |
Build a Built-In Wardrobe Wall, the Biggest of the KALLAX Bedroom Ideas
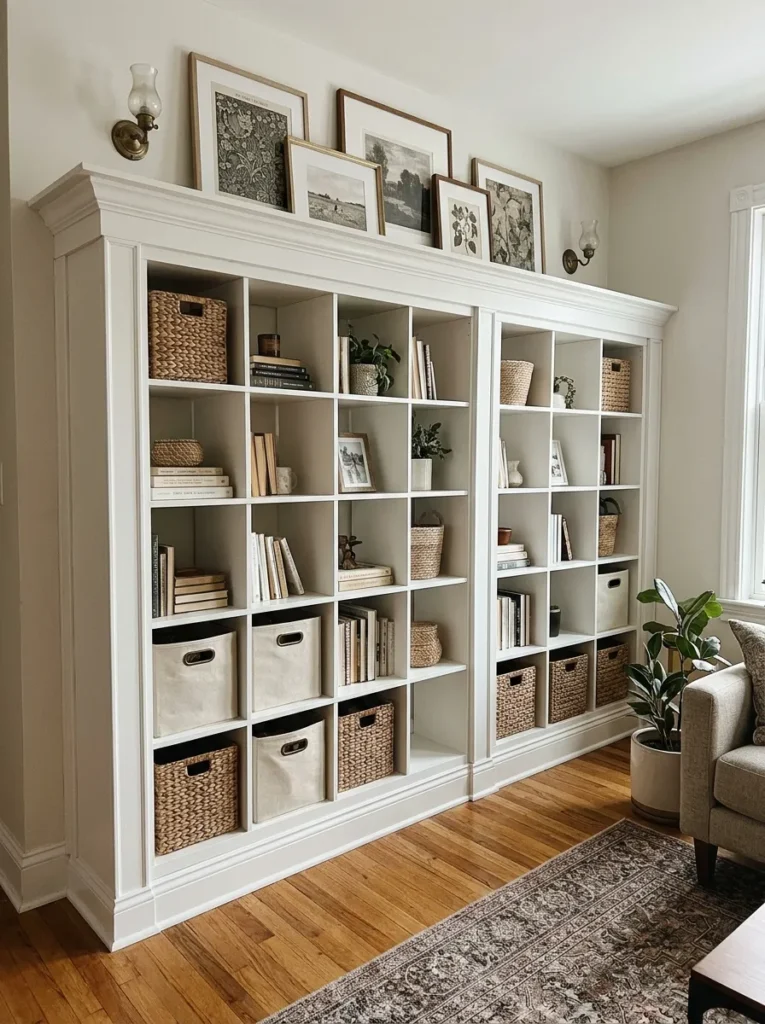
Placing several KALLAX units side by side, then adding trim and molding, creates a built-in look for far less than custom cabinetry. A 4×4 unit is about 58 inches wide and tall, so two cover roughly 10 feet of wall. Expect roughly 300 to 800 dollars depending on size and finish, and prices vary widely.
Build order: Assemble and level the units, screw them together side by side, and anchor them to wall studs. Add a face frame of wood trim across the front edges, then crown molding along the top. Warning: cutting and nailing involve sharp tools, so wear eye protection and follow the tool instructions.
Finish detail: Fill nail holes, caulk the seams, and paint everything one color, such as a soft white or a deep green. Add black knobs to door inserts for a cabinet look. This suits a bedroom with an empty wall or no closet, and it is best planned over a full weekend.
- Level and anchor each unit before adding trim
- Paint a small sample patch first
- Plan on a full weekend
Shop This Look
| MOLDING | TRIM BOARD | NAIL SET |
|---|---|---|
| Primed Crown Molding | Primed Wood Trim Boards | Finish Nail Set |
| Shop → | Shop → | Shop → |
How to Start
Start with one unit and one purpose. Measure the wall where it will go, including the baseboard, and write down the height, width, and distance to the nearest outlet. Then decide whether the unit is a nightstand, a bench, or a storage wall. This first step takes about 10 minutes and prevents most returns.
Next, work in a set order. Assemble and anchor the unit first, then add legs or a finish if you want one. After that, add baskets or bins, and leave decor for last. Styling an unfinished unit usually means moving everything twice.
Here are three starter items for a budget of roughly 100 dollars, though prices vary:
- One small KALLAX unit in the color you prefer
- Two woven baskets sized for the cubes
- One lamp or a small decor piece for the top
A realistic plan is about 2 hours to assemble and style one unit. Most people stay under 150 dollars by using decor they already own and buying only baskets. Take a photo before and after so you can see what worked.
Shop This Look
| TAPE MEASURE | RUBBER MALLET | MOVING BLANKET |
|---|---|---|
| Locking Tape Measure | Rubber Mallet for Furniture | Padded Moving Blankets |
| Shop → | Shop → | Shop → |
Common Mistakes
- Skipping wall anchors: An unanchored tall unit can tip, especially with drawers or doors pulled open. Use the anchor hardware that comes with the unit and follow the instructions.
- Ignoring weight limits: IKEA lists a maximum load per shelf, and heavy books or a bench seat can exceed it. Check the product page and keep heavy items on the lowest shelf.
- Buying baskets before measuring: Cube openings are about 13 inches, and a basket that is slightly too large will not fit. Measure the opening, then order a size that leaves about half an inch of clearance.
- Mixing too many finishes: Black, brass, chrome, and three wood tones together look busy. Choose two metals at most and repeat them across the knobs, frames, and lamp.
- Overstuffing every cube: A shelf filled edge to edge looks like storage, not farmhouse decor. Leave several cubes empty and move extra items to a closet.
- Placing the unit too close to the bed: A tall unit next to the pillow can feel crowded and may get bumped. Leave at least a few inches of gap, and measure the unit against your mattress height.
- Forgetting lease rules: Drilling, wall mounting, and adhesive films can cause damage deposits to be lost. Read your lease first and test any film in a hidden spot.
Frequently Asked Questions
What are the best IKEA KALLAX bedroom ideas for a small room?
A KALLAX used as a nightstand or a low bench works best in a small room. A nightstand uses about 30 inches of wall, and a low unit can double as a bench. Keep the finish light and add legs so the floor stays visible.
Can you use a KALLAX as a nightstand?
Yes, but check the height first. A 2×2 unit stands about 30 inches tall, which is taller than most nightstands and can sit above your mattress. Anchor it to the wall and keep heavy items low.
How do you make a KALLAX look like farmhouse furniture?
Add warm wood tones, woven baskets, and black hardware. Wood legs, door inserts with knobs, and a plank top change the shape of the unit. Painting or covering the frame in wood grain film helps it match your other pieces.
Is a KALLAX strong enough for a bedroom bench?
It works for light use, but check IKEA’s stated load limit. Each shelf is rated for a fairly small weight, far lower than most adults weigh. Treat it as a perch for putting on shoes, not a place for heavy or repeated sitting.
Which KALLAX size fits best at the end of a bed?
The 4×1 unit is about 58 inches wide, which is just under the 60 inch width of a queen mattress. It is also about 16.5 inches high, a comfortable bench height. For a king bed at roughly 76 inches wide, you may want two units or a wider plan.
The Finishing Touch
When you finish, step back about 6 to 8 feet and check four things. Look at balance, so heavy items are not all on one side. Check spacing, so some cubes stay empty. Look at color, so no single shade dominates. Finally, check stability, so nothing leans or hangs past the edge.
Then change one thing and look again. Swap a basket, turn a frame, or move the lamp to the other end of the unit. Small changes often fix a shelf better than a big rework, and a quick photo helps you compare versions.
Pick one cube today and style it with a vase, a book, and a frame. It takes about 10 minutes and costs little. When you find a look you like, save your favorite IKEA KALLAX bedroom ideas to a Pinterest board so you can come back and refresh the room later.