16 Simple Crafts for Kids to Make at Home
Simple crafts for kids to make at home are hands-on creative projects using everyday household materials — paper, cardboard, paint, glue, fabric scraps, natural objects from the garden — that give children aged 3 to 12 a structured creative activity, a satisfying finished object, and the specific developmental benefits of making something with their hands. This article gives you 16 simple craft ideas that genuinely work for kids at home — meaning they can be set up in under five minutes, use materials already in most houses, produce a result children are genuinely proud of, and can be completed within a child’s realistic attention span without adult frustration or abandoned projects.
Picture a rainy Saturday afternoon where a six-year-old is pressing autumn leaves between sheets of contact paper at the kitchen table while a nine-year-old is cutting and folding a cardboard box into a puppet theater, and the whole activity is genuinely self-directed — you set out the materials, showed them what to do, and the children took over completely. No expensive craft kits. No exotic materials. No complicated instructions that require adult management at every step. Just children making things, the specific absorption of creative work, and the pleasure of a finished object they made themselves. Here are 16 projects worth setting up — this weekend.
Why Simple Home Crafts Work So Well for Kids
Simple home crafts succeed as a children’s activity because they operate from the specific developmental needs of childhood — the need for agency in creation (making something from nothing produces a sense of capability that few other activities replicate), the need for sensory engagement (paint, clay, glue, fabric, and natural materials all provide tactile and visual stimulation that screen activities cannot), the need for incremental mastery (craft projects have clear beginning, middle, and end points with visible progress at each stage), and the need for the specific satisfaction of a finished object that persists beyond the activity itself.
The materials that make home crafts genuinely accessible are those already present in most households: cardboard packaging, paper in all weights, natural objects from the garden (leaves, sticks, pinecones, pebbles), fabric scraps, basic craft paint in primary colors, PVA glue, scissors, and sticky tape. These materials are inherently forgiving — cardboard can be cut again, paint can be applied over dried layers, paper can be restarted — in a way that expensive specialist materials are not, which reduces the pressure on both child and adult and allows genuine creative experimentation rather than careful preservation of costly supplies.
The developmental literature on children’s craft engagement consistently identifies three specific benefits beyond the immediate pleasure of making: fine motor skill development through cutting, threading, folding, and painting at small scales; creative confidence through the experience of making aesthetic decisions and seeing those decisions produce visible results; and emotional regulation through the focused, repetitive actions (cutting paper strips, sticking leaves, rolling clay) that activate the calming parasympathetic nervous system response in the same way that adult mindfulness practices do. These benefits accumulate across years of regular craft engagement and produce children who are more comfortable with creative uncertainty, more willing to attempt difficult things, and more capable of self-directed focus than children whose entertainment is primarily passive.
Even the simplest craft — pressing a hand into a piece of air-dry clay and watching the impression appear — provides a moment of genuine creative agency that a child will return to by showing the result to every adult they encounter that day. The simplicity is the point: a craft that works reliably and produces a result the child is genuinely proud of is worth infinitely more than an ambitious project that requires adult management at every stage and ends in tears over a complicated step.
Craft Guide at a Glance
| Element | Trait 1 | Trait 2 |
|---|---|---|
| Philosophy | Child-led making — setting up the materials and stepping back as the child takes creative ownership | Everyday materials — household items and garden findings as the raw material for genuine creativity |
| Materials | Cardboard, paper, PVA glue, basic paint, air-dry clay, fabric scraps, natural garden objects | Sticks, leaves, pinecones, egg cartons, toilet roll tubes, buttons, yarn, contact paper |
| Age Range | Simplified versions for ages 3–5, standard versions for ages 6–9, extended versions for ages 10–12 |
1. Pressed Leaf Sun Catchers (Ages 4–10)
Vibe: Bright and natural — the sun catcher that makes a rainy day feel like the best possible occasion to stay home.
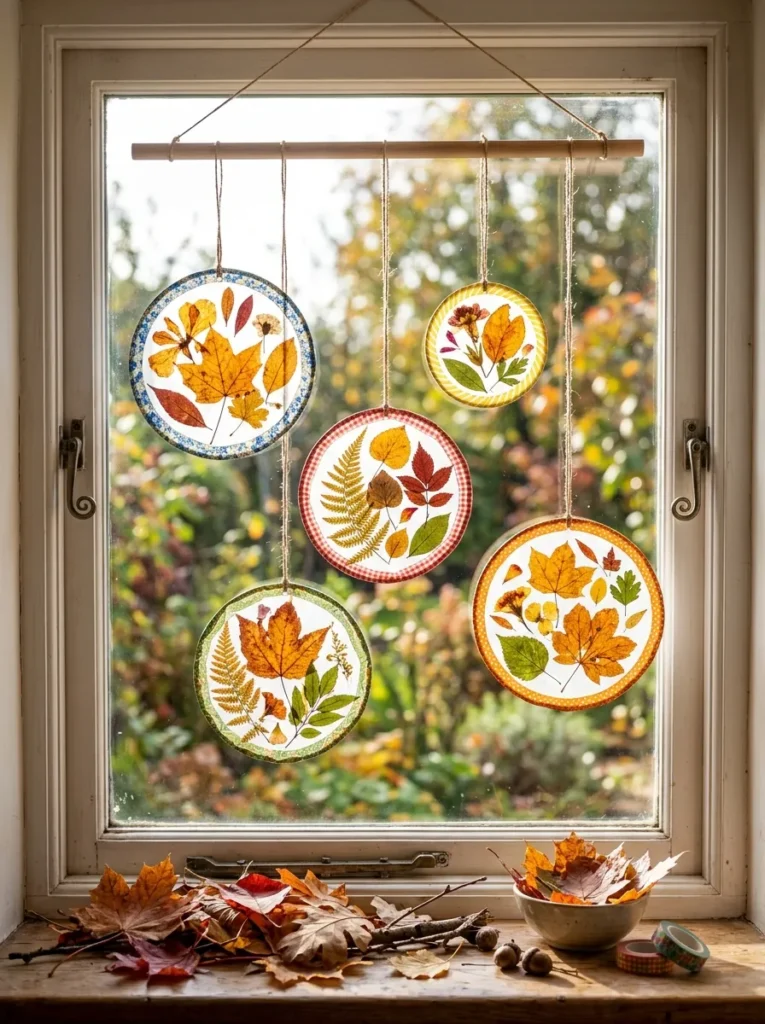
Why it works: Pressed leaf sun catchers use contact paper (also called self-adhesive transparent film, available from stationery suppliers) as the binding medium for a collection of natural materials gathered from the garden or park — leaves, ferns, flower petals, and small feathers. The transparent sticky surface holds the natural materials flat and the second contact paper layer seals the composition, creating a translucent panel that glows with color when held up to light. This project works across a wide age range because the making steps are inherently adjustable — a three-year-old can press leaves onto the sticky surface with full creative freedom, while a ten-year-old can plan a deliberate compositional arrangement of materials before committing to the second layer.
How to get it: Cut two identical circles from contact paper for each sun catcher — any size from 10cm to 30cm in diameter works well. Peel the backing from one circle and lay it sticky-side-up on the table. Invite the child to arrange collected leaves, petals, and ferns on the sticky surface in whatever composition pleases them. When the arrangement is complete, peel the backing from the second circle and press it sticky-side-down over the arrangement, sandwiching the natural materials between the two layers. Press firmly to seal all edges. Edge the circle with washi tape for a colored border and punch a hole at the top for hanging.
Age adaptations: Ages 3–5: adult cuts the circles and holds the contact paper while the child places leaves freely. Ages 6–9: child cuts their own circle shapes and arranges materials independently. Ages 10–12: child experiments with compositional principles (symmetry, color pattern, botanical groupings) and creates a series of coordinated panels.
| Product |
|---|
| Contact paper transparent self-adhesive roll |
| Washi tape set varied colors |
| Hole punch for hanging |
| Natural twine for hanging |
| Wooden dowel for display rod |
Also view: 14 Easy Handmade Gifts for Your Best Friend
2. Cardboard Box Puppet Theater (Ages 5–12)
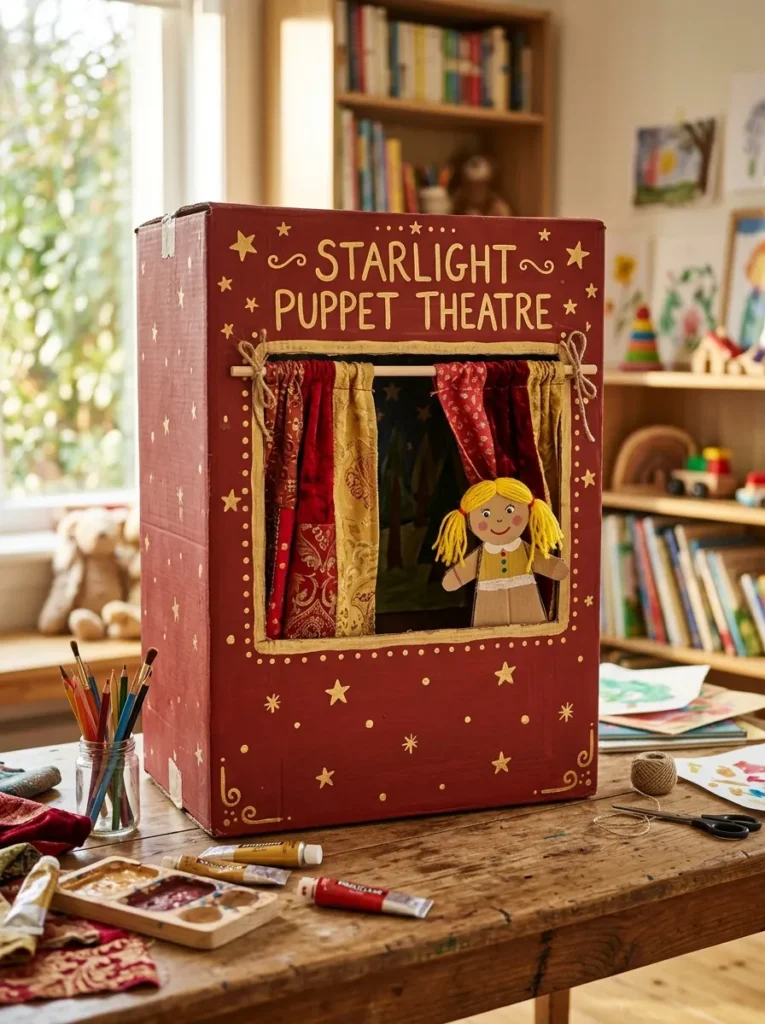
Vibe: Creative and imaginative — the cardboard theater that becomes the center of a week of play rather than an afternoon.
Why it works: A cardboard box puppet theater is the home craft project with the highest play-life-to-making-time ratio — a large box (a moving box, a washing machine box, or any sizeable cardboard packaging) converted into a puppet theater in an afternoon provides weeks of imaginative play through puppet shows, dramatic performances, and storytelling that the theater structure makes possible. The making phase engages craft skills (painting, cutting, decorating, making puppets) and the playing phase engages narrative and social skills in a single connected project that bridges the gap between craft session and independent play.
How to get it: Select the largest cardboard box available — the bigger the box, the more immersive the theater. Cut a rectangular stage opening in one face of the box, leaving a 10cm border on all sides. Paint the exterior in a theatrical color — deep red, deep blue, or black — using standard craft paint mixed with a small amount of PVA glue for better cardboard adhesion. Decorate with hand-painted stars, moons, and the theater’s name in a contrasting color. Thread a small wooden dowel through two small holes cut at the top of the stage opening and hang a fabric curtain cut from a pillowcase or fabric scrap. Make simple hand puppets from paper bags, socks, or cardboard with painted faces and yarn hair.
| Product |
|---|
| Large cardboard box from packaging |
| Craft paint set primary colors |
| PVA glue for paint adhesion |
| Fabric scrap for curtain |
| Yarn set for puppet hair |
Also view: 15 DIY Fabric Crafts for Every Home
3. Salt Dough Handprint Keepsakes (Ages 2–8)
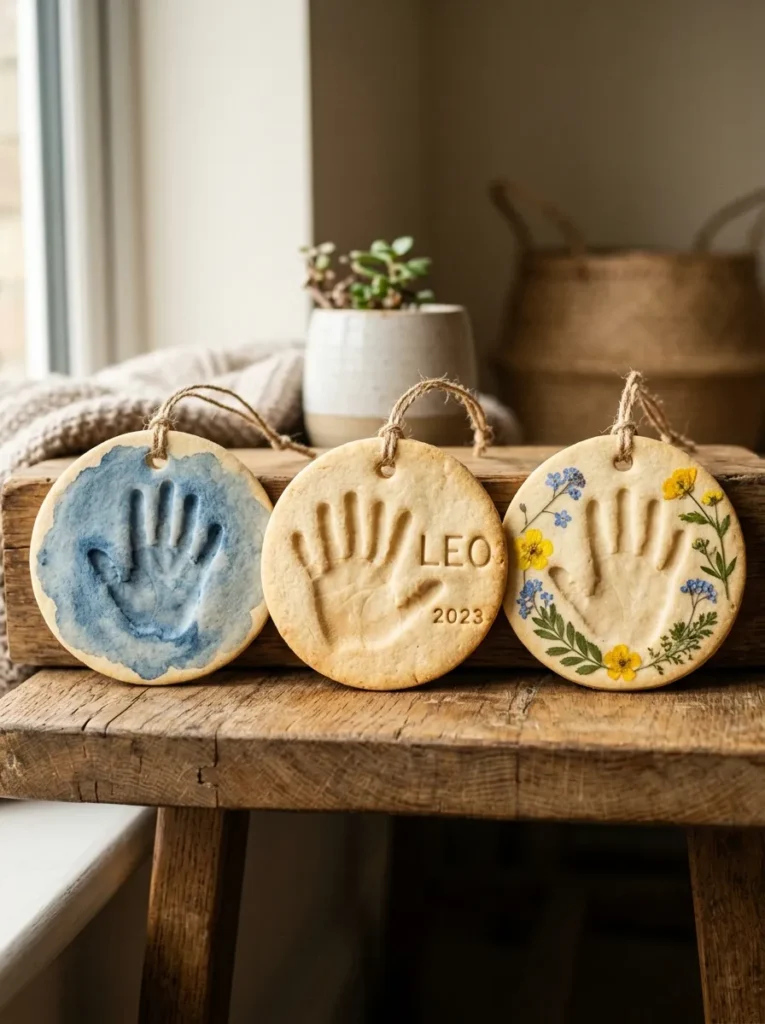
Vibe: Warm and keepsake-quality — the craft that becomes more meaningful with every year that passes.
Why it works: Salt dough is the craft material with the highest keepsake value and the lowest material cost — flour, salt, and water from any kitchen cupboard combine to produce a pliable, workable dough that captures fine detail in pressed impressions, dries or bakes to a hard, permanent form, and accepts paint, varnish, and decoration after hardening. A handprint pressed into salt dough and preserved with the child’s name and date becomes a keepsake that parents and grandparents consistently rank as among the most meaningful objects in their homes — the captured record of a hand size at a specific age is irreplaceable in a way that photographs, while valuable, cannot fully replicate.
How to get it: Mix 2 cups plain flour, 1 cup table salt, and approximately ¾ cup water to a smooth, non-sticky dough (add water gradually — the dough should not crack when bent but should not stick to hands). Roll to approximately 1cm thickness. Press the child’s hand firmly into the dough and lift cleanly. Use a pencil or skewer to scratch the child’s name and date beside the handprint before the dough dries. Cut a neat circle around the handprint using a small bowl as a template and a blunt knife. Bake at 120°C for 3 hours or until completely hard throughout. Decorate with watercolor paint when cool, then seal with PVA varnish.
Age adaptations: Ages 2–3: adult manages the dough preparation and the pressing, child contributes the hand. Ages 4–8: child participates in mixing the dough and pressing their own hand. Ages 9–12: child makes the full project independently, experimenting with textures, decorations, and paint effects.
| Product |
|---|
| Plain flour for salt dough |
| Table salt for salt dough recipe |
| Watercolor paint set for decoration |
| PVA varnish for sealing |
| Skewer for name inscription |
4. Nature Mandala Arrangement (Ages 4–12)
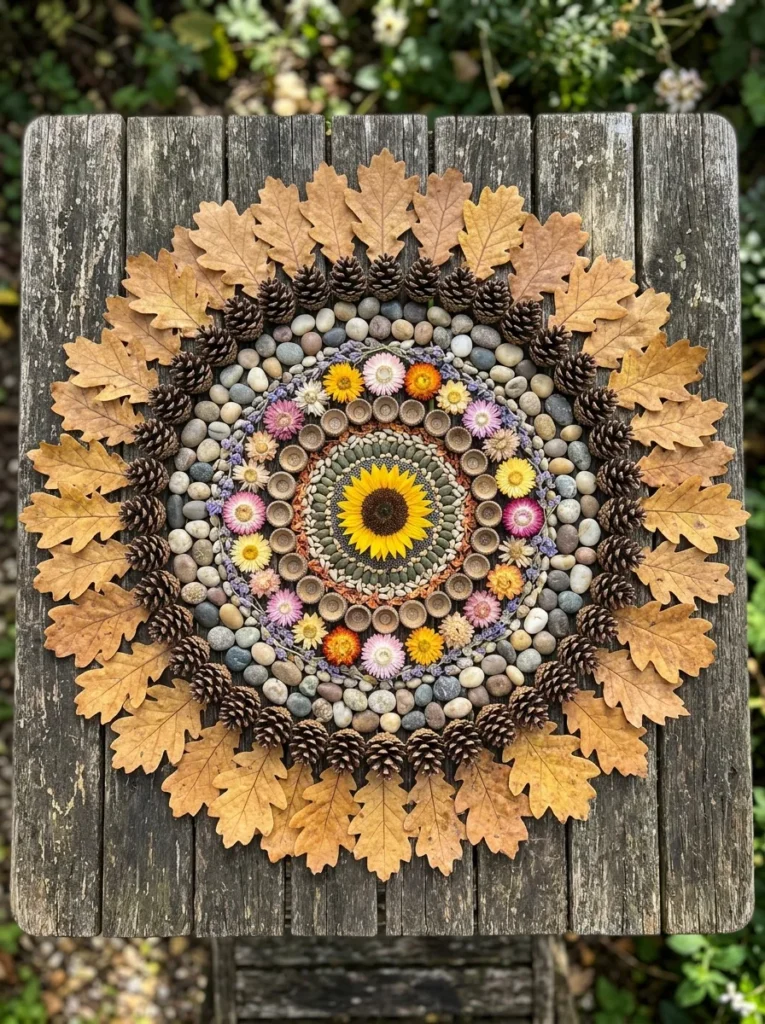
Vibe: Meditative and natural — the outdoor activity that teaches both pattern-making and the pleasure of looking carefully at natural objects.
Why it works: Nature mandala making is the outdoor craft activity with the highest developmental return — the mandala-making process requires children to categorize and sort natural objects (which objects are similar? which are different?), to understand and create radial symmetry (what does it mean for a pattern to repeat going around a circle?), and to make sequential aesthetic decisions (does this look balanced? what belongs in this ring?). These cognitive processes are identical to those engaged by formal mathematics and art education but are accessed through a pleasurable, self-directed outdoor activity that children identify as play rather than learning. The mandala also has no wrong outcome — any arrangement of natural materials in a roughly circular pattern satisfies the form, which gives children the freedom to experiment without anxiety about correctness.
How to get it: Begin by walking outdoors together and collecting natural materials — leaves, sticks, pebbles, pinecones, acorn caps, seed heads, flowers. The collection phase is itself part of the craft: looking carefully at natural objects, selecting by color and size and texture, and gathering enough variety for a complex mandala. Place a central object (a flower, a large leaf, or a significant stone) on a flat outdoor surface. Work outward in concentric rings, placing similar objects in each ring. Photograph the completed mandala — nature mandalas cannot be preserved in their material form, but the photograph provides a record that children will return to with pride.
| Product |
|---|
| Collection bag for natural materials |
| Camera or phone for mandala photograph |
| Magnifying glass for material examination |
| Nature identification book for interest |
| Waterproof mat for damp ground option |
5. Recycled Cardboard Tube Binoculars (Ages 3–8)
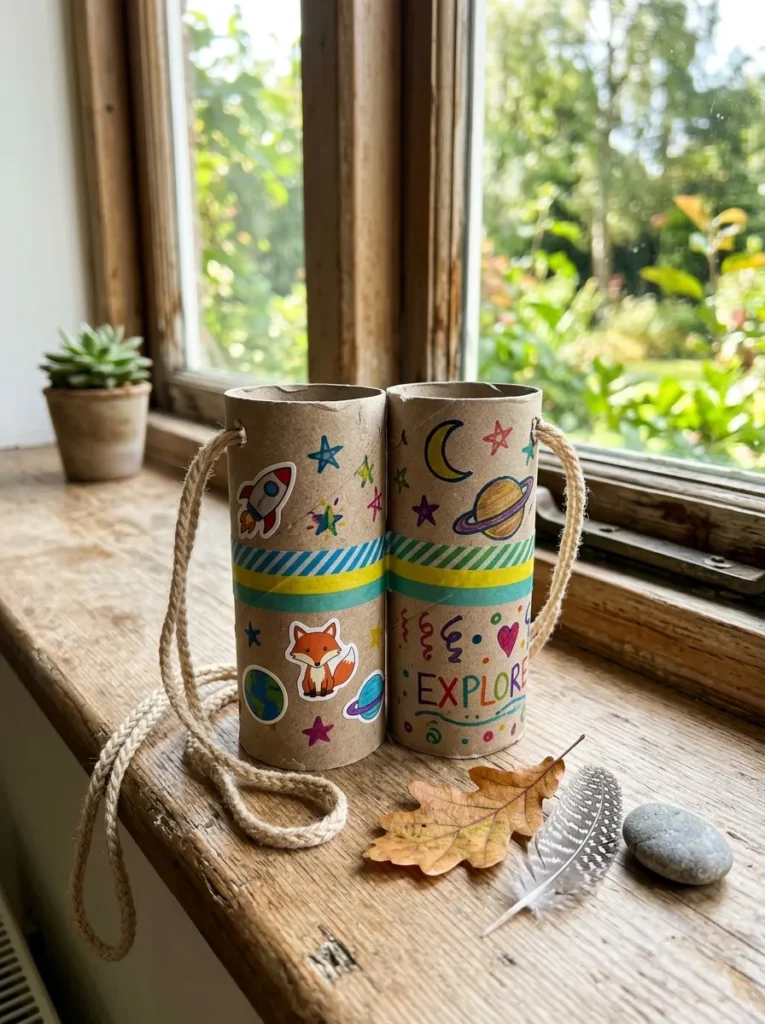
Vibe: Playful and exploratory — the two-minute craft that generates two hours of imaginative outdoor play.
Why it works: Cardboard tube binoculars are the quintessential simple craft — two toilet paper rolls, some tape to join them, and decoration — that produces an object with outsized play value because children genuinely use them as props in imaginative outdoor exploration. The binoculars transform a walk in the garden or park into a nature expedition, a pirate adventure, or a wildlife observation session depending on the child’s current imaginative direction. The craft itself takes 10–15 minutes and requires almost no adult instruction, which makes it the ideal starter craft for young children who need quick results and immediate play-payoff to sustain engagement.
How to get it: Collect two toilet paper rolls (or cut a paper towel roll in half). Tape the two rolls side by side using masking tape or washi tape, aligning the openings at both ends. Decorate with whatever is available — stickers, washi tape in stripes or patterns, permanent markers for drawing patterns or scenes. Punch a hole on the outer side of each roll near one end and thread a length of yarn through both holes, tying at each end to create a lanyard for wearing. Optionally, cover one or both ends with colored cellophane (from sweet wrappers or packaging) taped in place for a tinted view that adds another dimension of play.
| Product |
|---|
| Toilet paper roll set collected |
| Washi tape set for decoration |
| Sticker sheet set varied designs |
| Permanent marker set for drawing |
| Yarn length for lanyard |
6. Painted Rock Garden Characters (Ages 4–12)
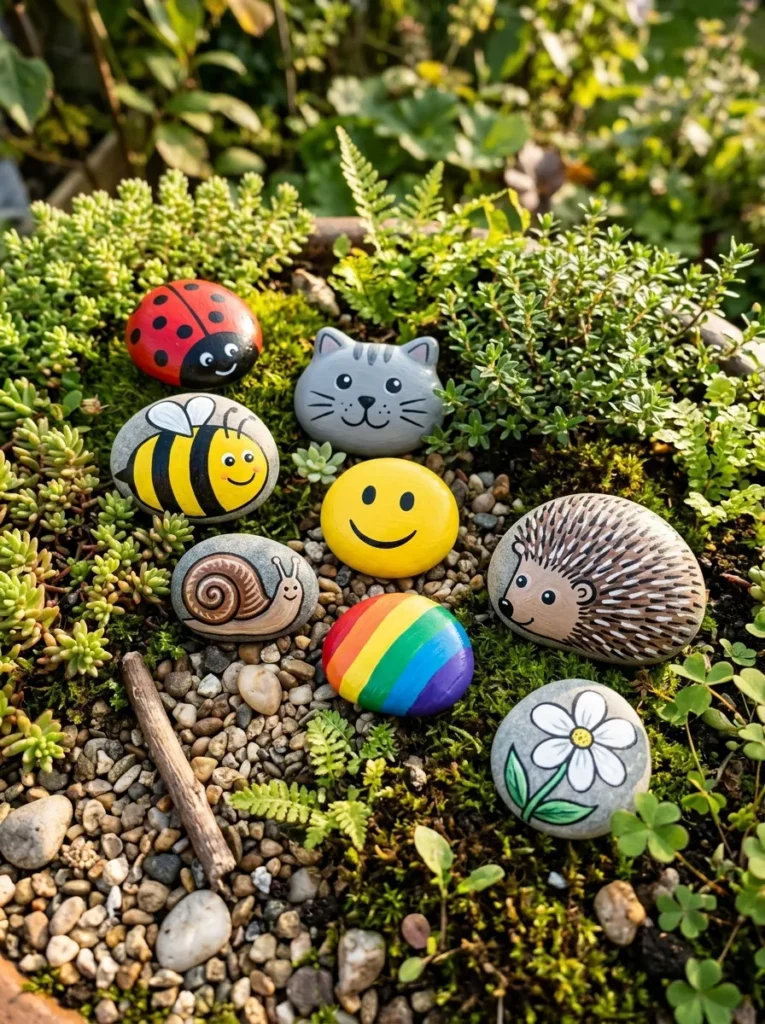
Vibe: Cheerful and handmade — the craft that makes the garden more interesting and gives children a design portfolio that lives outdoors.
Why it works: Painted rock characters apply the design principle of canvas limitation as creative freedom — the pebble’s smooth, irregular surface and its specific size and shape naturally suggest certain subjects (a round pebble becomes a face, a long flat pebble becomes a fish, a small angular pebble becomes a house) in a way that a blank piece of paper does not, making the creative starting point immediately accessible for children who struggle with the blank-canvas challenge. The collection aspect of painted rock crafts — making a series of characters that populate a garden space together — gives children a sustained project with a clear goal (populate the garden with twelve characters, or make one of every animal you know) that extends the creative engagement beyond a single session.
How to get it: Collect smooth pebbles from a garden, riverbank, or beach — smooth surfaces accept paint more reliably than rough-textured stones. Clean and dry each pebble thoroughly. Sketch the design lightly in pencil on the pebble surface, then paint using acrylic craft paint — acrylic adheres well to stone and dries quickly. Apply a white base coat first if the paint color is light — the stone’s gray color will otherwise show through pale paint. Seal completed painted rocks with a coat of outdoor-rated PVA varnish or clear acrylic varnish for weather resistance.
Age adaptations: Ages 4–6: simple dot patterns, faces, and ladybird spots using cotton buds for controlled dot application. Ages 7–10: character designs, animals, and scenes using fine brushes. Ages 11–12: detailed miniature painting, mandalas, and gradient color blending.
| Product |
|---|
| Smooth pebble collection or purchased |
| Acrylic craft paint set bright colors |
| Fine brush set for detail work |
| Cotton bud set for dot technique |
| Outdoor clear varnish for sealing |
7. Paper Plate Weaving (Ages 5–11)
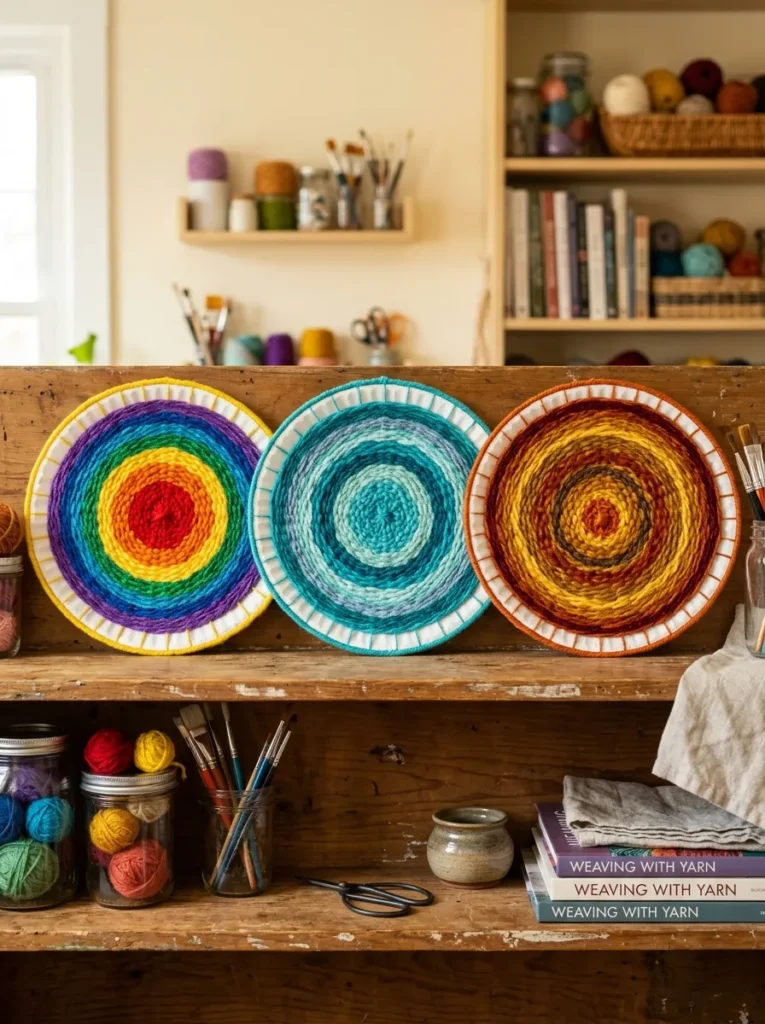
Vibe: Colorful and textural — the weaving that teaches a real craft technique and produces something genuinely satisfying to hold.
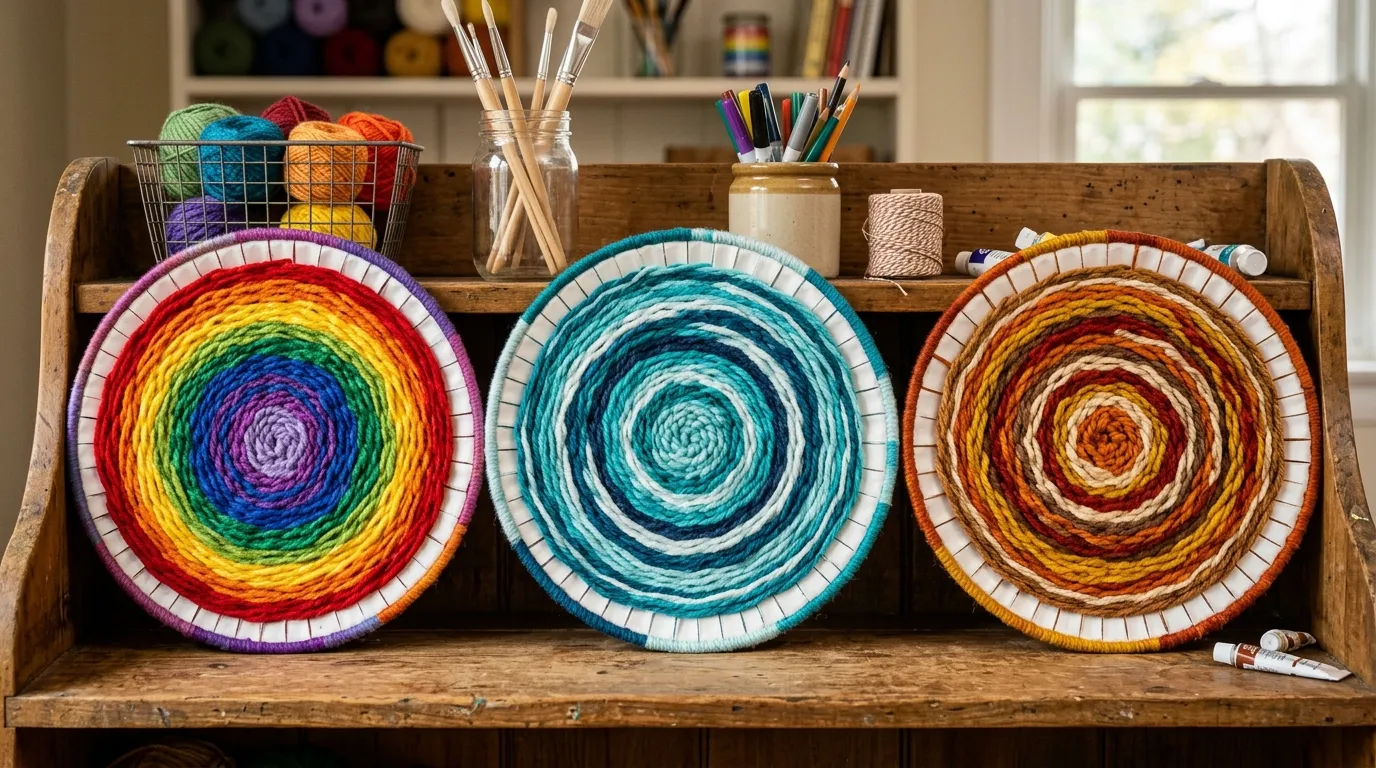
Why it works: Paper plate weaving introduces the fundamental principles of weaving — warp (the fixed structural threads), weft (the working threads woven through), over-and-under structure, and color sequencing — using materials (paper plates and yarn) that are available in every home, require no loom or specialist equipment, and produce a complete woven circle in a single session. The radial structure of the paper plate warp creates a naturally circular woven form that is more visually interesting than a rectangular woven piece and that can be displayed as wall art, used as a mat, or incorporated into other craft projects. The technique of counting over-one-under-one teaches children the pattern-following skill that transfers directly to other mathematical and musical pattern activities.
How to get it: Cut eight to twelve evenly spaced cuts from the edge of a paper plate to within 3cm of the center — these cuts create the warp sections. Cut a small notch in the center of the plate to anchor the first yarn end. Tie yarn to the center notch and begin weaving over and under each warp section, moving outward from the center ring by ring. Change colors by cutting the first yarn and tying on a new color at any point. Continue until the full plate surface is covered. Finish by threading the yarn end under several woven rows to secure.
| Product |
|---|
| Paper plate set standard size |
| Yarn set varied colors |
| Blunt tapestry needle large eye |
| Scissors for yarn cutting |
| Washi tape for additional plate decoration |
8. Collage Portraits from Magazine Cuttings (Ages 5–12)
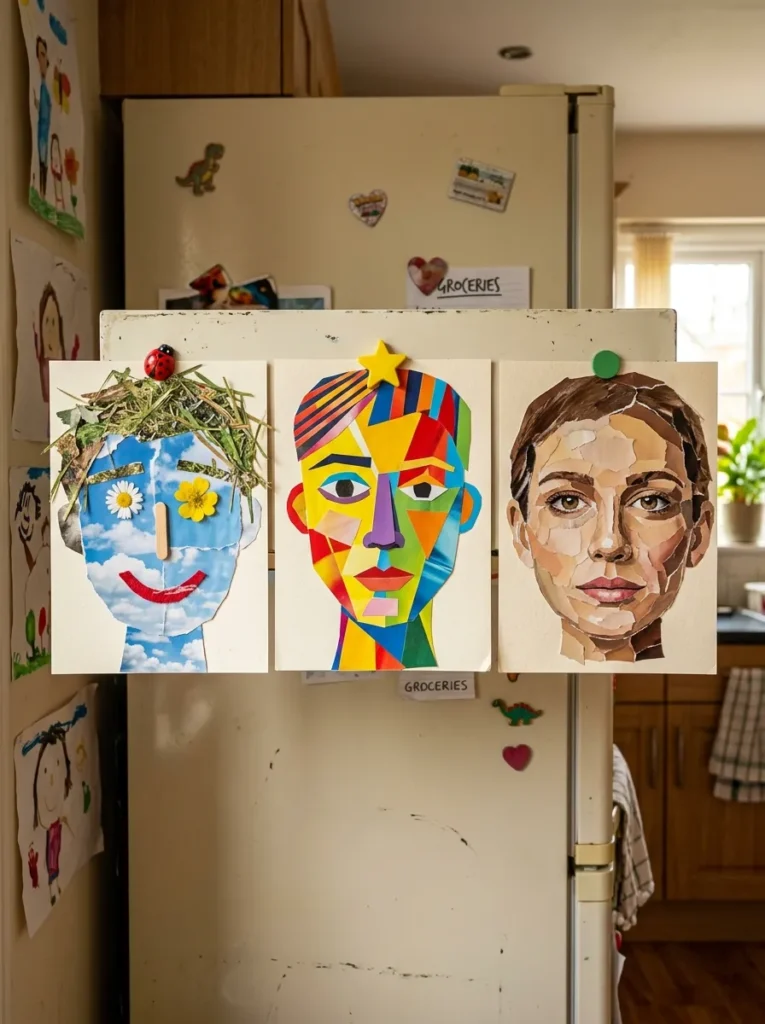
Vibe: Creative and personal — the collage that makes every face look like a deliberate artistic statement.
Why it works: Magazine collage portraits apply the design principle of material substitution as artistic medium — by replacing drawn or painted face features with cut magazine images that share a color or texture with the feature being represented (blue sky paper for eyes, green grass for hair, red fabric for lips), children learn to see color and texture as abstract design elements rather than literal representations. This conceptual shift — understanding that a piece of blue sky paper can function as an eye because of its color rather than its subject matter — is the foundational insight of abstract visual art, and collage is the medium that makes this insight most accessible to children because the physical act of finding and cutting the right piece of paper makes the color-texture decision concrete and tangible.
How to get it: Collect old magazines, newspapers, and color paper scraps before the session. Provide each child with a piece of card as a backing surface and ask them to make a portrait — of themselves, of a family member, or of an imaginary character. Encourage looking for textures and colors rather than images that literally match face features — the most interesting collage portraits use unexpected materials for each face element. Provide PVA glue thinned with a small amount of water for decoupage-style application over cut pieces.
| Product |
|---|
| Old magazine collection assorted |
| Card sheets A4 for backing |
| PVA glue thinned for decoupage |
| Scissors set child-safe |
| Glue stick for initial placement |
9. Tie-Dye With Rubber Bands and Food Coloring (Ages 5–12)
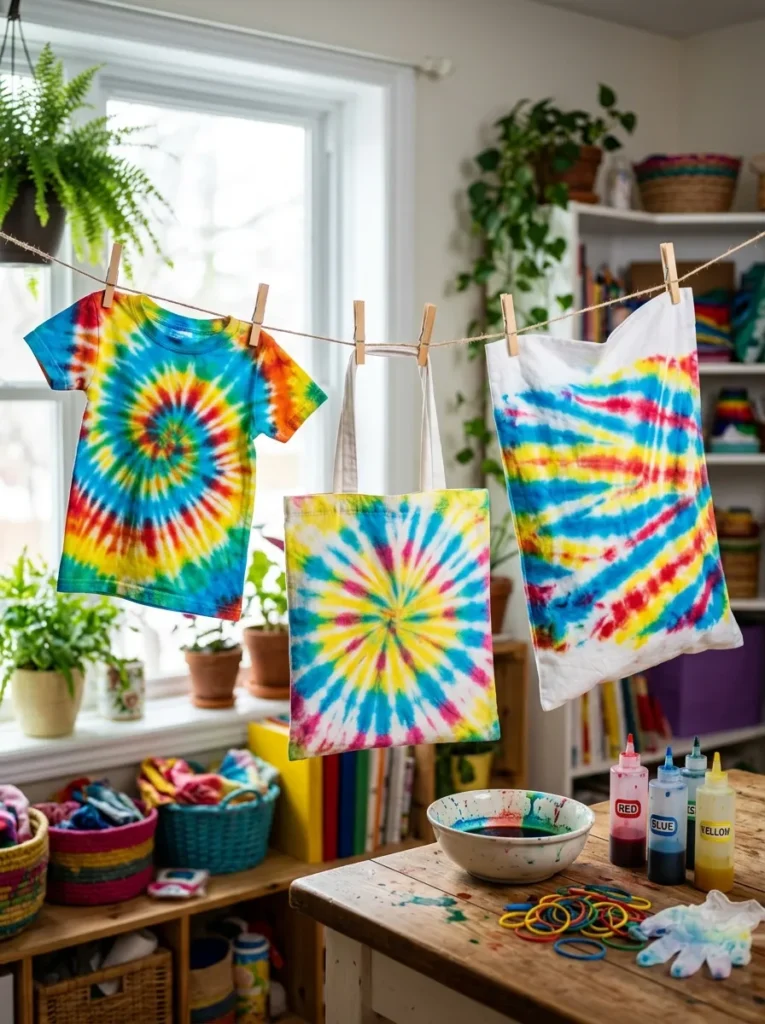
Vibe: Vibrant and celebratory — the tie-dye project that makes ordinary white things extraordinary and generates genuine excitement at the reveal.
Why it works: Tie-dye with rubber bands is the children’s craft project with the most consistently exciting reveal moment — the transformation that occurs when rubber bands are removed and a bundled, dye-soaked fabric is opened to reveal the pattern is genuinely surprising even when the child has followed instructions and understands what will happen. The resist-pattern mechanism (rubber bands prevent dye from reaching the fabric beneath them) teaches a principle of materials science that children find genuinely interesting: that absence can create pattern. The food-coloring version is appropriate for a first tie-dye experience and for delicate items where color permanence is not required; fabric dye produces wash-fast results for functional clothing use.
How to get it: Soak the white cotton item in cold water and wring out lightly. Create the pattern by twisting, bunching, or folding the fabric and securing tightly with rubber bands at intervals — the rubber bands must be tight enough to resist dye penetration. Prepare food coloring or fabric dye in small bowls. Apply different colors to different sections of the bundled fabric using squeeze bottles, spoons, or by dipping each section. Leave for one hour minimum before removing rubber bands and opening the fabric — the anticipation of the opening is a significant part of the project’s pleasure.
| Product |
|---|
| White cotton t-shirt or tote set |
| Rubber band set large quantity |
| Food coloring set primary colors |
| Squeeze bottle set for dye application |
| Gloves set child-size for protection |
10. Stained Glass Effect Window Art (Ages 4–10)
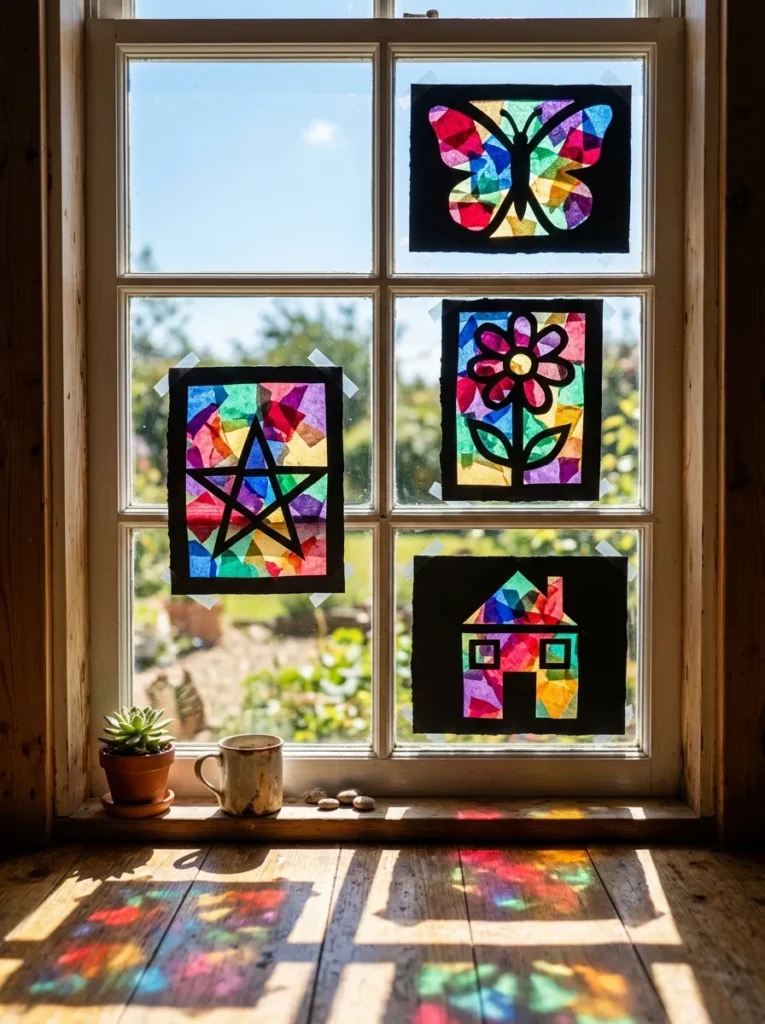
Vibe: Bright and magical — the window art that turns any window into a light show and any grey day into something glowing.
Why it works: Stained glass effect window art using black paper and tissue paper applies the light transmission principle of stained glass to a completely accessible child craft — the black paper provides the “lead” framework that defines the design shapes, while the tissue paper’s semi-transparency allows light to pass through and color it in the same way genuine stained glass does. The effect is most dramatic in direct sunlight when the colored tissue paper casts jewel-toned light patterns onto the floor and walls, creating the magical quality of genuine stained glass at essentially zero cost. The project is also developmentally rich because it teaches children about light transmission (you can see through some materials but not others) through direct, visible experience.
How to get it: Fold a sheet of black construction paper in half and draw half of a symmetrical design along the fold line — butterfly wings, a half-flower, a half-heart. Cut out the interior design shapes through both layers of the folded paper, then open to reveal the full symmetrical cut design. The black paper frame should remain structurally sound with enough black paper remaining between cut sections to hold together. Turn the paper frame over. Glue pieces of torn or cut colored tissue paper over each cut opening from behind, overlapping pieces for mixed colors. Mount on a sunny window with adhesive putty.
| Product |
|---|
| Black construction paper set |
| Colored tissue paper set jewel tones |
| PVA glue or glue stick |
| Scissors child-safe for paper cutting |
| Adhesive putty for window mounting |
11. Bird Feeder from Recycled Materials (Ages 5–12)
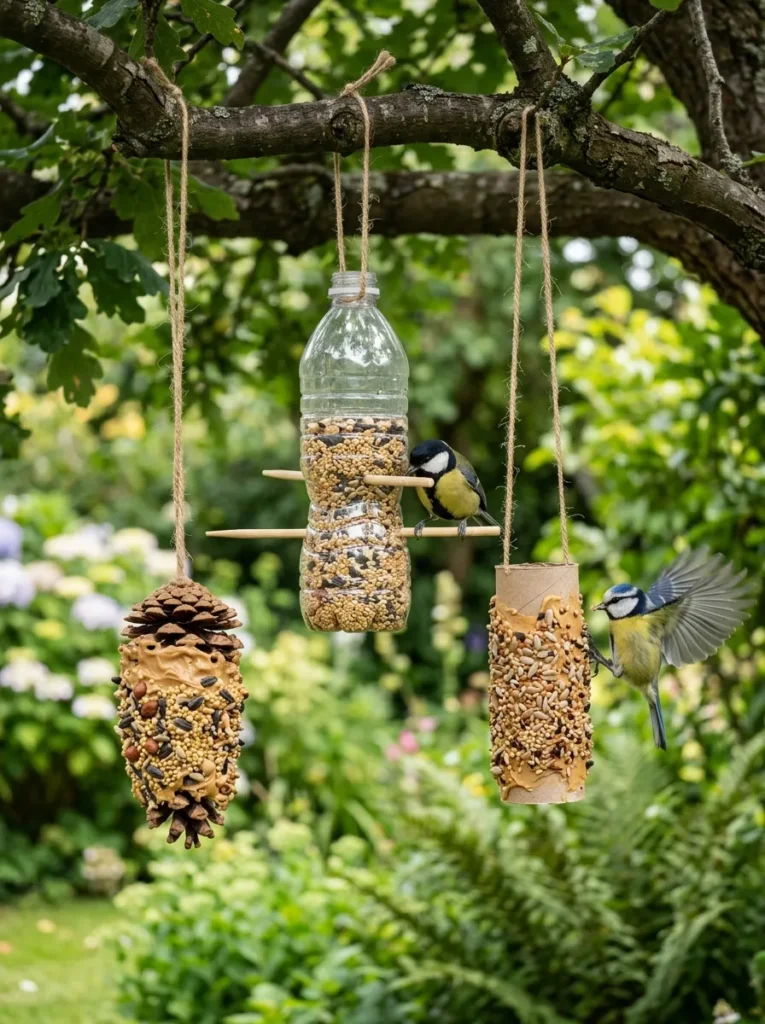
Vibe: Natural and purposeful — the craft that keeps giving back through weeks of bird watching from the kitchen window.
Why it works: Recycled material bird feeders are the craft category that most directly connects making to ongoing real-world observation — hanging a feeder made by the child in the garden and then watching from the window as real birds use it creates a sustained connection between the craft activity and the natural world that develops over days and weeks of bird watching. The craft itself teaches children about bird nutrition (what foods are safe for birds, why birds need fat in winter) and recycling (transforming waste materials into functional objects), while the ongoing observation opportunity builds patience, attention to detail, and interest in natural history. The pine cone feeder specifically is achievable by children as young as three and requires no tools beyond a piece of string.
How to get it: Pine cone feeder: tie a length of natural string around the top of a large pine cone. Spread peanut butter (check for nearby nut allergies before this option) over all surfaces using a spoon or butter knife. Roll the coated pine cone in a plate of bird seed until all surfaces are covered. Hang from a branch. Bottle feeder: push two wooden chopsticks through a clean plastic bottle near the bottom, crossing at right angles to create four perches. Make small holes above each perch end for birds to access seeds inside. Fill the bottle with mixed birdseed and hang by the bottle cap.
| Product |
|---|
| Large pine cones for feeder |
| Natural string or twine |
| Peanut butter smooth for coating |
| Wild bird seed mix |
| Chopstick set for bottle feeder perches |
12. Sock Puppets with Button Eyes (Ages 4–10)
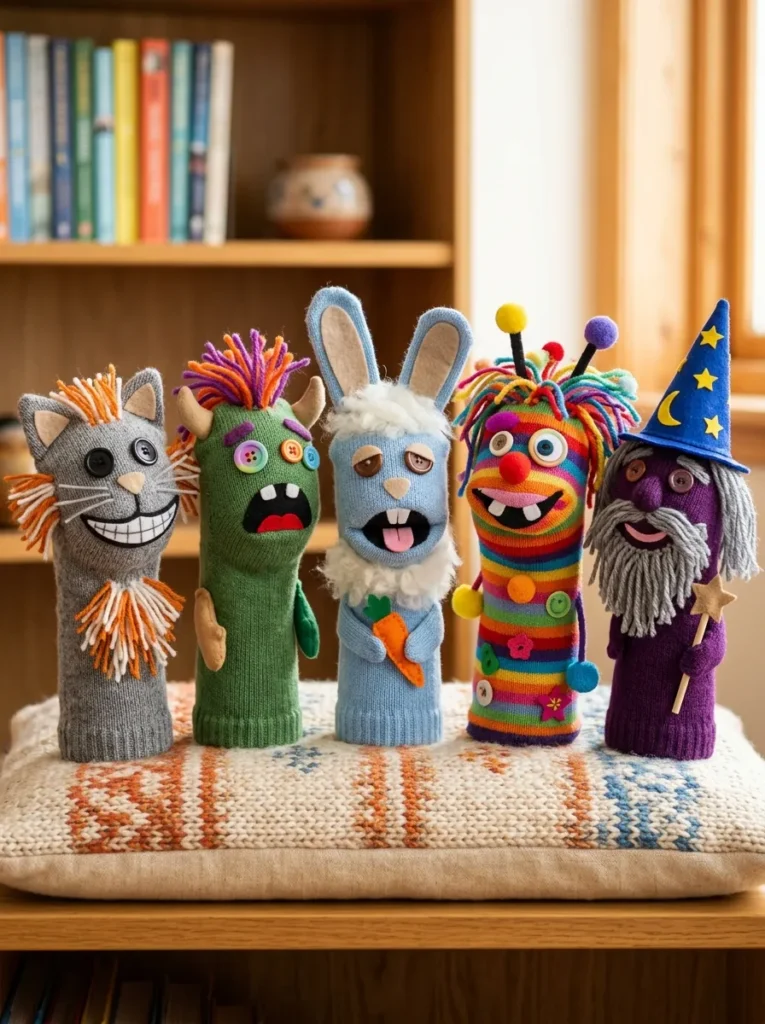
Vibe: Whimsical and characterful — the sock puppet that generates a week of performances and storytelling from a single afternoon of making.
Why it works: Sock puppets apply the minimal-material-maximum-character principle — an old sock, two buttons, a scrap of felt, and a length of yarn produce a character with a specific personality that no purchased toy replicates because the child made the decisions that define that character. The specific aesthetic of a handmade sock puppet — imperfectly sewn, idiosyncratically decorated, uniquely expressive — is precisely what makes it more beloved to the child who made it than a perfectly manufactured alternative. The making process also teaches fundamental sewing concepts (needle, thread, knot, stitch) in a context where imperfect stitching produces a perfectly acceptable result, making sock puppets the ideal first sewing project for children who have not yet used a needle and thread.
How to get it: Provide each child with one clean adult sock (different colors for different characters). Push your hand into the sock to feel where the mouth opening will be. Sew two buttons at the toe end for eyes (adults sew for children under six; older children can sew their own). Cut a mouth oval from red or pink felt and glue inside the toe opening. Add character features using whatever materials are available — yarn hair stapled or glued, felt ears, card accessories, ribbon, fabric scraps. The hand inside the sock forms the mouth by pinching the toe section.
| Product |
|---|
| Adult sock set odd singles |
| Button collection varied sizes |
| Felt sheet set multiple colors |
| Yarn set for hair |
| Embroidery needle child-safe blunt |
13. Paper Bag Kite (Ages 5–10)
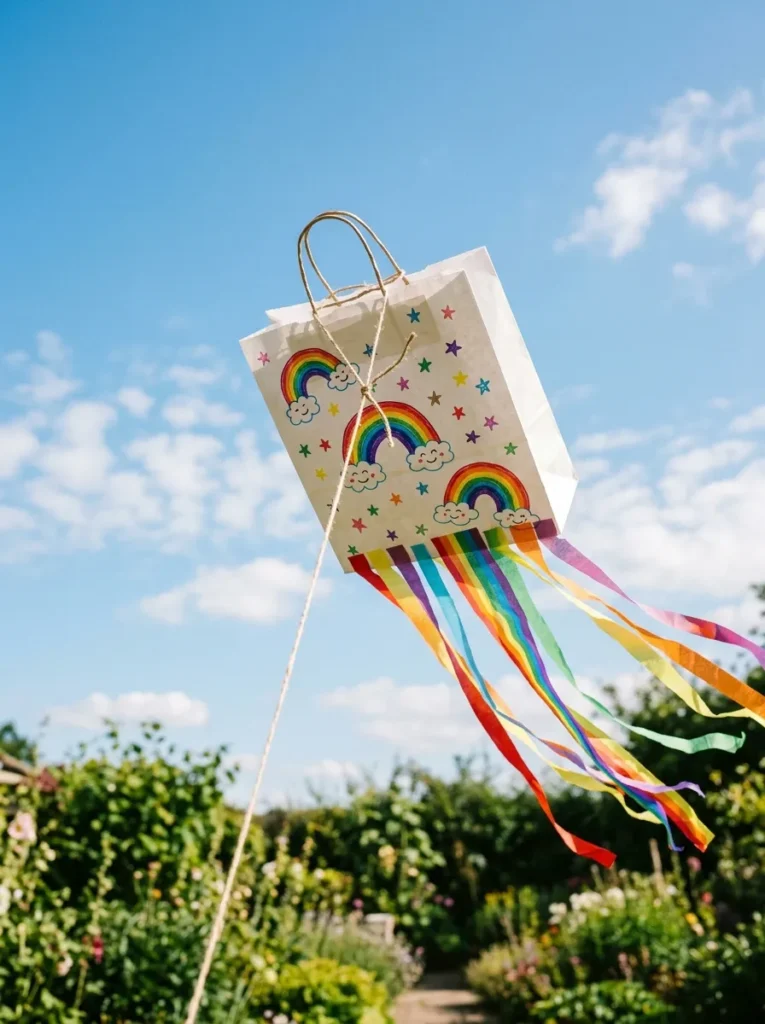
Vibe: Joyful and breezy — the five-minute craft that turns a windy afternoon into the most exciting afternoon of the week.
Why it works: A paper bag kite is the craft with the shortest making time and the most immediately physical, outdoor play outcome — a decorated paper carrier bag, long ribbon tails, and a ball of string can be assembled in under five minutes and will fly in any consistent wind above approximately 10km/h. The physical experience of a kite pulling against string in the child’s hand is one of the most direct examples of atmospheric physics available to children in a domestic context, making the paper bag kite as much an outdoor science experiment as a craft project. The decoration phase (marker drawings, sticker decoration, tissue paper additions) provides the creative element that connects the craft context to the outdoor play context.
How to get it: Take a standard paper carrier bag (the stronger the paper the better — thick kraft paper bags work best). Decorate the bag exterior using permanent markers, stickers, or torn tissue paper strips glued on. Tie the two bag handles together at the top to create a single attachment point. Attach long ribbon or crepe paper strips (at least 60cm each) to the bottom of the bag for tails — tails provide stabilizing drag that prevents tumbling. Thread a long piece of string through the handle knot and tie securely. Run outside holding the string and let the bag fill with air as you run, or stand with your back to the wind and feed string out as the kite rises.
| Product |
|---|
| Paper carrier bag strong kraft |
| Permanent marker set bright colors |
| Ribbon or crepe paper set for tails |
| Ball of garden string or kite string |
| Sticker set for additional decoration |
14. Leaf and Nature Print Art (Ages 3–10)
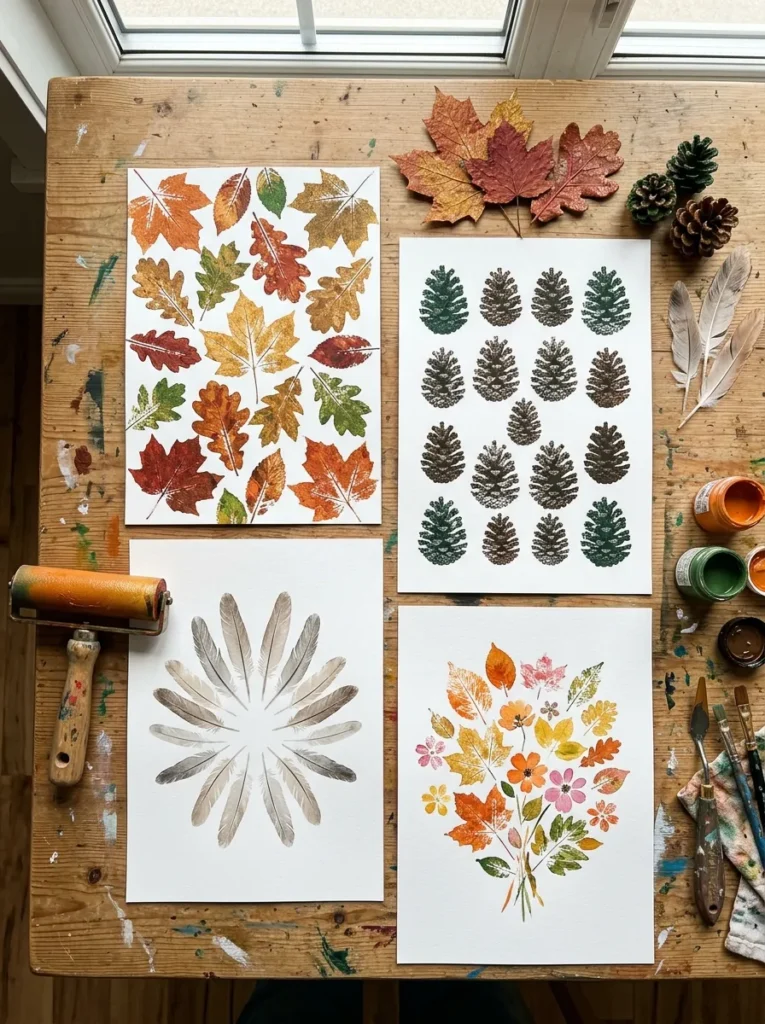
Vibe: Earthy and creative — the printmaking session that makes children look at leaves as tools rather than just objects.
Why it works: Nature printing — rolling paint onto natural objects and pressing them onto paper to transfer the impression — is the children’s craft that most directly teaches the printmaking principle used in professional printmaking studios. The reversed impression, the texture transfer from three-dimensional to two-dimensional surface, and the repeatability of a single printing object are all genuine printmaking concepts that children experience directly through nature printing without any specialist equipment. The printed result also consistently surprises children — the detail of a leaf’s vein structure reproduced in paint on paper is always more intricate and beautiful than children expect, producing the specific discovery pleasure that makes an activity genuinely engaging rather than merely entertaining.
How to get it: Collect large, flat leaves with prominent vein structures — oak, maple, and ivy leaves produce particularly good print results. Squeeze a small amount of paint onto a tile or flat palette. Roll the brayer through the paint to coat it evenly, then roll the paint-coated brayer over the top surface of the leaf until the leaf surface is completely painted. Place the painted leaf paint-side-down onto paper, press firmly across all areas with a clean hand, then lift carefully to reveal the print. The leaf can be re-inked and printed multiple times or used in combination with other natural objects in a single composition.
| Product |
|---|
| Acrylic craft paint set autumn tones |
| Small foam brayer paint roller |
| Flat palette tile for paint rolling |
| A4 paper set or cartridge paper |
| Variety of flat leaves for printing |
15. Woven Paper Heart Basket (Ages 6–12)
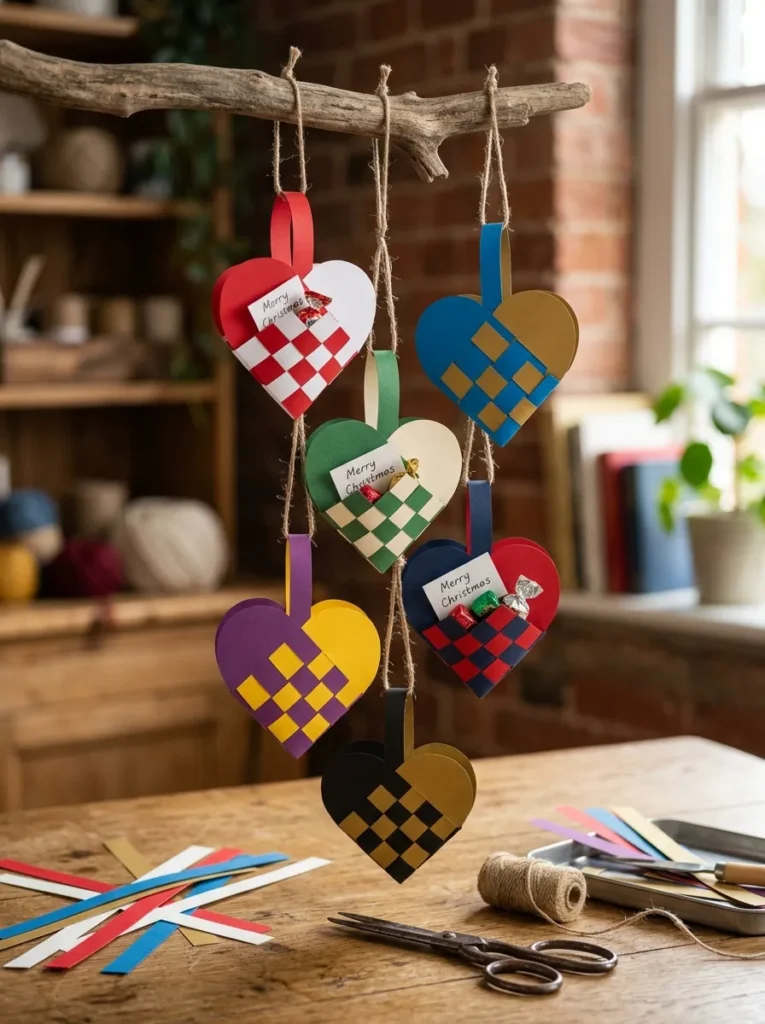
Vibe: Festive and precise — the paper basket that looks too complicated to be a children’s craft and produces genuine pride in the child who finishes one.
Why it works: The Danish woven paper heart basket (Julehjerter) is the traditional Scandinavian paper craft most widely recognized across European children’s craft traditions — a construction that produces a three-dimensional woven basket from two identical heart-shaped paper pieces interlocked through a woven construction that creates an interior pocket. The basket’s construction teaches the over-and-under weaving principle in a construction context where the outcome (a three-dimensional basket with interior space) is more complex and more surprising than flat weaving projects. The two-color combination required for the classic heart construction also teaches children about contrast, pattern, and complementary color relationships through the practical decision of which two colors to pair.
How to get it: Cut two identical heart shapes from two different colors of card, each approximately 14cm tall — the heart shape comprises two straight parallel strips at the top (the weaving section) and a round bottom. The two strips of each heart must be the same width. Fold each heart in half horizontally through the widest point. Weave the two heart halves together by alternately sliding one strip through the opening of the opposite color’s strip — this is the step that requires most practice and patience. When the weaving is complete, the two hearts lock together forming a basket shape with an interior pocket. Attach a paper strip handle.
| Product |
|---|
| Colored card sheet set multiple colors |
| Scissors for card cutting |
| Heart template for consistent cutting |
| Pencil for template tracing |
| Clear tape for handle attachment |
16. Homemade Playdough Sculpting (Ages 2–10)
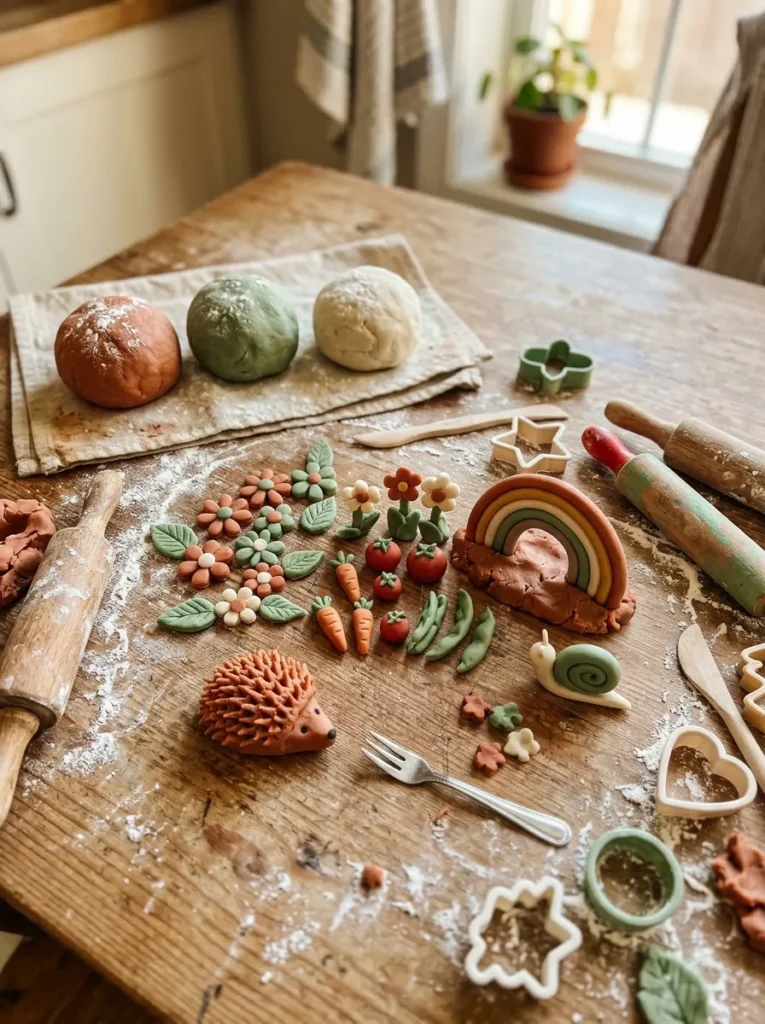
Vibe: Tactile and absorbing — the kitchen activity that occupies children of every age simultaneously and never loses its appeal no matter how many times it is offered.
Why it works: Homemade playdough is the craft material with the broadest age range and the deepest developmental engagement — a two-year-old pressing and pulling the dough is developing fine motor skills and tactile processing; a ten-year-old sculpting a detailed miniature scene is developing spatial reasoning, sequential construction planning, and artistic patience. The material itself is the craft rather than any specific project — the open-ended quality of playdough means that the child determines the direction, duration, and complexity of the activity according to their own developmental stage and imaginative direction on that specific day. Homemade playdough is significantly superior to commercial alternatives in texture (softer, more pliable), scent (naturally pleasant from the cream of tartar), and color customization (any food coloring produces any color on request).
How to get it: Mix 2 cups plain flour, ½ cup table salt, 2 teaspoons cream of tartar, 1 tablespoon vegetable oil, and 1.5 cups boiling water. Add food coloring to the water before mixing for the most even color distribution. Stir quickly with a spoon then knead on a floured surface when cool enough to handle — the dough is ready when smooth and non-sticky. Store in an airtight container for up to three months. Provide rolling pins, shape cutters, plastic knives, and textured tools (forks for scales or spines, combs for fur texture, garlic presses for hair or grass). The miniature garden prompt — make one of each: a flower, an animal, a vegetable, a rainbow — provides just enough direction for children who struggle with open-ended beginnings.
Age adaptations: Ages 2–3: free exploration of the dough — poking, squeezing, rolling, cutting with plastic knife. Ages 4–7: simple shape making, rolling snakes and balls, assembling into characters or scenes. Ages 8–12: planned sculptural projects, detailed texturing, color mixing, miniature world building.
| Product |
|---|
| Plain flour for playdough |
| Cream of tartar for playdough texture |
| Food coloring set multiple colors |
| Child rolling pin set |
| Shape cutter set assorted |
How to Start Your Home Crafting Practice with Kids
Start with what you already have. Before purchasing any craft supplies, walk through the house and collect everything that could become a craft material — toilet paper rolls, cardboard packaging, old magazines, fabric scraps, buttons from a sewing box, yarn ends, dried beans and pasta, garden leaves and sticks. Lay these collected materials on the kitchen table and invite the children to look at them and decide what they want to make. This scavenging-and-deciding process is itself a creative activity that develops resourcefulness and the specific skill of seeing potential in ordinary objects. The first home craft session using only found materials is also the most accurate predictor of which craft materials are worth purchasing more of — the materials the children return to enthusiastically are the ones worth investing in.
The most common mistake parents make when setting up home crafts is over-managing the process — setting out materials with a specific outcome in mind, demonstrating the “right” way to make the project, and then providing corrective guidance when the child’s version diverges from the demonstration. The craft projects on this list are designed to be child-led from the moment the materials are set out — the adult’s role is to set up the materials, explain the basic technique, and then step back completely. A pressed leaf sun catcher where every leaf was placed by the child with complete creative freedom is more developmentally valuable than a perfectly arranged sun catcher where the adult guided every placement. Resist the impulse to improve the child’s work.
Three items under $30 that make home crafting significantly better: A roll of brown kraft paper ($6–$10) used to cover the table before any messy craft activity — this single habit eliminates post-craft table cleaning anxiety and allows children to paint freely without worrying about the surface below; a set of washable poster paints in the six basic colors ($8–$15) that provides everything needed for any painting craft on this list without the specialist purchases that individual projects seem to demand; and a bag of self-adhesive googly eyes ($4–$8) that can be added to any craft project to instantly give it a character and personality — googly eyes are the single addition that most reliably delights children at every age from two to twelve and transforms a cardboard tube into a creature, a rock into a character, and a pinecone into an owl.
Realistic expectations: Most children aged 4–8 have a sustained craft attention span of 20–45 minutes before interest shifts. Children aged 8–12 can sustain focused craft work for 60–90 minutes on a project with sufficient complexity. Setting up a craft that takes longer than the child’s realistic attention span produces an abandoned, unfinished project and a frustrated child — always choose the simpler version of a project for a first attempt and scale complexity upward in subsequent sessions if the child wants more. The most valuable craft session is one the child finishes and wants to repeat, not one that produces an impressive object at the cost of the child’s enjoyment of the process.
Frequently Asked Questions About Simple Crafts for Kids at Home
What age can children start doing crafts at home?
Children can begin participating in craft activities from around 18 months with appropriate supervision and age-adjusted materials — at this age the participation is primarily sensory (feeling playdough, pressing stamps, finger painting) rather than skill-based, and the activity’s value is the sensory and motor experience rather than the finished object. By age 3, most children have sufficient fine motor development and attention span to participate meaningfully in simple crafts with a genuine finished object — salt dough handprints, painted rocks, and playdough sculpting are all accessible at this age. By ages 5–6, children can participate in most of the projects on this list with minimal adult assistance. The critical age-adjustment principle is always to prioritize the child’s experience of making over the adult’s expectation of the finished result — a messy, imperfect salt dough handprint made independently by a four-year-old is a better developmental outcome than a neat, perfect handprint made with extensive adult correction.
How do I keep children interested in crafts without buying expensive supplies?
The most effective way to sustain children’s interest in home crafts without significant supply investment is to rotate the material offered rather than accumulating a permanent craft supply collection. A single afternoon with contact paper and garden leaves is more engaging than a cluttered craft box overflowing with unused materials, because scarcity and novelty drive creative engagement more effectively than abundance and familiarity. Set up the materials for a specific project, work through it, then put everything away before the next session — the anticipation of materials coming out again is part of what makes the next craft session feel like an occasion rather than a background activity. The most powerful craft materials for sustained interest across all ages are those that are open-ended rather than project-specific: playdough, paint, collage materials, and basic cutting-and-sticking supplies provide infinite project variety from a single material investment.
What do I do with the finished crafts that accumulate at home?
The most practical approach to managing children’s craft accumulation is a rotating gallery system — designate one wall, notice board, or refrigerator section as the active gallery where a maximum of five to eight pieces are displayed at any time, and rotate new pieces in as the collection grows. When a piece leaves the gallery, it can be photographed (creating a permanent digital record before the physical object is discarded), kept in a portfolio folder for pieces of particular significance, given as a gift to a grandparent or family friend, or released with the child’s agreement. Children are generally more willing to release craft objects when they know the object has been documented photographically and when the rotation is explained as making room for new work rather than discarding the old. Never dispose of a child’s craft object without their knowledge — the trust established through consultation is more valuable than the physical space recovered.
How do I manage the mess of home crafts without discouraging creativity?
The most effective mess management approach for home crafts is preventive rather than reactive — setting up the materials in a way that contains the mess before the activity begins is more efficient and less disruptive to the creative flow than attempting to manage mess during the activity. Cover the table with a kraft paper roll. Put a plastic sheet or old shower curtain on the floor under the table for painting activities. Provide smocks or old shirts as aprons for paint activities. Fill water pots for brush rinsing before the session begins rather than mid-session. The principle is to remove every cause of interruption from the child’s creative flow — stopping to manage a spill, change clothes, or protect a surface breaks the concentration that produces the child’s best craft work and their deepest engagement with the activity.
Can children do these crafts independently, or do they always need adult supervision?
Most of the projects on this list can be completed independently by children aged 8 and above with adult setup and minimal check-in supervision. Children aged 5–7 can complete most projects independently once the initial setup and technique demonstration is provided — they may need an adult nearby for occasional assistance (threading a needle for the sock puppet, applying the second contact paper layer for the sun catcher) but the majority of the making can proceed without adult direction. Children aged 3–5 require more consistent adult presence for safety reasons (scissors, hot water for playdough) and for the practical assistance that small hands still need for some construction steps. The goal of adult involvement in children’s crafts should always be to do the minimum necessary to keep the child safe and moving forward — every step the adult takes over from the child reduces the developmental value and the child’s pride in the finished result. Step in for safety; step back for everything else.
Ready to Start Making with Your Kids?
These 16 craft projects cover the complete range of what home crafting with children can offer — from the five-minute paper bag kite that turns a windy afternoon into an outdoor adventure, to the Danish woven heart basket that produces genuine pride in a technical construction achievement, to the pressed leaf sun catcher that makes a rainy day collection walk feel like serious artistic preparation. Every home craft practice begins with the simplest possible invitation — collecting autumn leaves from the garden, cutting two pieces of contact paper, and inviting the children to arrange the leaves however they like before pressing the second layer over. That first sun catcher, hung in the kitchen window where the afternoon light turns the pressed maple leaves amber and gold, is the beginning of a craft practice that fills winter afternoons, produces a year of handmade gifts for grandparents, and gives children the specific experience of having made something beautiful from materials found in their own garden on an ordinary afternoon. Set out the materials this weekend. Step back when the children begin. See what they make.