15 IKEA Christmas Tree Ideas for Christmas Decorating Beginners
IKEA Christmas tree ideas are setups built around IKEA’s artificial trees, which come in 59, 70¾, 82¾, and 94½ inch heights, plus small potted versions, and which you decorate yourself with lights, ribbon, and ornaments. This article gives 15 of them for people decorating for the first time, ordered roughly from the simplest to the ones that take more planning. Most of them need nothing more than a tree, one string of lights, and a single type of ornament.
The tree itself is the easy part. IKEA’s VINTERFINT trees are needle-free, indoor and outdoor rated, and they unscrew into smaller sections, so you don’t vacuum pine needles in January and the box fits in a closet. The harder part for beginners is deciding what goes on the tree, and how much. That’s where most of these ideas help.
Check current prices and stock before you plan anything. IKEA’s Christmas range changes every year, and sizes sell out in November.
Disclosure: This post contains affiliate links. If you buy through them, I may earn a small commission at no extra cost to you.
Jump To
- Why IKEA Christmas Trees Work for Beginners
- The 15 Ideas, Simplest First
- How to Start
- What Goes Wrong When You Skip a Step
- Frequently Asked Questions
- Final Thoughts
Why IKEA Christmas Trees Work for Beginners
The main reason is how little the tree asks of you. It comes out of the box in sections, the branches are hinged, and you fluff them by angling each one outward in a different direction. IKEA’s own product page says to do this for a full look, and it’s the step people skip most. A tree that looks thin usually just hasn’t been fluffed.
The sizes matter for planning. The 59 inch tree is about 26¾ inches wide, and the 70¾ inch tree is about 40¼ inches wide, so a bit of floor space measuring goes a long way before you buy. There are also small potted versions in four sizes, which is useful if you only have a console table or a shelf.
The plastic leaf material on the larger trees is listed as at least 70 percent recycled, and the tree wipes clean with a damp cloth. Reviews are mixed on fullness. Some buyers love the real-looking deep green and uneven branch lengths, and others wish it had more volume. That’s a reason to fluff carefully and to choose ideas that add fullness, like ribbon and garland.
For 2026, IKEA is marketing the VINTERFINT range as its tree of the year, along with STRÅLA LED lighting chains and paper-based decorations. That means matching lights and ornaments are easy to find in one trip, if you want that.
Quick Reference
- Best starting point: The 59 inch tree with one string of warm white lights
- Biggest impact: Lights, then a single ornament color
- Budget to start: Roughly $40 to $100 for tree, lights, and basic ornaments (approximate)
- Time: About 30 minutes to assemble and fluff, then one evening to decorate
The 15 Ideas, Simplest First
1. A 59 Inch Tree in a Small Living Room
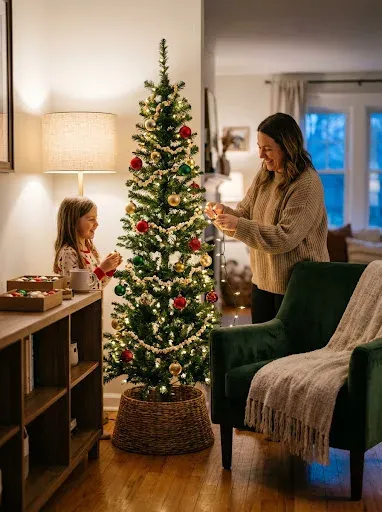
If you’ve never put up a tree, start here. At 59 inches tall and roughly 26¾ inches wide, it fits in a corner, next to a TV stand, or beside a sofa without blocking the walkway. It also keeps the decorating job small enough that you finish in one evening.
Assembly note: Screw the sections together on the floor, then stand it up and fluff each branch outward and in different directions, starting at the bottom. Spend a full ten minutes on this. Most thin-looking trees are just unfluffed trees, and no ornament will fix that afterward.
Placement note: Measure the corner before you buy and leave a few inches around the tree so you can reach in. Keep it away from heaters and vents, since plastic can warp and warm air blows the lights around. Check the current price of the 59 inch size, since it has changed from year to year.
Shop This Look
Also see: 16 Easy Handmade Gift Ideas for Beginners With No Crafting Experience
2. A Tall 82¾ or 94½ Inch Tree for High Ceilings
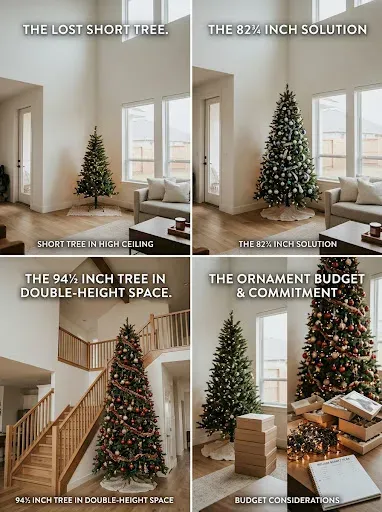
Rooms with high ceilings make a short tree look lost. The 82¾ inch and 94½ inch sizes fill the vertical space, and the 94½ inch tree is useful if you have a double-height living room or a staircase landing. The bigger tree means more ornaments to buy, so plan your budget before you commit.
Reach note: You’ll need a step stool for the top third. Put the lights on while the tree is still easy to reach, and do the top section first. Decorating from the top down means you never lean over finished branches.
Spacing note: Big trees look better with larger ornaments in the lower half and smaller ones near the top. If every ornament is the same size, the tree reads as flat from a distance. Start with about 30 ornaments and add more rather than buying 100 and finding out you hate the color.
Shop This Look
3. A Trio of Mini Potted Trees on a Console Table
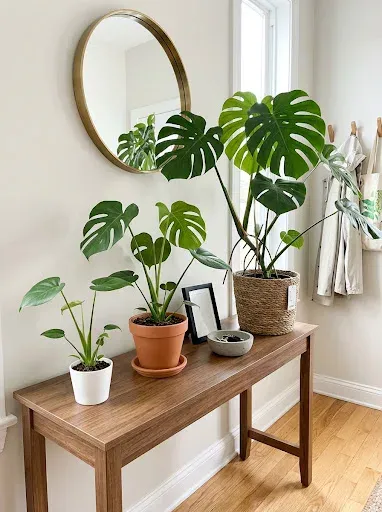
IKEA sells the potted versions in several sizes, from about 2¼ inches up to 6 inches in pot diameter. The smaller ones are around 10 inches tall, and one of the larger ones has been sold at around 37 inches. Put three at different heights on an entryway table and you have a tree display without needing floor space.
Grouping note: Use odd numbers. Three looks arranged, while two looks accidental and four starts to look crowded. Vary the heights and keep the pots the same color. If the pot is plain plastic, cover it with a ceramic or wooden cachepot.
Light note: Thread a thin battery-powered micro string through each one, and keep the battery packs hidden behind the pots. These minis work as year-round plants too, since they’re just green plastic when the ornaments come off. I’d add only a few tiny ornaments to each one. More than that looks cluttered at this size.
Shop This Look
- Mini battery micro LED lights, copper wire
- Ceramic planter, small, matte white
- Miniature ornaments, 1 inch
4. Lights First: A Vertical Wrap With Warm White Strings
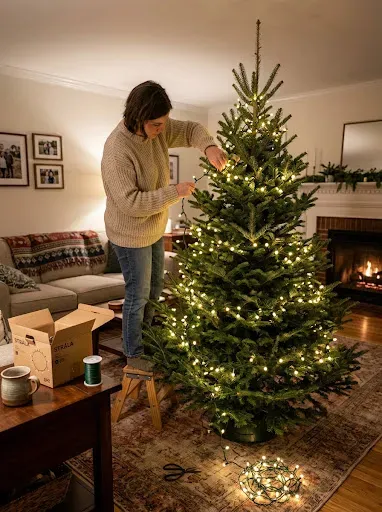
Lights make the tree look finished more than any ornament, so do them first and take your time. IKEA’s STRÅLA LED lighting chains are designed for trees, but any warm white LED string works the same way. Pick one color temperature and stay with it, since warm and cool white strings look odd side by side.
Wrap note: Run the lights up and down the branches in vertical sections instead of circling the tree in horizontal bands. Vertical wrapping hides the wire better and makes it easier to remove later. A rule of thumb is roughly 100 bulbs per foot of tree height, though that’s a starting point, not a requirement. Push some strands deeper toward the trunk for depth.
Test note: Plug the lights in before they go on the tree. Fixing a dead section is quick on the floor and annoying once the strand is wrapped. If a section doesn’t light, check the bulb and the fuse in the plug first, and don’t bother returning it until you’ve checked.
Shop This Look
5. One Ornament Color, Repeated
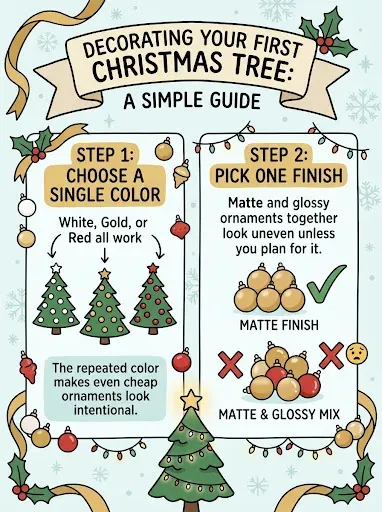
For a first tree, a single color is easier than a mix. White, gold, or red all work, and the repeated color makes even cheap ornaments look intentional. Pick one finish too. Matte and glossy ornaments together look uneven unless you plan for it.
Color note: Buy a pack of 36 or so in one color and add a second finish only after you’ve hung them. If it looks flat, add a few in a different texture, like a matte one among glossy ones. Don’t mix more than two colors on your first tree.
Hanging note: Hang the largest ornaments first, spaced evenly, then fill the gaps with smaller ones. Put some deeper into the tree toward the trunk instead of all at the branch tips. This gives the tree depth, and it makes the plastic branches less visible.
Shop This Look
6. A Paper Tree and Paper Decorations
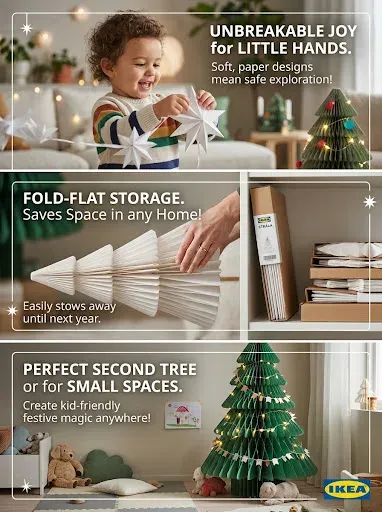
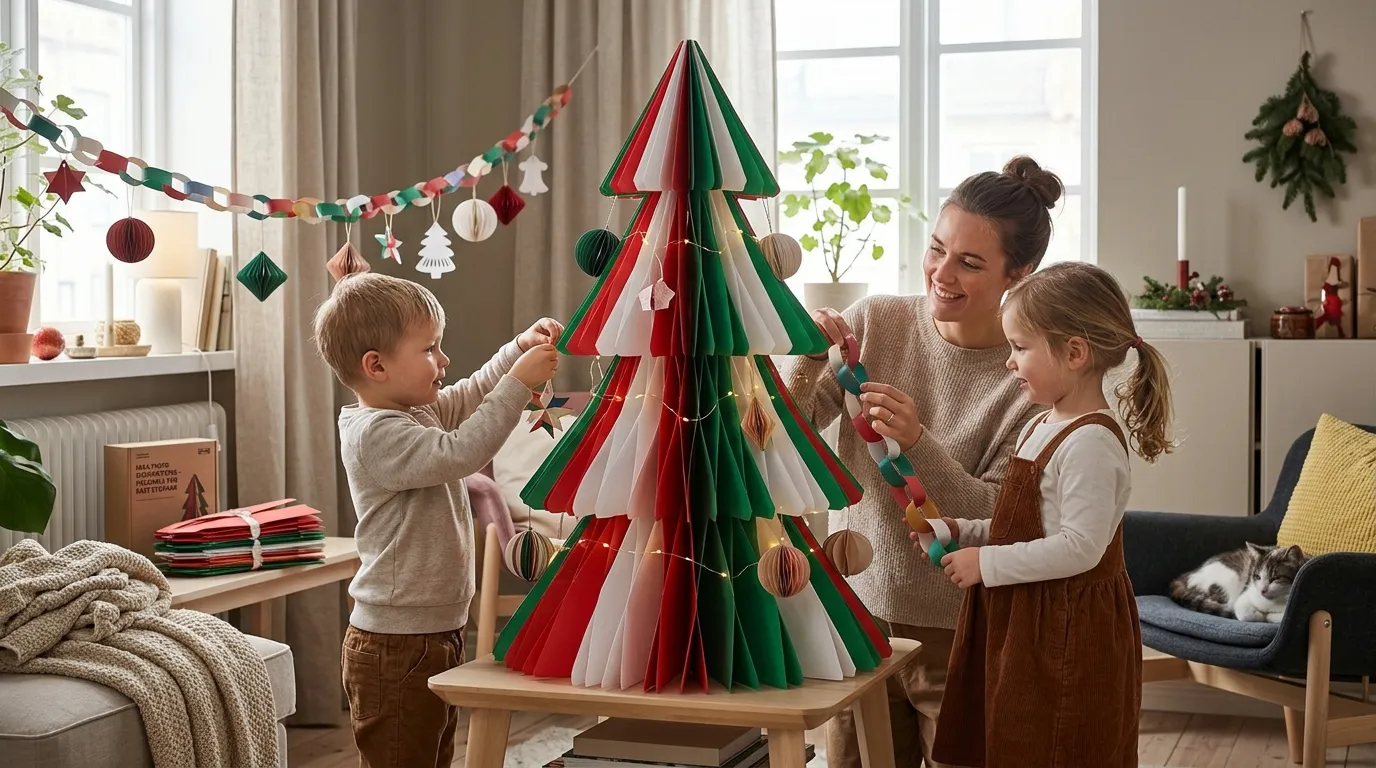
IKEA’s recent collection includes paper-based Christmas items, such as large paper trees, garlands, and tree decorations. They’re a good choice if you have small children, because they don’t break, and if you want something that folds flat for storage. You can use a paper tree as the main tree in a small space or as a second tree in a kid’s room.
Paper note: Paper does not like damp or heat. Keep it away from radiators, windows with condensation, and anything that runs hot. Don’t hang battery lights directly against the paper, because some bulbs warm up. Use LED strings only and keep them loose.
Storage note: Fold or flatten it in the same box each year, and don’t stack heavy things on it. Paper holds creases, so a crushed tree stays crushed. It’s less durable than plastic, and that’s the trade-off for the lower weight and lower price.
Shop This Look
7. A Ribbon Cascade That Fills a Thin Tree
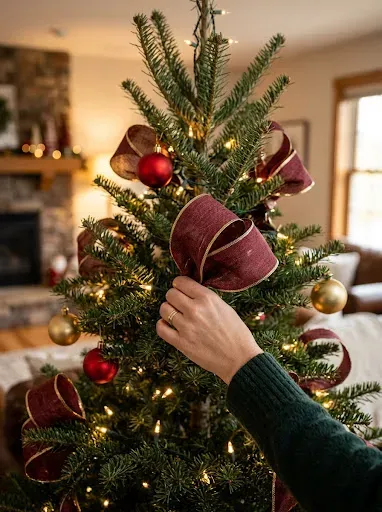
Ribbon is the cheapest way to make a tree look fuller. Wired ribbon holds its shape, so you can tuck loops into the branches and the tree gets more volume without more ornaments. This helps most on the trees that some reviewers call a bit sparse.
Tuck note: Start at the top, tuck the ribbon end behind a branch, and drape it down in loose swoops, tucking it behind branches every foot or so. Use about 2.5 to 3 yards per foot of tree height as a rough guide, and buy one more roll than you think you need. Cut ribbon ends at an angle so they don’t fray.
Width note: Choose wired ribbon about 2.5 inches wide. Narrow ribbon disappears on a green tree, and very wide ribbon looks heavy on a small one. Pick one color and match it to the ornaments, or use a second color on purpose.
Shop This Look
8. Hide the Stand With a Collar or Basket
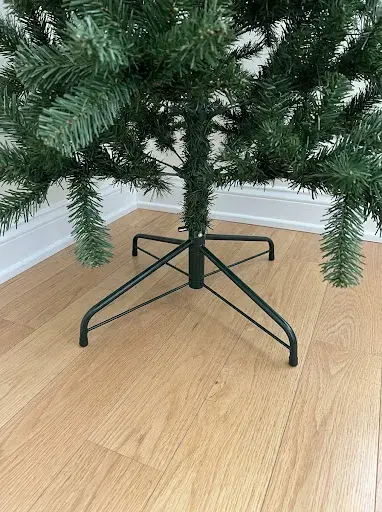
The metal or plastic stand is the least attractive part of any artificial tree, and it’s the first thing people see at eye level. A woven basket or a tree collar solves it in two minutes. IKEA has plenty of baskets in the home section that work as tree bases.
Fit note: Measure the stand’s diameter and height before shopping. A basket that’s too small won’t fit over it, and one that’s too tall hides the lower branches. A good fit is a basket about 4 to 6 inches wider than the stand. If the tree sits on a rug, put something flat and hard under it so the weight doesn’t tilt.
Stability note: A basket doesn’t replace the stand. It sits around it. Check that the tree is level and stable before you hang anything, especially if you have pets or kids. If it wobbles, shim the stand with a thin piece of wood or a folded cardboard before you cover it.
Shop This Look
9. A Wooden Bead Garland Instead of Tinsel
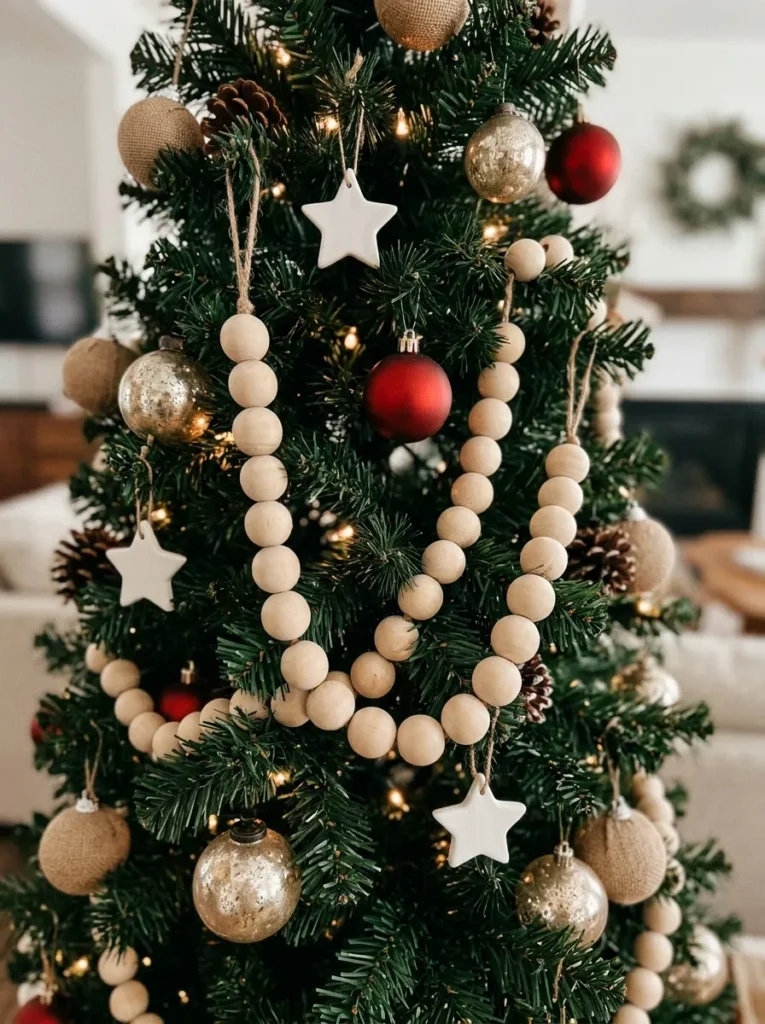
A wooden bead garland adds texture and a natural look without much effort. Natural wood beads sit well against the dark green plastic, and they pair with white, red, or neutral ornaments. They’re also easy to find in a craft store or online.
Drape note: Hang the garland in loose swags that dip about 8 to 10 inches between branch points. Start at the top and work down. If you pull it tight, it looks stiff and sits flat against the tree. If it sags too much, it hides the ornaments.
Weight note: Wooden beads are heavier than plastic ones, so use thicker branches for support, and hook it over two or three branches instead of one. A thin plastic branch will bend if you hang a lot of weight on it. If a branch droops, add a hook or a small piece of floral wire to hold it.
Shop This Look
10. A Red and White Scandinavian Folklore Look
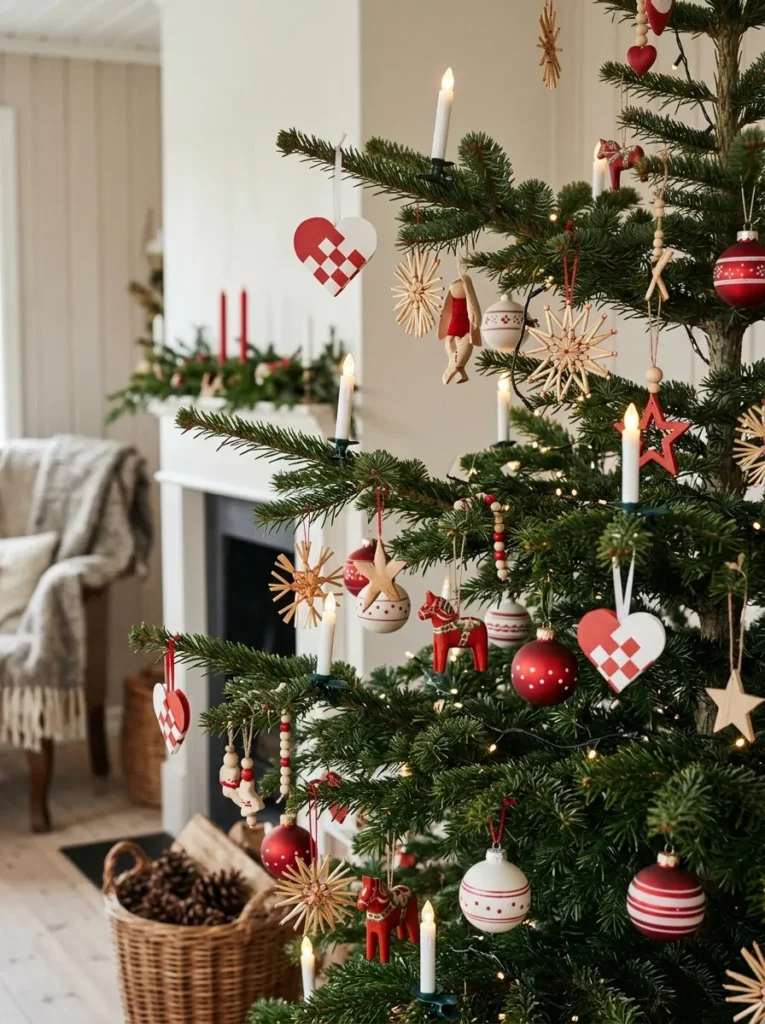
IKEA describes one of its 2026 themes as Scandinavian Folklore, with a classic red feel. You can copy that look without buying anything from the collection. Use red and white ornaments, simple straw or wooden shapes, and a few small woven hearts. The effect is traditional and a little homemade.
Pattern note: Stick to two colors and a few simple shapes, like hearts, stars, and little wooden horses. Keep patterns minimal, since lots of stripes and checks together read as noise. Hang the red ornaments first and fill in with white, or the other way around, depending on which you have more of.
Handmade note: Folded paper hearts and straw stars are easy to make and cost almost nothing. If you want to try, cut a stack of red and white paper strips and weave them into small heart baskets. It takes about five minutes per heart once you’ve done a couple, and the first one will look odd.
Shop This Look
11. A Playful Mix With One Unexpected Ornament
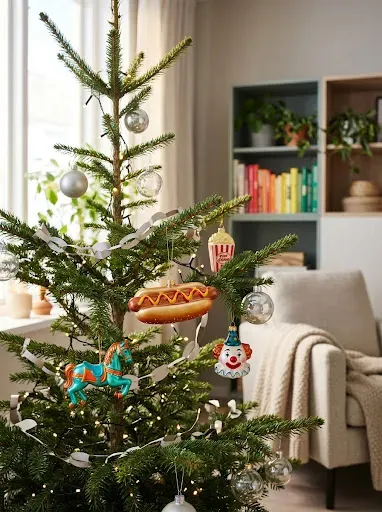
IKEA’s other 2026 theme, Happy Carnival, is bolder and a bit silly, and it includes a hot dog ornament. The point for beginners is that a tree can be mostly plain and have one funny thing on it. A few bright ornaments among a calm base makes people look closer.
Mix note: Start with a plain base, such as one color of ornament and warm lights, then add three to five odd ones. Keep the odd ones spread out so they don’t clump, and put one near eye level. More than a handful of jokes and the tree stops looking like a tree.
Color note: If the odd ornaments are very bright, repeat one of their colors somewhere else, like in the ribbon or a small bow. It ties things together without much effort. If nothing matches, leave it. Not every tree needs to be coordinated, and this one is meant to be a little messy.
Shop This Look
12. A Kid-Safe Tree With Unbreakable Ornaments Low Down
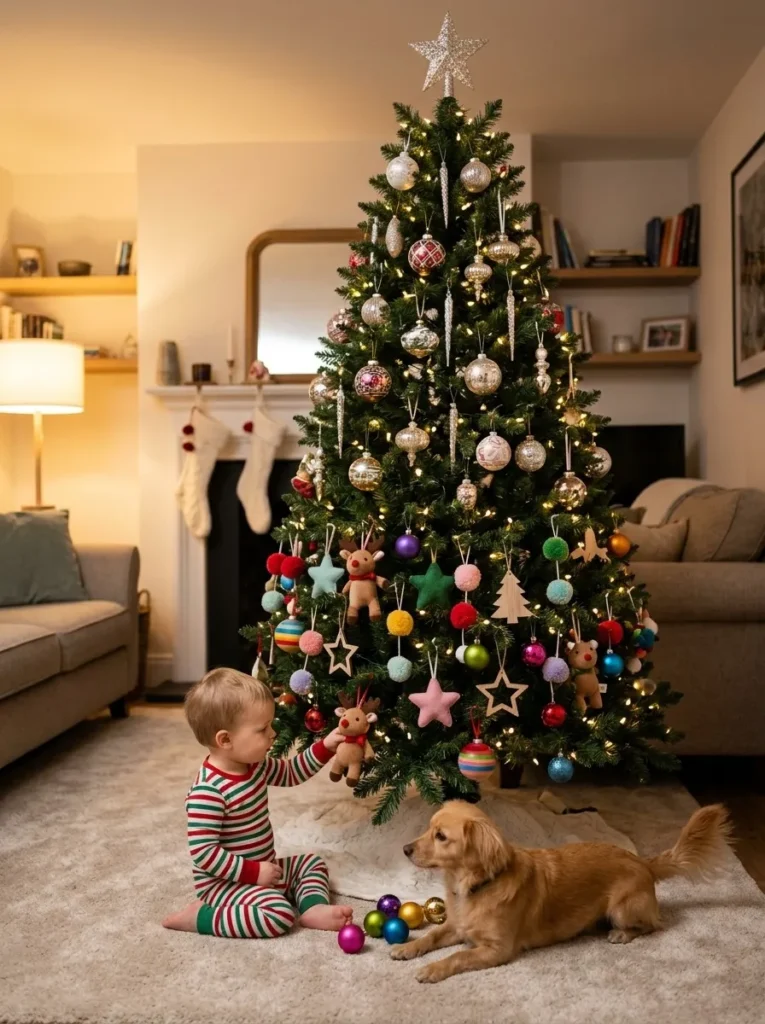
If you have toddlers or pets, glass ornaments on the lower branches are asking for trouble. Put shatterproof or fabric ornaments on the bottom third and keep the fragile ones above reach. This doesn’t change how the tree looks much, and it saves a lot of cleanup.
Zone note: Divide the tree into thirds. Bottom third gets unbreakable, soft, or wooden pieces. Middle gets your usual ornaments. Top gets anything fragile or sentimental. Secure each ornament with a closed hook or a loop of ribbon, since an open hook slides off when the branch gets pulled.
Cord note: Keep the light cord and plug up and away from where a child can chew or tug it. Use a cord cover or run the cord behind furniture. A plug-in power strip with an off switch makes it easier to turn the lights off at night. Check the tree’s stability twice, and anchor it to the wall if you’re worried.
Shop This Look
13. Dried Orange Slices and Cinnamon for a Natural Look
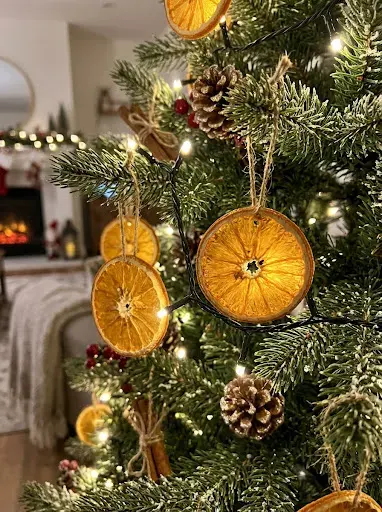
Dried orange slices look good on a green tree, especially with warm white lights shining through them. They’re cheap, and you can make them in an oven. Slice oranges about a quarter inch thick, pat them dry, and bake at a low temperature, roughly 200°F for two to three hours, flipping them partway. Times vary, so check often.
Drying note: They’re done when they feel dry and slightly leathery, not sticky. If they’re still soft, they’ll mold in storage. Let them cool on a rack before you hang them. Don’t skip that step, since they harden as they cool.
Hanging note: Thread a piece of twine through the edge and tie it in a loop. Mix them with cinnamon sticks tied with twine, and keep both away from heat sources. They won’t last forever, and I’d treat them as a one-season decoration. Keep them out of reach of pets, since they aren’t meant to be eaten.
Shop This Look
14. A Tabletop Tree on a Riser With Tiny Lights
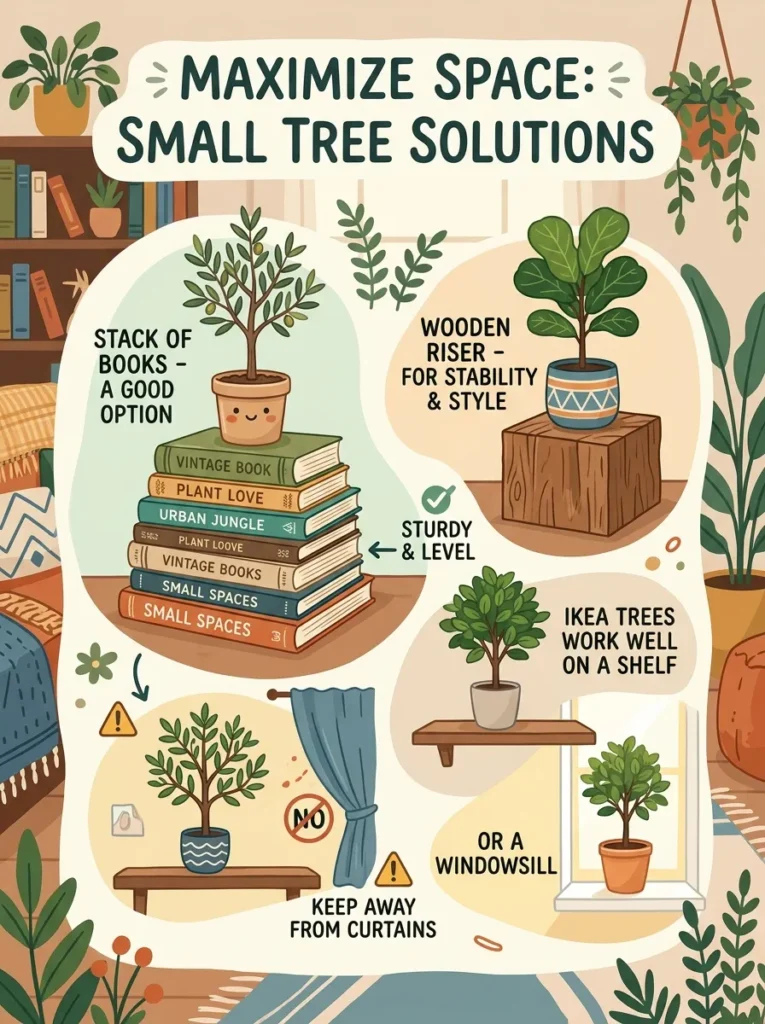
If you have no floor space, a small potted tree on a stack of books or a wooden riser is a good option. The smaller IKEA trees work well on a shelf or a windowsill. Put it on something sturdy and level, and keep it away from curtains.
Height note: Raising the tree 3 to 4 inches off the surface makes it look larger and gives the pot a cleaner base. A cake stand, a wooden block, or a stack of two hardcover books works. Cover the riser with a small cloth if it looks messy.
Light note: Use a battery micro-light string with a timer, so you don’t have to run a cord across the table. Wrap it loosely, since the tree is small and too many lights turn it into a bright blob. If the tree is on a shelf, check that nothing hangs over it.
Shop This Look
15. A Porch Pair in Weighted Planters
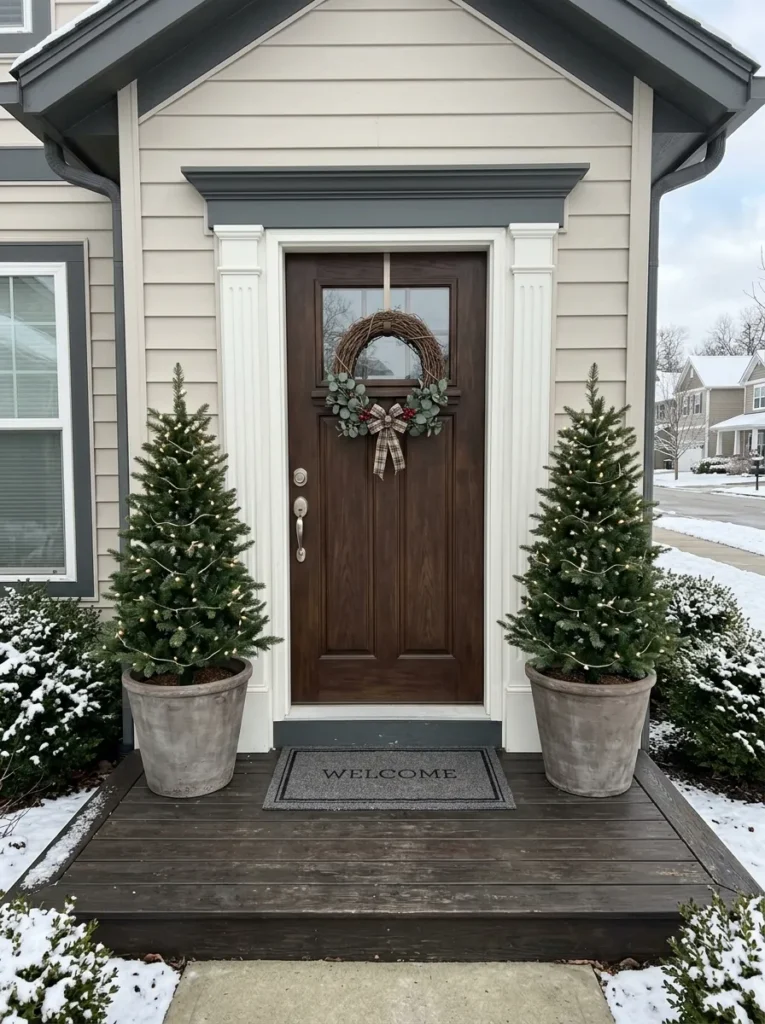
IKEA lists the VINTERFINT trees as suitable for indoor and outdoor use, so two of them in planters by the front door works. Choose the same size for both and place them symmetrically. This is also the lowest-effort way to decorate outside, since there’s no watering.
Weight note: Wind is the problem. A tree in a light plastic planter will tip over, so fill the planter with sand, gravel, or bricks and set the tree stand firmly inside. If your porch is exposed, tie the tree to a railing with a bit of cord. Check it after the first windy day.
Outdoor note: Use lights rated for outdoor use, and plug them into an outdoor-rated extension cord. An indoor string outside is a fire and shock risk. Keep connections off the ground and covered, since water gets into plugs. Bring decorations indoors if heavy rain or snow is forecast.
Shop This Look
How to Start
Start with the tree and one string of lights. That’s it. Put the tree up, fluff it properly, add the lights, and live with that for a day. You’ll see what the tree needs, and you won’t have spent money on ornaments you end up not using.
The most common beginner mistake is skipping the fluffing. A tree that’s been unpacked and not fluffed looks thin and flat, and people blame the tree and buy more ornaments to cover it. Take ten minutes, work from the bottom up, and pull every branch apart so none point the same way. It’s boring, and it matters more than anything else on this list.
Three things under $50 give you the most to work with: a good string of warm white LED lights, a pack of shatterproof ornaments in one color, and a roll of wired ribbon. Together they cost well under $50 at most stores, but prices vary.
For timing and budget, assembly and fluffing take about 30 minutes for a mid-size tree. The lights take another 30 to 45 minutes, and ornaments depend on how many you hang. A starter setup runs roughly $40 to $100 including the tree, though it depends on which size you pick and what you already own. Add more over time. Nobody needs a finished tree in year one.
Shop This Look
What Goes Wrong When You Skip a Step
Most problems with a new tree are small and predictable.
A tree that wasn’t fluffed looks sparse, and the lights show through the gaps. People see that and assume they need more lights or ornaments, so they overbuy. The fix is free, and it’s the fluffing.
Lights that weren’t tested before they went on mean you’re unwinding a tree to find one dead section. It happens most years to somebody. Plug everything in on the floor first.
Plastic trees near heaters and fireplaces can warp, and some plastics can give off fumes when they get hot. Keep the tree at a safe distance from any heat source and check the instructions that came with it.
Overloaded lights and extension cords are a real fire risk. Don’t daisy-chain more strings than the packaging allows, check the wattage on your power strip, and switch the lights off when you leave the house or go to bed. Outdoor trees need outdoor-rated lights and cords, and indoor ones outside are a shock risk.
Finally, an unlevel stand makes the tree lean, and a leaning tree gets heavier on one side as you decorate. Make sure it sits level before anything goes on, and use a shim if the floor isn’t flat.
Frequently Asked Questions
What sizes do IKEA Christmas trees come in?
IKEA’s VINTERFINT artificial trees have been sold in 59, 70¾, 82¾, and 94½ inch heights, plus smaller potted versions in several pot sizes. The 59 inch tree is about 26¾ inches wide and the 70¾ inch tree is about 40¼ inches wide. Availability and sizes change each season, so check IKEA’s site.
Are IKEA Christmas trees good for beginners?
Yes, because they’re needle-free, they come in sections, and they wipe clean with a damp cloth. The main thing to learn is how to fluff the branches, which IKEA’s own product page recommends for a fuller look. Some reviewers say the tree could be fuller, so ribbon and garland help.
Can I use an IKEA Christmas tree outdoors?
IKEA lists the VINTERFINT trees as suitable for indoor and outdoor use. Outside, you’ll need a weighted planter and outdoor-rated lights and cords. Tie the tree down if it’s windy, and bring delicate decorations indoors during heavy rain.
How many lights does an IKEA Christmas tree need?
A common rule of thumb is about 100 bulbs per foot of tree height, so roughly 400 to 500 for a 59 inch tree. Treat that as a starting point. Some people prefer fewer and some prefer more, and warm white LEDs look best on green plastic.
What’s the easiest way to decorate a tree for the first time?
Fluff the branches, add one string of warm white lights in vertical sections, then use one color of ornaments. Add ribbon or garland only if the tree still looks thin. Start small, and add pieces each year.
Final Thoughts
Fifteen ideas covers a lot, and you only need one or two. The list runs from a small tree in a corner to a porch pair, and from a plain single-color tree to a mixed, silly one. Pick the setup that fits your room and your budget this year.
Today, measure the spot where the tree will go and write down the width and height. That one step stops most bad purchases. Save your favorite IKEA Christmas tree ideas to a Pinterest board so you can come back to them when you’re ready to decorate.
Keep Exploring
- 12 Small Space Christmas Decor Ideas That Don’t Look Cluttered
- 10 Budget Christmas Ornament Ideas Beginners Can Make
- 15 Christmas Mantel Decor Ideas for Renters