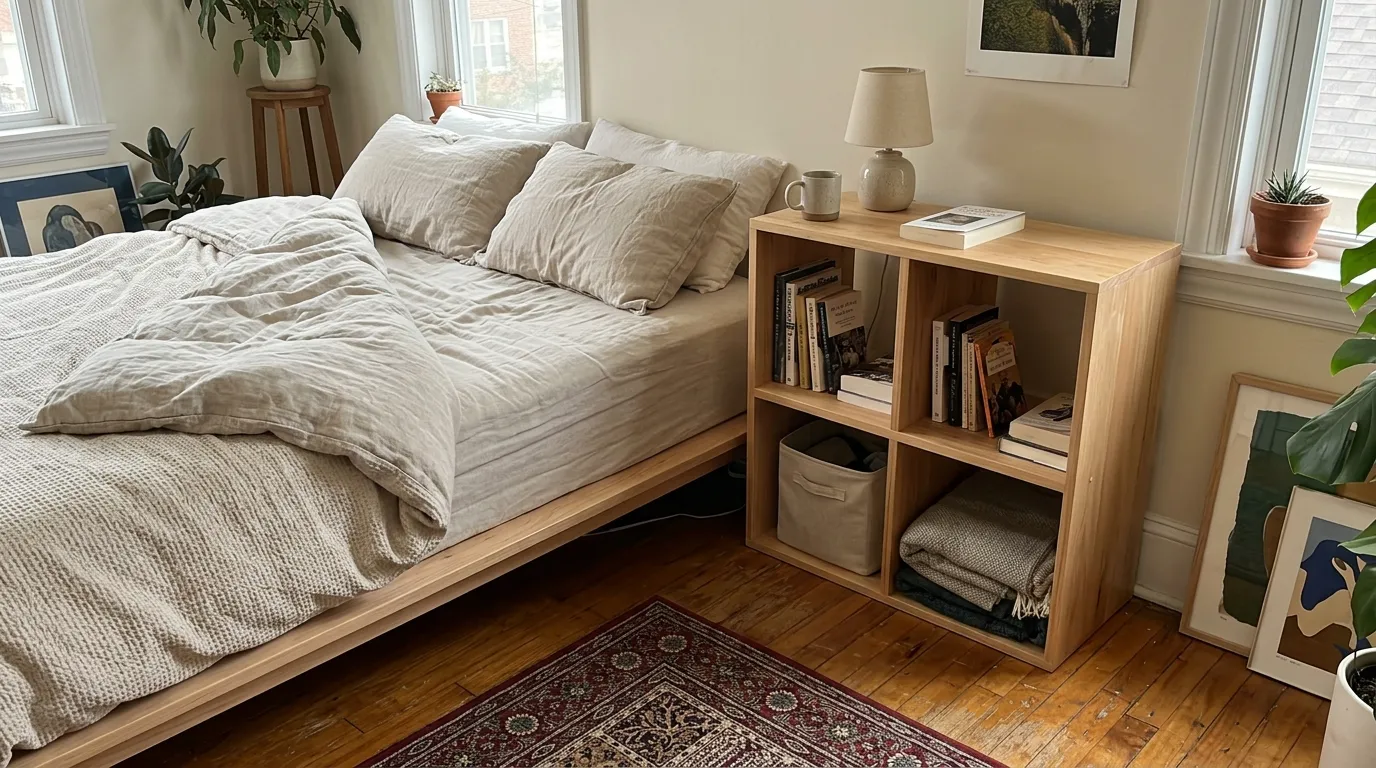
17 IKEA KALLAX Bedroom Ideas for Turning Open Shelves Into Closed Storage
IKEA KALLAX bedroom ideas for closed storage are ways to hide what sits in the cube shelf’s open grid by adding doors, drawers, lidded boxes, curtains, panels, or a new top and legs, so the unit reads as a cabinet or dresser. This article covers what to check before you start, the principles that matter, and 17 ideas, most costing roughly $15 to $90 on top of the shelf, with a basic one done in under an hour.
The main problem with a KALLAX in a bedroom is visual noise. Open cubes show every sock, charger, and half-folded shirt, and a bedroom is where you want things calm. Closing the cubes fixes that, but it brings new problems: doors that don’t line up, drawers that hold less than you expect, and weight and tipping risks. Most of the fixes are small and cheap.
You don’t need all 17 ideas. Pick one or two that match what you store, and do those first.
Jump To
- What to Check Before You Start
- The Basic Principles of Closing Open Shelves
- Essential Elements
- Closing Techniques
- KALLAX Closed Storage Ideas
- How to Start
- Common Mistakes
- Frequently Asked Questions
- The Finishing Touch
What to Check Before You Start
Start with the unit itself. KALLAX cubes are about 13 by 13 inches inside, and the unit is about 15⅜ inches deep, but the exact size depends on the model and the year, so measure your own cubes before you buy anything. A cube that’s even half an inch off makes a door or a panel look crooked.
Next, check what IKEA sells for it. At the time of my search, IKEA listed door inserts and two-drawer inserts for KALLAX in several finishes, each sized for the 13 by 13 inch cube, with a depth of about 14⅝ inches. Ranges change, so check the current listing. Read the reviews before you buy, since some buyers describe the inserts as light and the drawers as shallow, and a few mention small gaps between doors.
Then check weight and anchoring. A unit with doors and full cubes is heavy and can tip, especially if drawers are open or a child climbs it. Use the wall fittings in the box and anchors that suit your wall. Check the instruction sheet for the load limit per shelf, and spread heavy items across cubes.
Last, think about airflow and moisture. Closed cubes hold smells and damp, so don’t store wet towels, worn shoes, or damp laundry behind doors without ventilation.
Quick Reference
- Best starting point: Lidded fabric boxes in the cubes you use most
- Biggest impact: Doors or drawers on the cubes at eye level
- Budget to start: Roughly $15 to $60 (approximate, prices vary)
- Time: 30 minutes to a weekend, depending on the idea
The Basic Principles of Closing Open Shelves
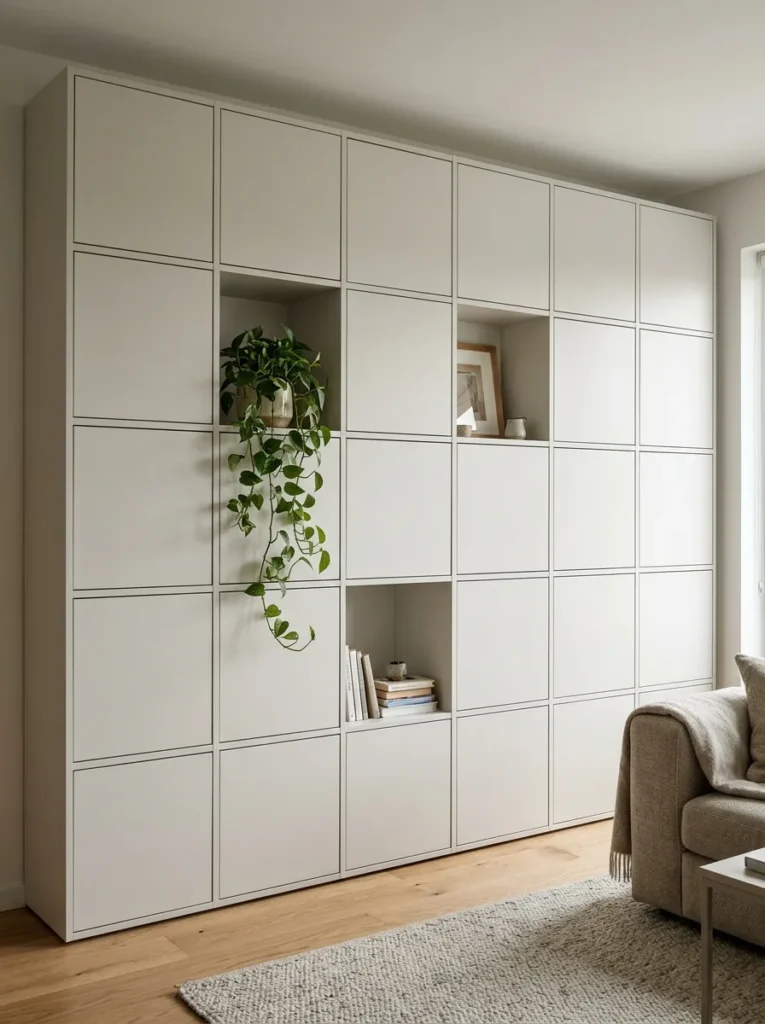
Close the Eye-Level Cubes First: The cubes between about 30 and 60 inches from the floor are the ones you see most. Closing these gives the biggest change for the least money.
Mix Open and Closed: A wall of identical closed fronts looks heavy. Leaving a few cubes open for a plant or a frame makes it look planned.
Keep One Finish: Pick one color or material for the fronts, such as white, oak, or fabric. A mix of finishes looks messy unless it follows a pattern.
Plan for Access: Doors need swing space, and drawers need pull-out room. Check that nothing blocks them, including the bed, a chair, or a door.
Think Weight: Heavy items belong low. Clothes, bedding, and boxes of paper add up fast, so check the load limit and anchor the unit.
Leave Room to Breathe: Don’t pack closed cubes full. Clothes and fabric need some air, and stuffed doors don’t close.
Also view: 15 Smart IKEA Built-In Hacks for Small Bedrooms
Essential Elements
A closed KALLAX uses a few of these.
Door Inserts: IKEA’s door inserts fit one cube each, at about 13 by 13 inches. They add a front and a shallow box. Check the finish and the hinge side.

Drawer Inserts: A two-drawer insert fills one cube. The drawers have shallow sides, so they hold light items better than heavy ones.
Lidded Boxes: Fabric or woven boxes with lids, about 12 to 13 inches wide, close the cube without hardware. They also come out of the cube easily.
Fabric Fronts: Curtains on thin rods, or fabric on a frame, cover several cubes at once. They’re cheap, and they’re easy to change.
Panels and Hinges: Plywood, cane, or MDF panels cut to size, with small hinges, make custom doors. They need basic tools and some patience.
Legs and Tops: A set of legs and a flat board on top turn the unit into a dresser or sideboard.
Shop This Look
- Fabric storage boxes with lids, 13 inch
- Furniture anti-tip wall anchor kit
- Self-adhesive felt pads, assorted
Closing Techniques
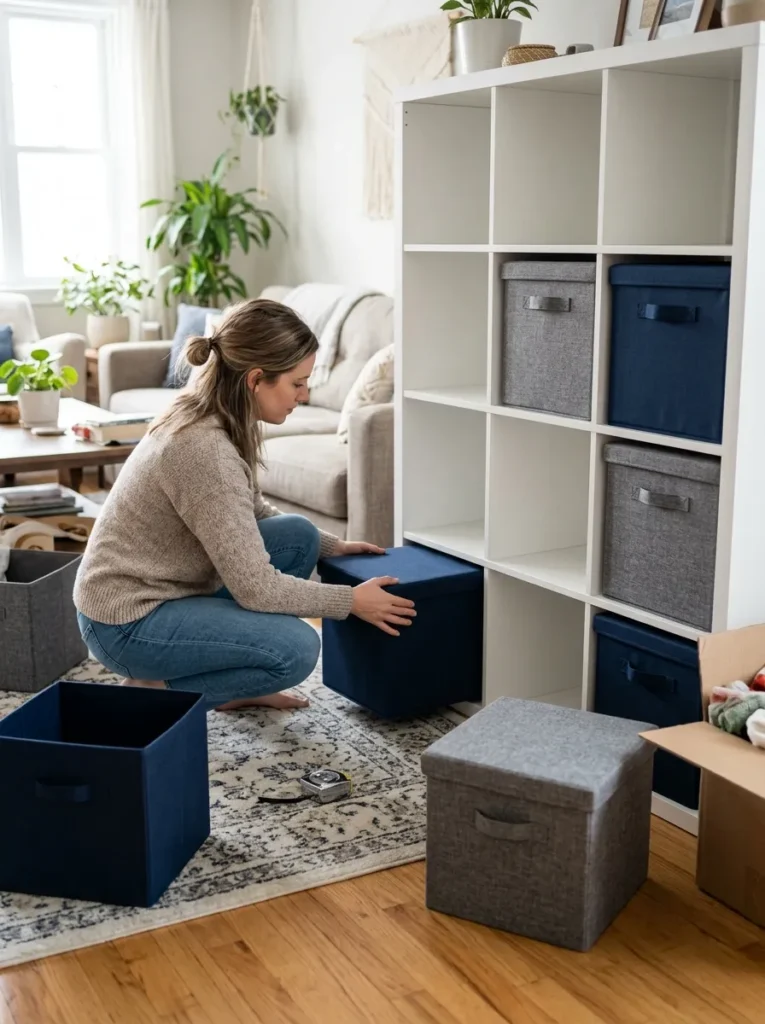
The Measure Twice Rule: Measure the inside of each cube at the top, middle, and bottom. Shelf units can vary slightly, and you want the smallest number.
The Dry Fit: Hold a door, panel, or box in place before you fix it. Check for gaps, rubbing, and swing.
The Soft-Close Add-On: Small felt or rubber bumpers on door edges stop banging and help doors sit flat.
The Back Finish: If the back of the unit shows, as in a divider, add a panel or fabric so the back looks as tidy as the front.
The Vent Gap: Leave a small gap, or drill a few small holes, in doors for shoes or damp items, so air moves.
The Anchor Check: After any change, check the wall anchor and the level. A heavier unit needs a second look.
KALLAX Closed Storage Ideas
1. IKEA Door Inserts on the Eye-Level Cubes

The simplest way to close a cube is IKEA’s own door insert, made to fit one 13 by 13 inch cube. Add them to the middle row of a unit, and the front looks like a cabinet with a few open spaces above and below.
Fit note: Each insert is about 13 inches wide and high, and about 14⅝ inches deep. Check the instructions, and follow the order of steps, since reviews say it’s easier when you read them first. Install one first and check it before doing a whole row.
Alignment tip: Some reviewers mention slight gaps or mismatches between doors, so test with two or three before you buy the full set. Use the finish that matches your unit, since the colors vary slightly between lines. It suits bedrooms where you want a quick, tidy change.
Shop This Look
2. Two-Drawer Inserts for Small Clothes

A two-drawer insert fills one cube with two pull-out drawers, which keeps socks, underwear, and scarves out of sight. It looks like a dresser front inside the grid, and it’s easy to reach.
Depth note: Reviews mention that the drawer sides are short, so the space inside is smaller than the cube suggests. Plan on light, small items, and don’t overfill. Test by laying your items in a cube first to see how they stack.
Space tip: Add a small fabric divider inside each drawer to keep pairs together. Check the pull-out room, since a drawer needs several inches in front of the unit. It suits underwear, socks, and small accessories.
Shop This Look
3. Lidded Fabric Boxes in Every Cube
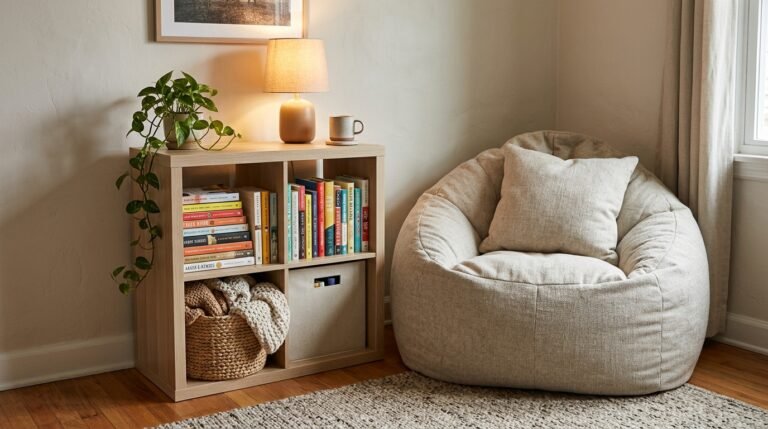
Lidded fabric boxes are the cheapest way to close a KALLAX, and they need no tools. Slide a box into each cube, and the grid turns into a neat wall of fronts.
Lid note: Choose boxes with a sturdy lid, about 12 to 13 inches wide, and check the depth against the cube. A box that’s too deep sticks out. Pick one color, or two that match the room, and keep the handles on the same side.
Label tip: Add a small tag or a label holder to the front, so you know what’s in each box. Boxes with firm sides stay square, and soft ones sag when half-empty. It suits renters and anyone who wants closed storage without drilling.
Shop This Look
4. Woven Baskets With Lids and Liners

A woven basket with a lid adds texture and closes a cube. It looks warmer than fabric, and it suits natural or boho bedrooms.
Weave note: Rough weaves can catch on clothes, so use a fabric liner, or choose a smooth, tight weave. Check the size, since many baskets are slightly irregular. Measure the opening, and buy one to test before you commit to a set.
Liner tip: A cotton liner protects delicate fabrics and keeps small items from falling through gaps. Keep baskets out of damp areas, since natural fibers can mildew. It suits sweaters, blankets, and bedding.
Shop This Look
5. Curtains on Tension Rods for a Whole Row

A short curtain across the front of a row of cubes hides everything with one piece of fabric. It’s cheap and quick, and it softens a hard grid.
Rod note: Use a small tension rod or a thin rod on adhesive brackets, hung just inside the front edge of the unit. Measure the width and height of the opening, and add a bit for gathers. Test the rod’s hold with the weight of the fabric.
Fabric tip: Choose a light cotton or linen blend that hangs straight, about 1.5 times the width of the opening for a gathered look. Heavy fabric pulls the rod down. It suits a bedroom with a casual, soft style, and it’s easy to change.
Shop This Look
- Mini tension rods, 12 to 20 inch
- Linen-look curtain panels, short, 24 inch
- Adhesive curtain rod brackets
6. Custom Hinged Panel Doors
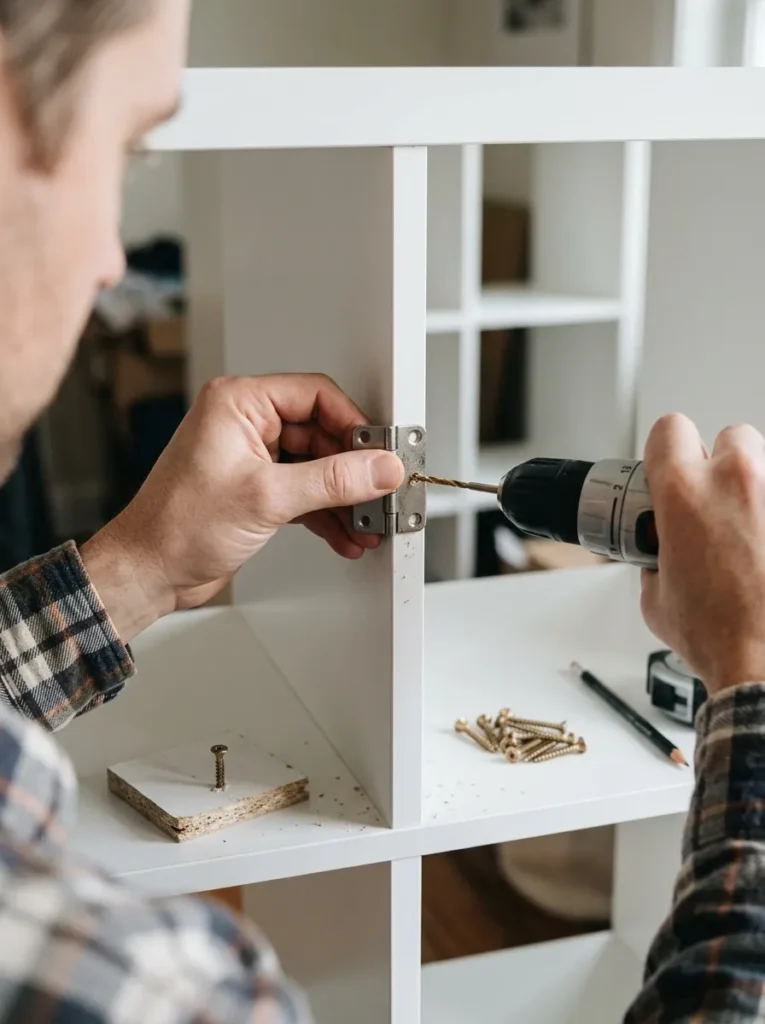
Cut plywood or MDF panels to size, add small hinges, and you have custom doors in any finish. It takes more work than an insert, and the result looks built-in.
Hinge note: Use small flat or concealed hinges rated for the panel’s weight, and mount them on the edge of the unit’s dividers. KALLAX panels are thin particleboard, so use short screws and pilot holes, to avoid splitting. Test on a spare piece first.
Paint tip: Sand the panels lightly, prime, and paint with a durable finish, letting each coat dry fully. Add a small knob or a finger pull. If you don’t have tools, many hardware stores cut panels to size. It suits people comfortable with basic DIY.
Shop This Look
- Small cabinet hinges, flat, set of 10
- Cabinet knobs, small, matte black
- Furniture paint, satin, durable
7. Cane Webbing Door Fronts

Cane webbing in a wood frame gives a light, airy look that closes the cube and still lets air through. It’s popular for bedrooms, and it suits clothes and shoes that need ventilation.
Cane note: Buy cane webbing by the roll, soak it briefly to soften it, then fix it into a frame with glue or a groove and spline. It tightens as it dries. Work slowly, and trim the edges neatly.
Frame tip: Build a simple frame from thin wood, sized to the cube, and hinge it like any panel. Pre-made cane door panels are also sold, which saves time. Check the sizes and keep the wood sealed. It suits boho and natural styles.
Shop This Look
8. Peel-and-Stick Covered Fronts

If you already have inserts or panels, peel-and-stick contact paper or wood-look film changes the finish for a few dollars. It’s a good way to match mixed fronts or update plain white.
Surface note: Clean and dry the surface, and cut the film slightly larger than the front. Peel back a few inches, press from the center out with a card, and trim the edges with a sharp knife. Glossy or textured surfaces hold film better than dusty ones.
Press tip: Heat the film lightly with a hair dryer around edges to help it stick, and go slowly to avoid bubbles. Test a small corner first, since it can be hard to remove from some finishes. It suits renters and quick updates.
Shop This Look
9. A Checkerboard of Open and Closed Cubes
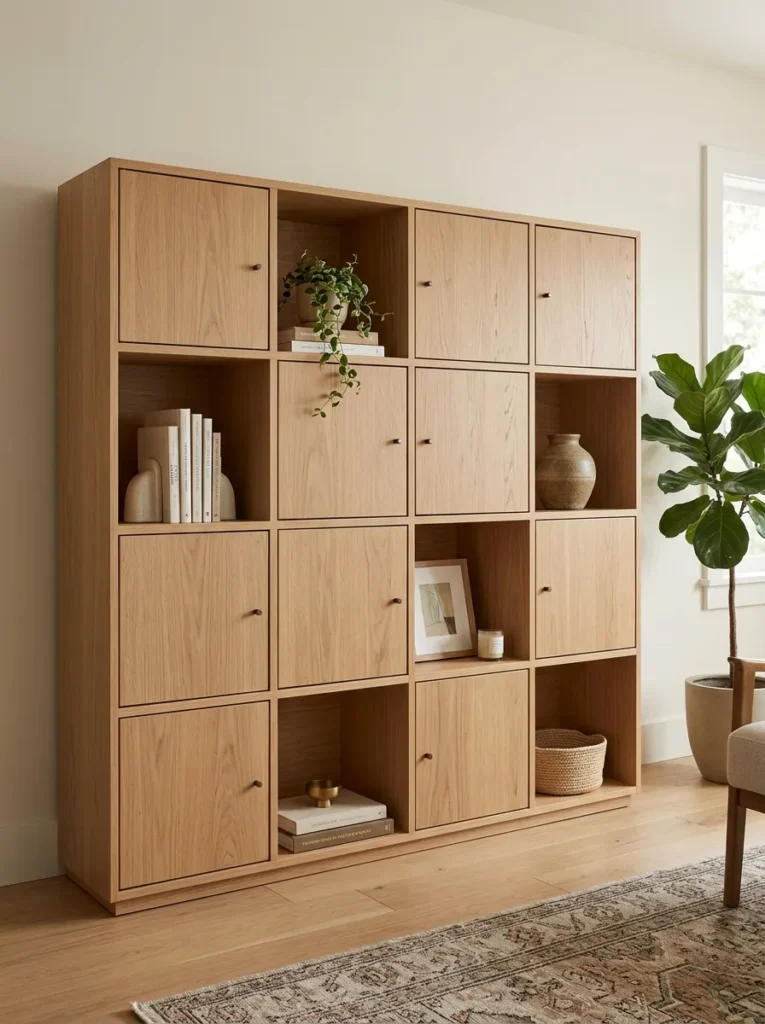
A pattern of closed and open cubes looks planned. Close every other cube with a door or box, and use the open ones for a plant, a book, or a frame.
Pattern note: In a 4 by 4 unit, close the cubes in a diagonal or checkerboard pattern. Keep the open ones to display a few items, not a pile of mess. A third open is a good guide.
Balance tip: Put closed cubes at the bottom, since they hold the heaviest items, and open ones at eye level for display. Keep colors consistent. It suits bedrooms where you want some decor and some storage.
Shop This Look
10. A Finished Back for a Room Divider
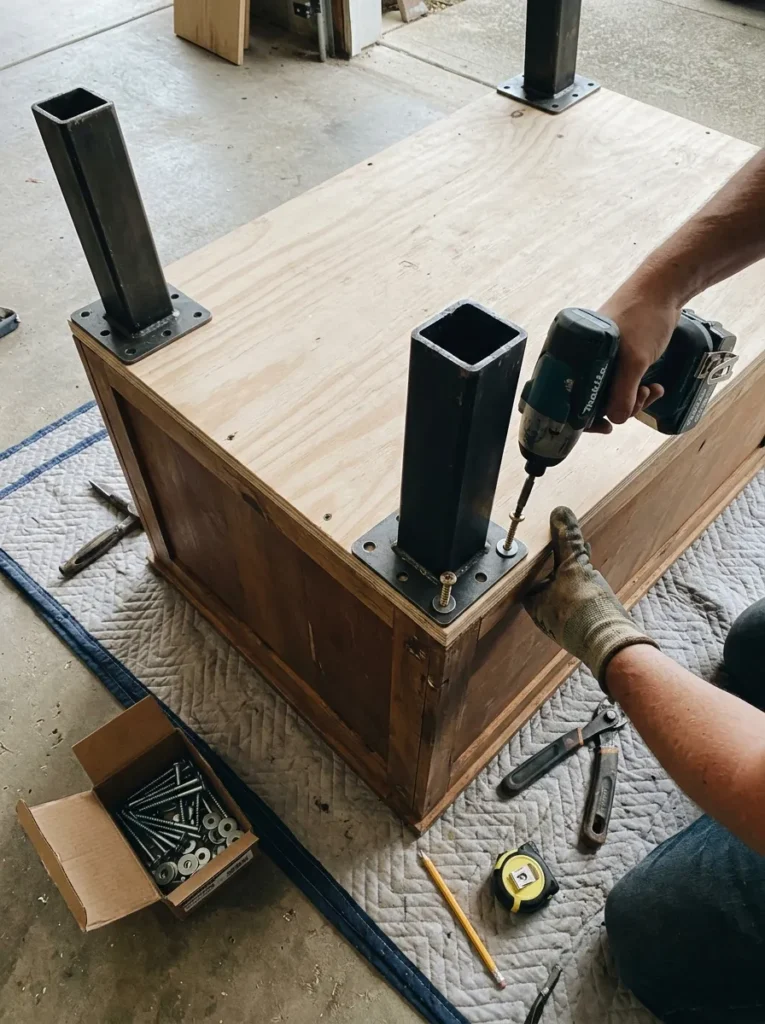
In a shared room or a studio, a KALLAX can divide the space. Closed storage on both sides means the back needs a clean finish.
Divider note: IKEA notes that some inserts have a finished back, which looks good from both sides. If your boxes or doors don’t, add a thin panel, fabric, or wallpaper on the back. Check the unit’s stability, and anchor it to the floor or ceiling if you can, or use wide feet.
Back tip: Use thin hardboard cut to size, painted or covered, and attach it with small brackets. Keep the unit away from walkways where it could be bumped. It suits shared rooms and studio apartments.
Shop This Look
11. Legs and a Wood Top for a Sideboard Look
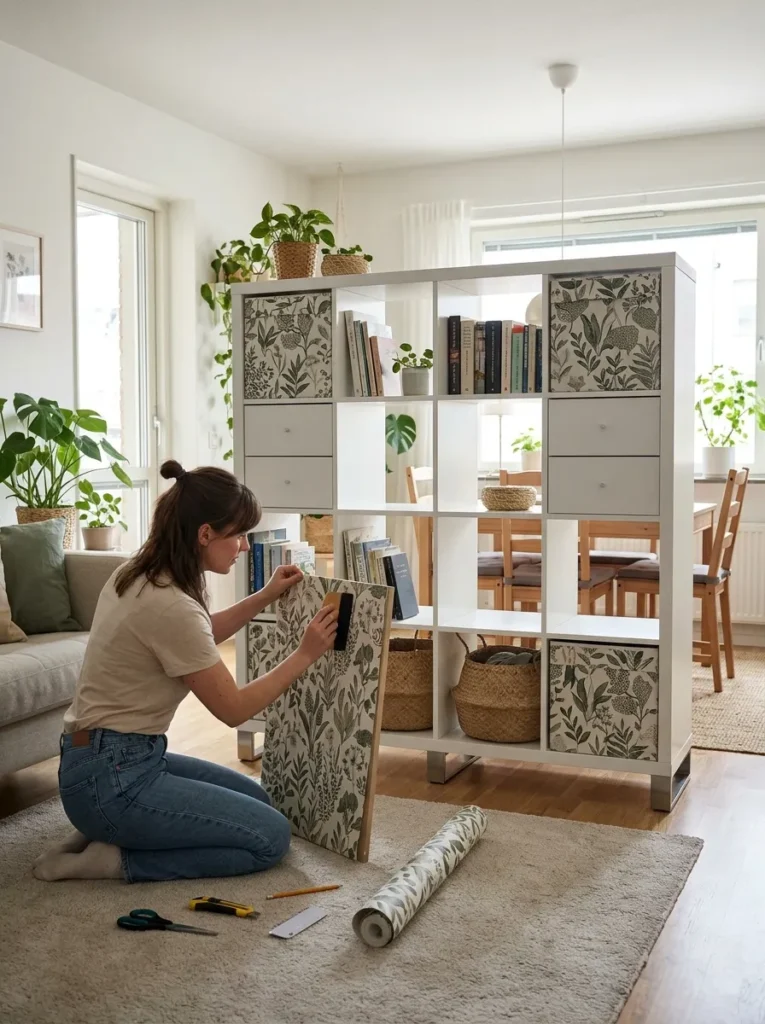
Adding legs and a top turns a horizontal KALLAX into a low sideboard or dresser. Closed fronts plus legs make it look like a store-bought piece.
Leg note: Choose legs rated for the weight of a full unit, and mount them to a base board so the load spreads. Check how the legs fit the unit, since the bottom may not be thick. A bottom plate improves strength.
Top tip: A solid wood or MDF top, cut slightly larger than the unit, gives a clean surface and hides the grid. Seal it for a bedroom surface. Check the height after adding legs, so you can reach the top. It suits dressers and entryway units.
Shop This Look
- Furniture legs, tapered, set of 4, 6 inch
- Mounting plate for furniture legs
- Wood tabletop board, 57 inch
12. A Closed Nightstand With a Door and a Top

A 2 by 2 unit with a door insert and a small tray on top is a closed nightstand. It hides chargers, books, and tissues, and the top holds a lamp.
Height note: A 2 by 2 stands about 30 inches tall, which is higher than many nightstands. If that’s too tall, lay it on its side, so the opening faces out. Check the mattress height before you decide.
Cord tip: Drill a small hole in the back panel for a lamp or charger cord, using a hole saw and a grommet. Check for hidden wires first. Keep the cord tidy with a clip. It suits small bedrooms and anyone who wants a closed nightstand.
Shop This Look
13. A Closed Sweater and Blanket Cabinet
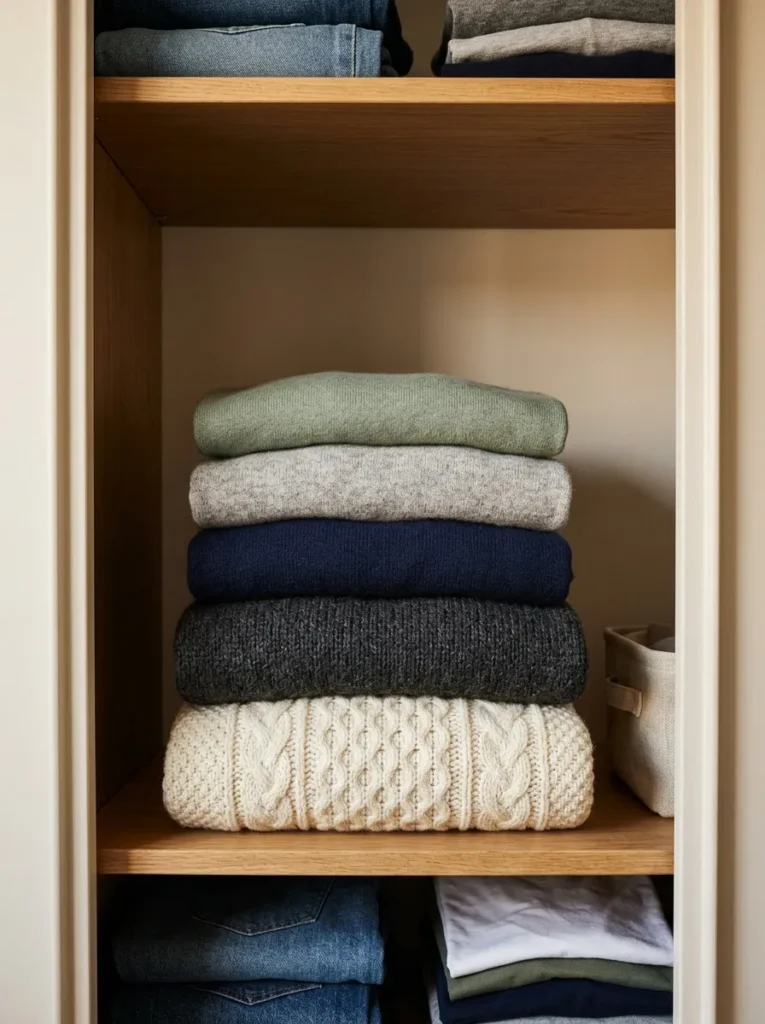
Folded sweaters and blankets are bulky and look messy in open cubes. Doors or lidded boxes hide them and keep dust off.
Fold note: Fold sweaters into a rectangle and stack them flat, with no more than 4 or 5 in a pile. Put the heaviest ones at the bottom. Don’t overstuff, since doors won’t close and wool gets crushed.
Moth tip: Add cedar blocks or lavender sachets, and wash or air items before storing. Don’t store wool damp. Check regularly for signs of moths. It suits cool climates and off-season storage.
Shop This Look
14. Ventilated Shoe Storage Behind Doors
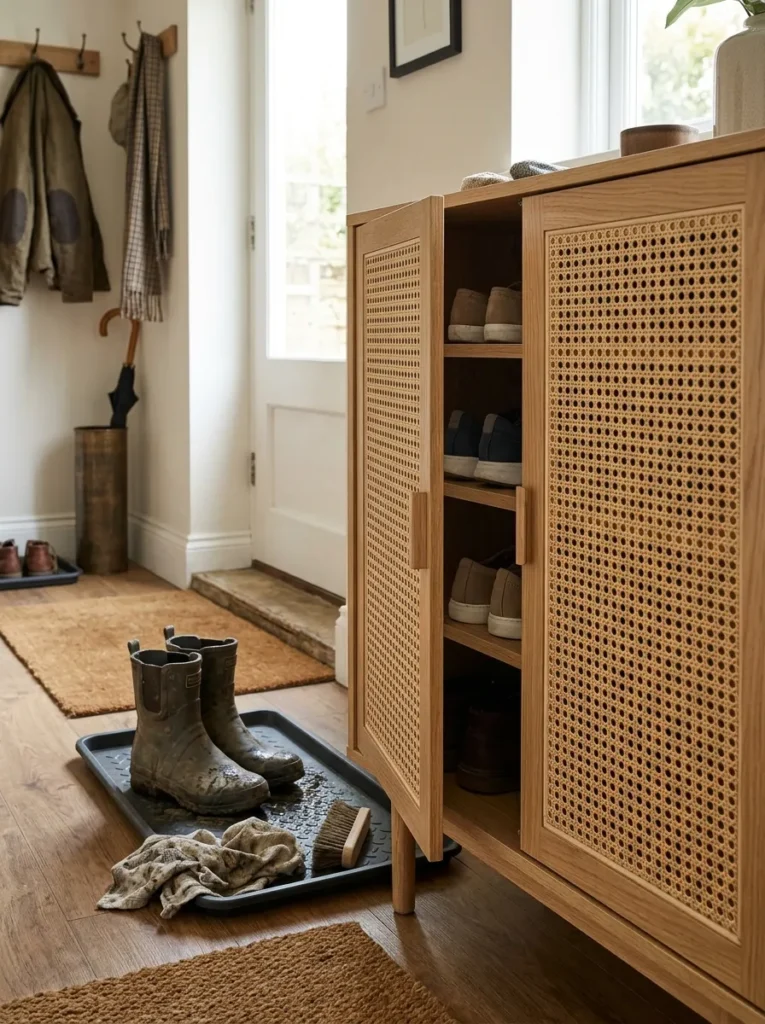
Shoes can look messy in open cubes, and closed doors tidy them. Shoes need airflow, so choose a design that lets air in.
Vent note: Use cane or slatted fronts, or drill a few small holes in solid doors. Don’t put damp or muddy shoes behind a closed door. Dry them first.
Tray tip: Add a small tray or a plastic liner under each pair, so dirt doesn’t spread. Tall boots won’t fit in a 13 inch cube, so keep those elsewhere. It suits flats, sandals, and sneakers.
Shop This Look
15. Child-Safe Closed Toy Storage

For a child’s room, closed cubes keep toys out of sight and reduce clutter. Choose soft-closing fronts and rounded edges.
Latch note: Use child-proof latches on any door that holds small or heavy items, and check that fronts don’t pinch fingers. Avoid heavy doors on low cubes. Keep sharp or small items in a high cube.
Anchor tip: Anchor the unit to the wall with anti-tip hardware, and don’t let children climb it. Check the anchors regularly. Keep the heaviest items low. It suits kids’ rooms and playrooms.
Shop This Look
- Child safety cabinet latches, adhesive
- Anti-tip furniture straps, heavy duty
- Soft fabric toy bins with lids
16. A Window Bench With Lidded Boxes Below
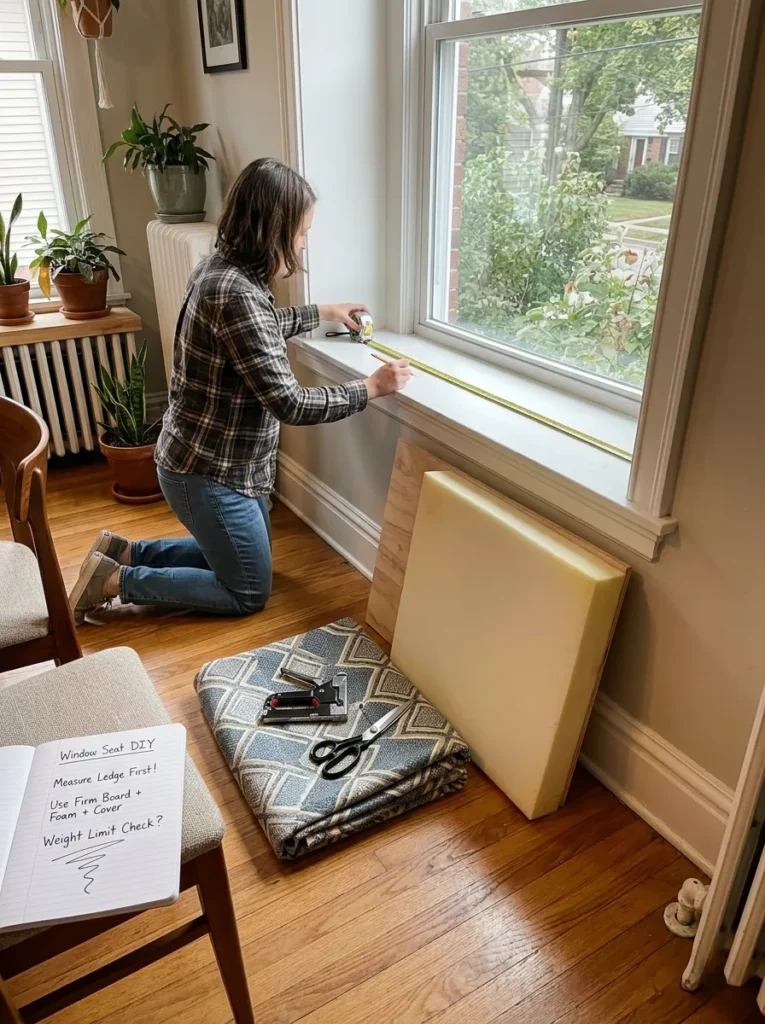
A 1 by 4 unit laid on its side is about 16 inches tall, which is bench height. Closed fronts and a cushion on top make a seat with hidden storage.
Seat note: Check the weight limit for sitting, and don’t let several adults sit on it unless the maker says it’s fine. Use a firm board on top, then foam and a cover. Measure the window ledge first.
Cushion tip: Add a non-slip mat under the cushion, and use boxes with lids to close the cubes. Keep the unit anchored. It suits bedrooms with a window and extra wall space.
Shop This Look
17. A Hidden Desk and Study Station
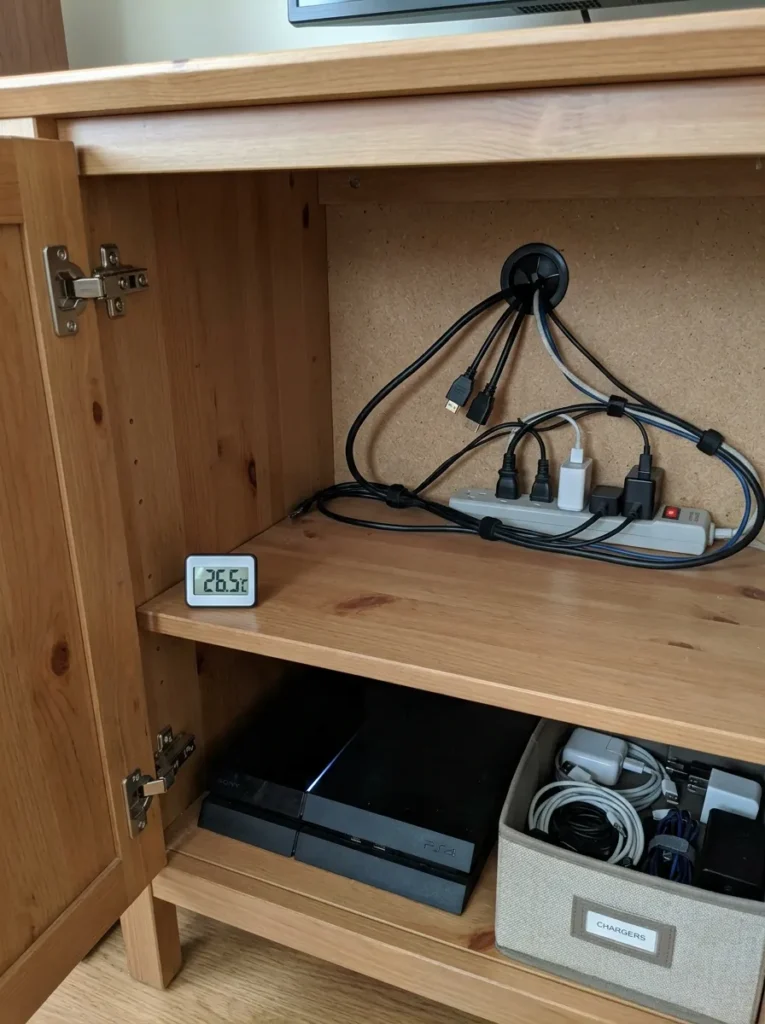
A 2 by 4 unit with doors can hold a laptop, notebooks, and chargers, and a fold-out or a shelf top gives you a work surface. When you close it, the room looks like a bedroom again.
Cable note: Cut a small cable opening with a grommet in the back, and run a power strip inside. Check the heat, and don’t close doors on a device that’s running hot. Keep chargers in a box.
Charge tip: Use a power strip with a surge protector, and keep it off the floor. Label the cords. A small lamp on top gives light. It suits students, small apartments, and shared rooms.
Shop This Look
How to Start
Start with the cubes at eye level. Measure them, then close two or three with lidded boxes or door inserts. Live with that for a week, and see what’s missing.
Next, decide how much you want to do. If you want no tools, stay with boxes and curtains. If you’re comfortable with a drill, add hinged panels, legs, or a top. Check your wall, and anchor the unit before you load it.
Three things under $60 make a good start: a set of lidded fabric boxes, a furniture anti-tip kit, and a pack of felt bumpers. Prices vary by brand and size, so check the dimensions. For timing, plan 30 minutes for boxes, an hour for door inserts, and a weekend for custom panels, legs, or a top. Spend a few minutes on the anchors every time.
Shop This Look
Common Mistakes
Not Measuring: Cubes can vary slightly. Measure each one, and test a single insert or box first.
Overloading Closed Cubes: Doors and drawers hide weight. Check the load limit, and keep heavy items low.
Skipping the Anchor: A heavier closed unit can tip. Use wall fittings every time.
Ignoring Airflow: Closed cubes trap damp and smells. Dry items first, and leave a vent gap.
Mixing Too Many Finishes: Different fronts look messy. Keep one color or follow a clear pattern.
Expecting Drawers to Hold a Lot: Drawer inserts are shallow. Use them for small, light items.
Rushing the Install: Doors misalign when steps are skipped. Read the instructions, and check each step.
Frequently Asked Questions
How do I turn KALLAX open shelves into closed storage?
Use door or drawer inserts, lidded boxes, curtains, or custom panels. The simplest option is lidded fabric boxes in each cube. IKEA also sells door and two-drawer inserts sized for the cubes, so check the current range.
What size are KALLAX door inserts?
IKEA’s door inserts are about 13 by 13 inches, with a depth of about 14⅝ inches, to fit one cube. Check the listing for your finish, and measure your unit first.
Are KALLAX drawer inserts good for clothes?
They work for small, light items, but reviews note that the drawer sides are short, so capacity is lower than you’d expect. Test a layout before you buy a full set.
Do I need to anchor a KALLAX with doors?
Yes. A unit with doors and full cubes is heavy and can tip, especially in a child’s room. Use the wall fittings in the box and anchors rated for your wall type.
Can I add doors to a KALLAX without tools?
Yes. Lidded boxes, curtains on tension rods, and IKEA door inserts need few or no tools. Custom panels and legs need a drill and some DIY skill.
The Finishing Touch
When you finish, step back and look at the unit in the daylight. Check four things: whether the fronts line up and close, whether the unit is level and anchored, whether anything is too heavy for its cube, and whether air can reach what’s inside.
If something feels off, change one thing and look again. A crooked door needs a quick adjustment. A heavy shelf needs lighter items. A stuffy cube needs a vent gap. Keep going until it settles.
Closed storage looks simple, but it comes from a few practical choices in the right order. Pick one row today, measure the cubes, and close the first one. Save your favorite IKEA KALLAX bedroom ideas to a Pinterest board so you can come back to them when you’re ready for the next step.